Hi, everyone! Welcome back to my blog for another fun DIY How To! Today, I am going to show you How To Make a Custom Sign Without a Machine. I have been meaning to share this How To with y’all for forever. If you’ve ever thought to yourself “That is such a cute sign, but it’s so expensive! I wonder if I could do that on my own, even though I don’t have a Cricut Machine…” The answer is YES, and it is SO easy!
There is one simple trick I use that I learned back in college when I was an Art major, and this trick has stuck with me ever since! I have made several of my own signs this way. These types of signs make great gifts too! Keep reading to find out how to make a sign without a machine!
Let’s start with the basics: Your Project Tools!
- Wood Plank
- Wood Stain
- Chalk Paint
- Mouse Sander
- Printer
- Photoshop or another type of Font Software
- Charcoal Pencil
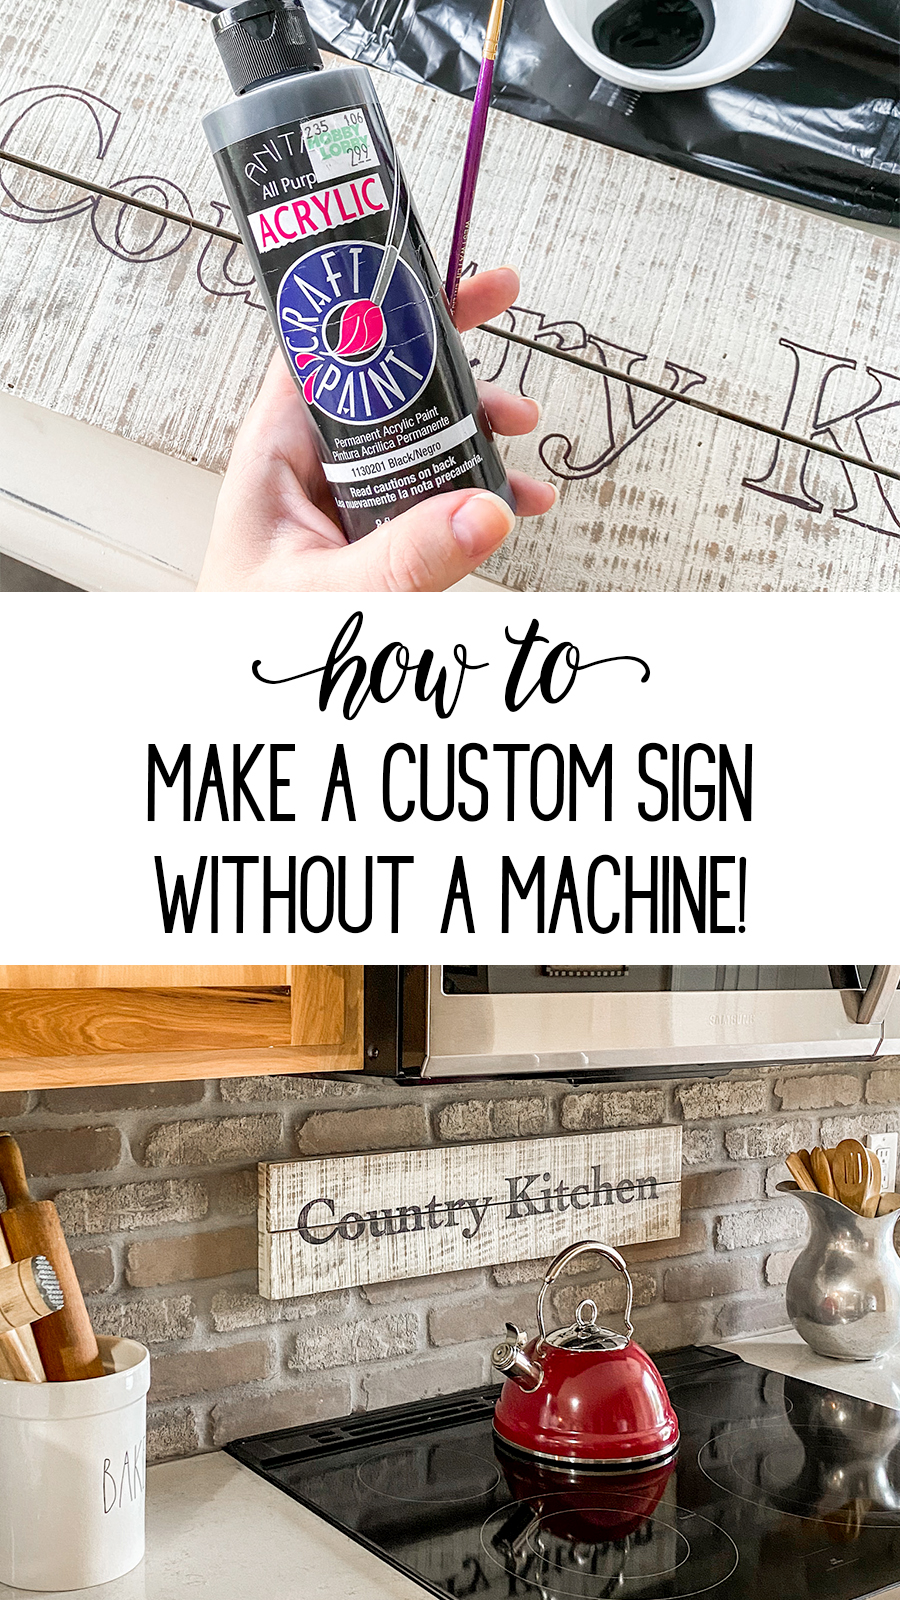
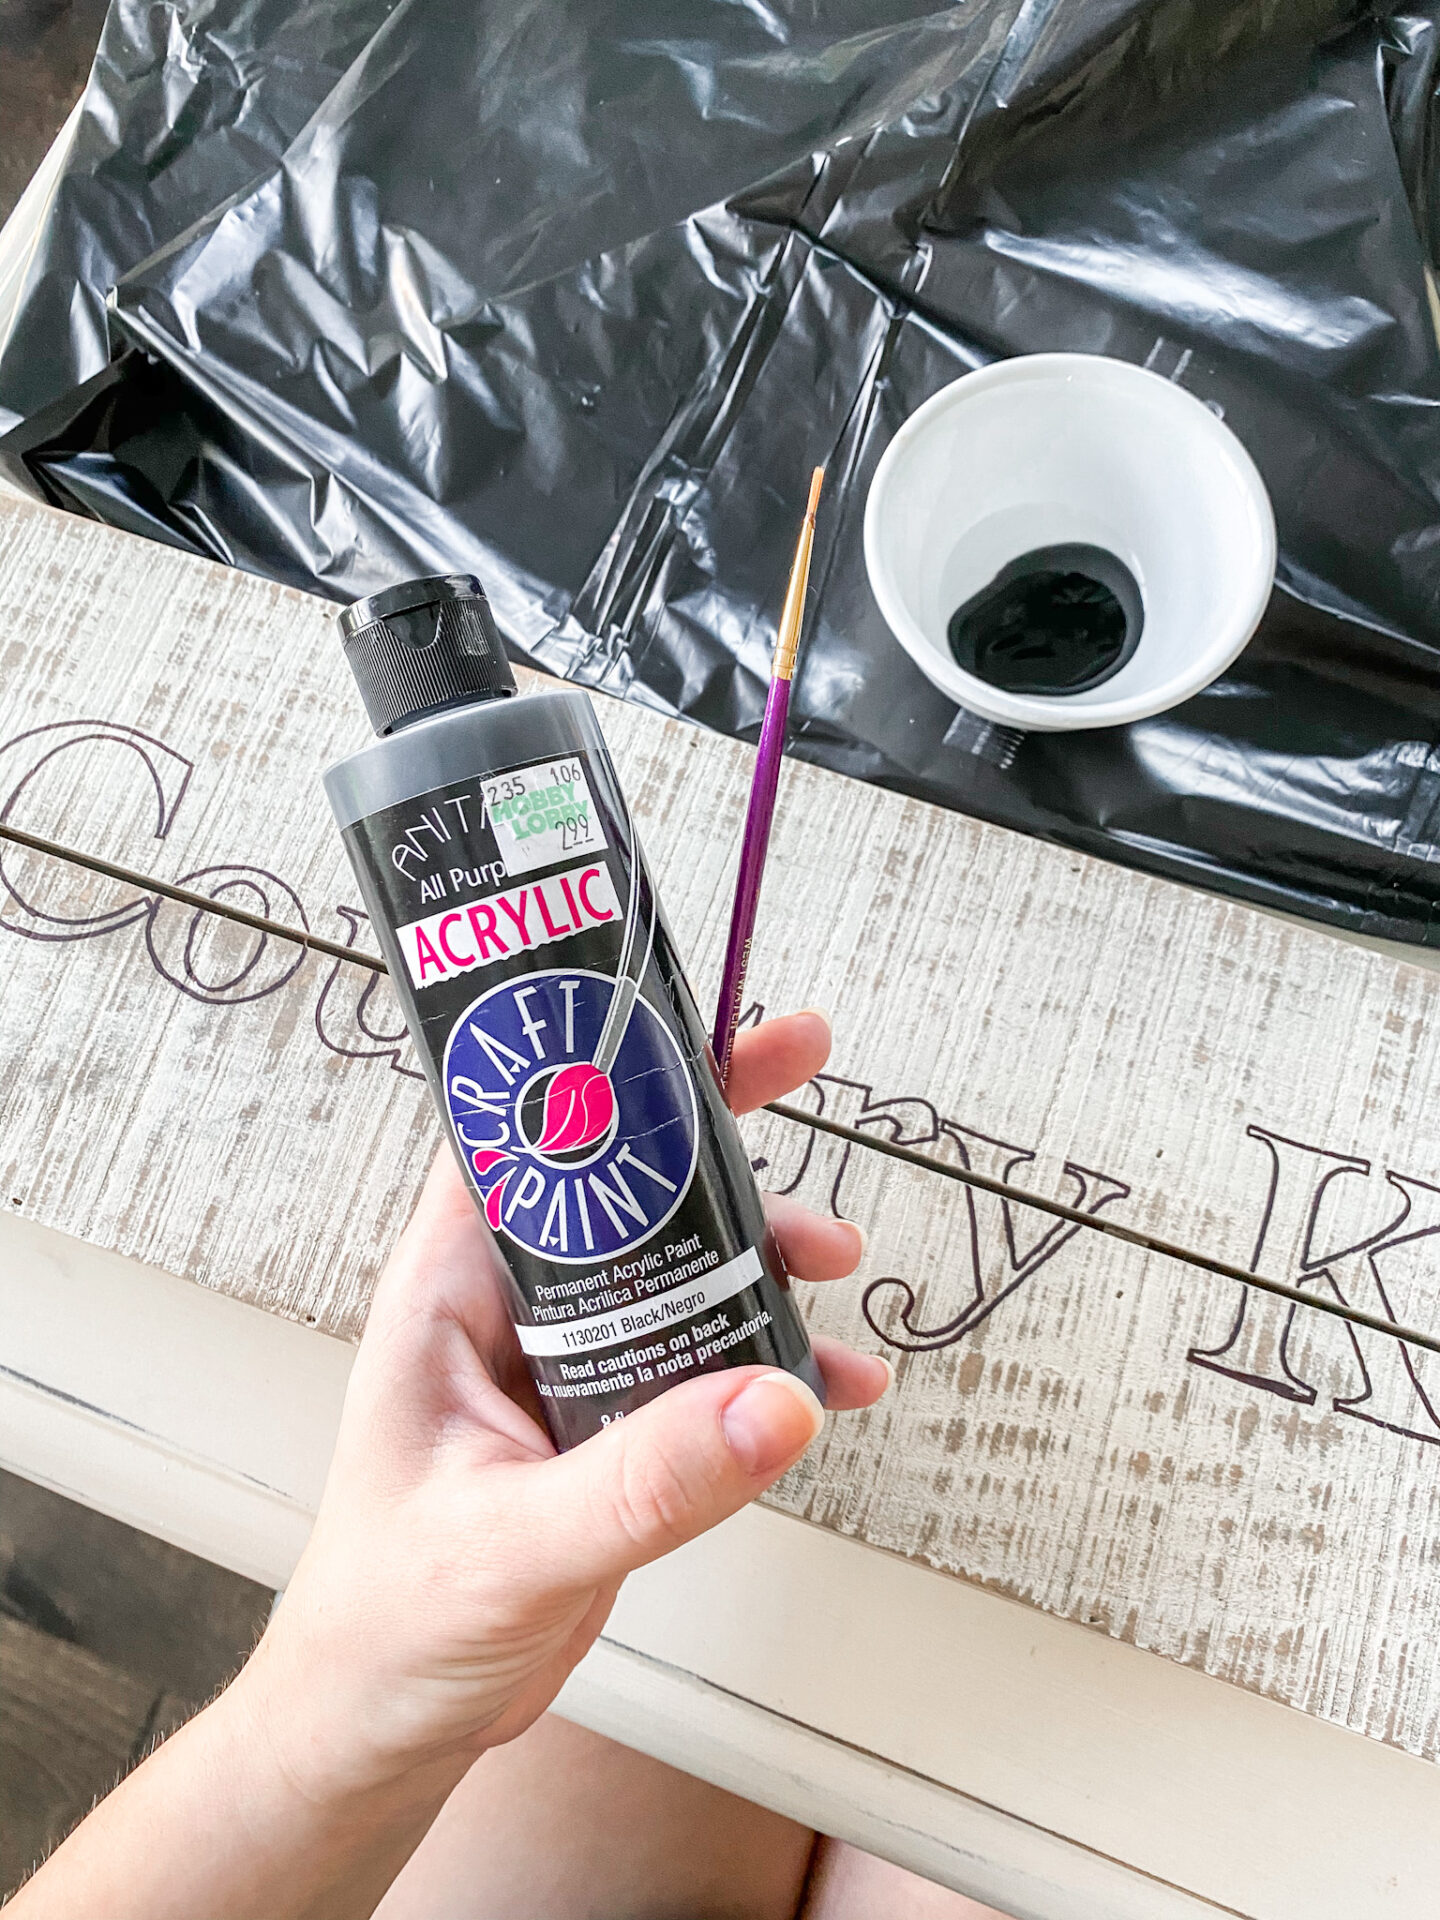
- Permanent Acrylic Paint
- Sharpie
- Fine Detailed Art Brush
- Old Paint Brush you can toss out after you’re done using it
- Polycrylic Finish
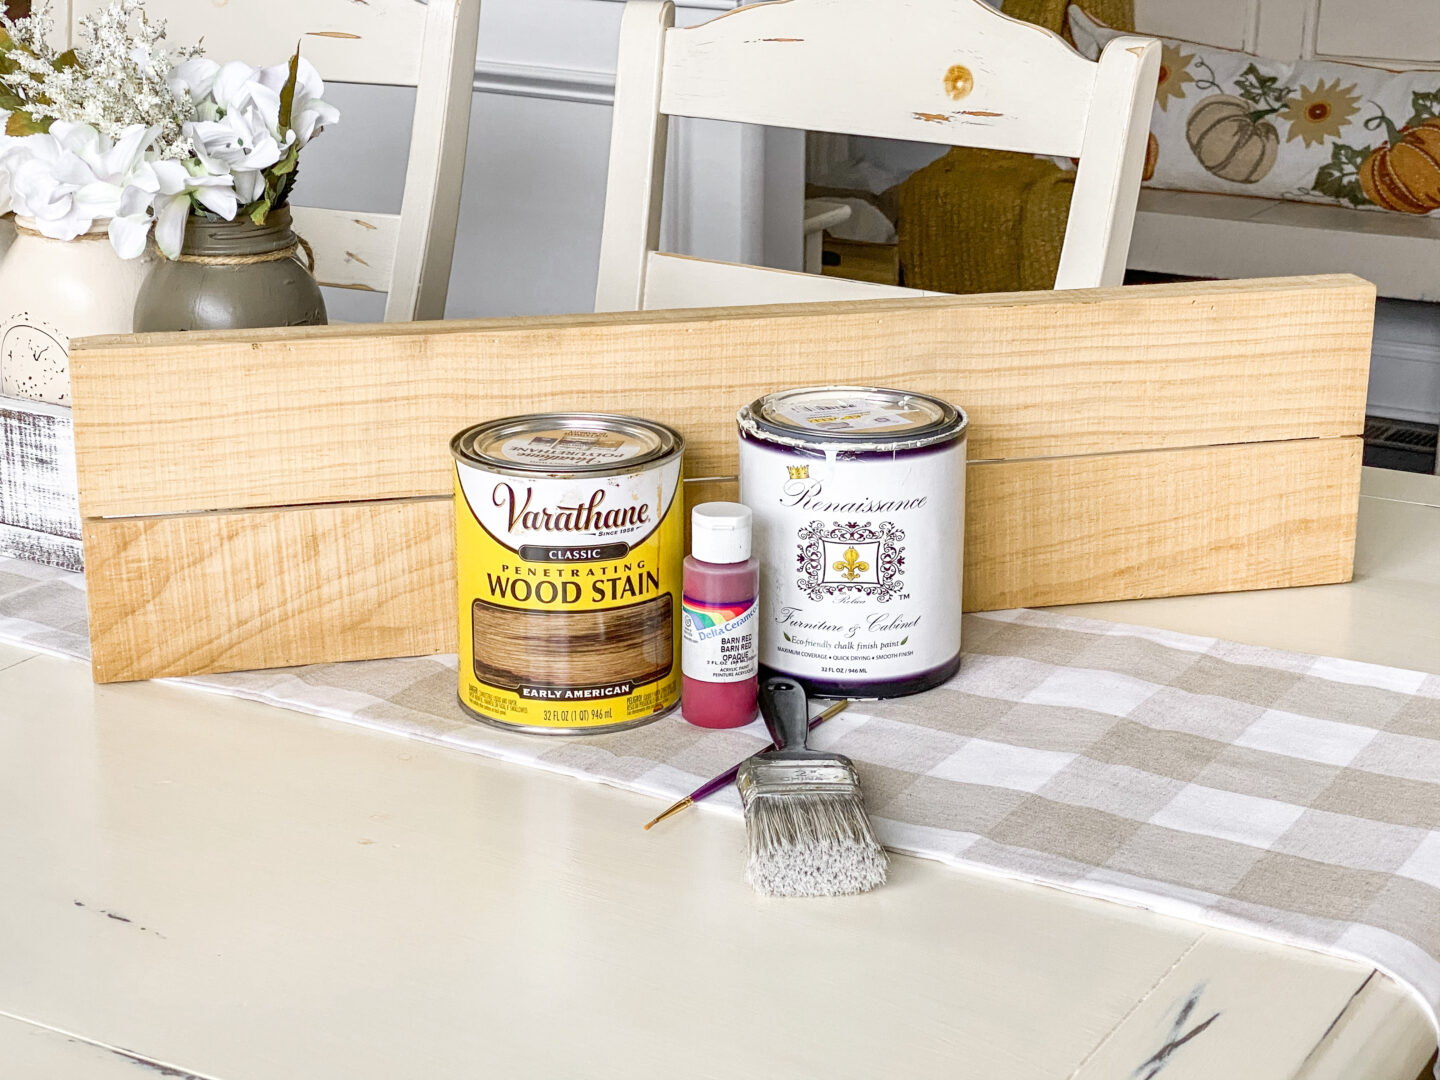
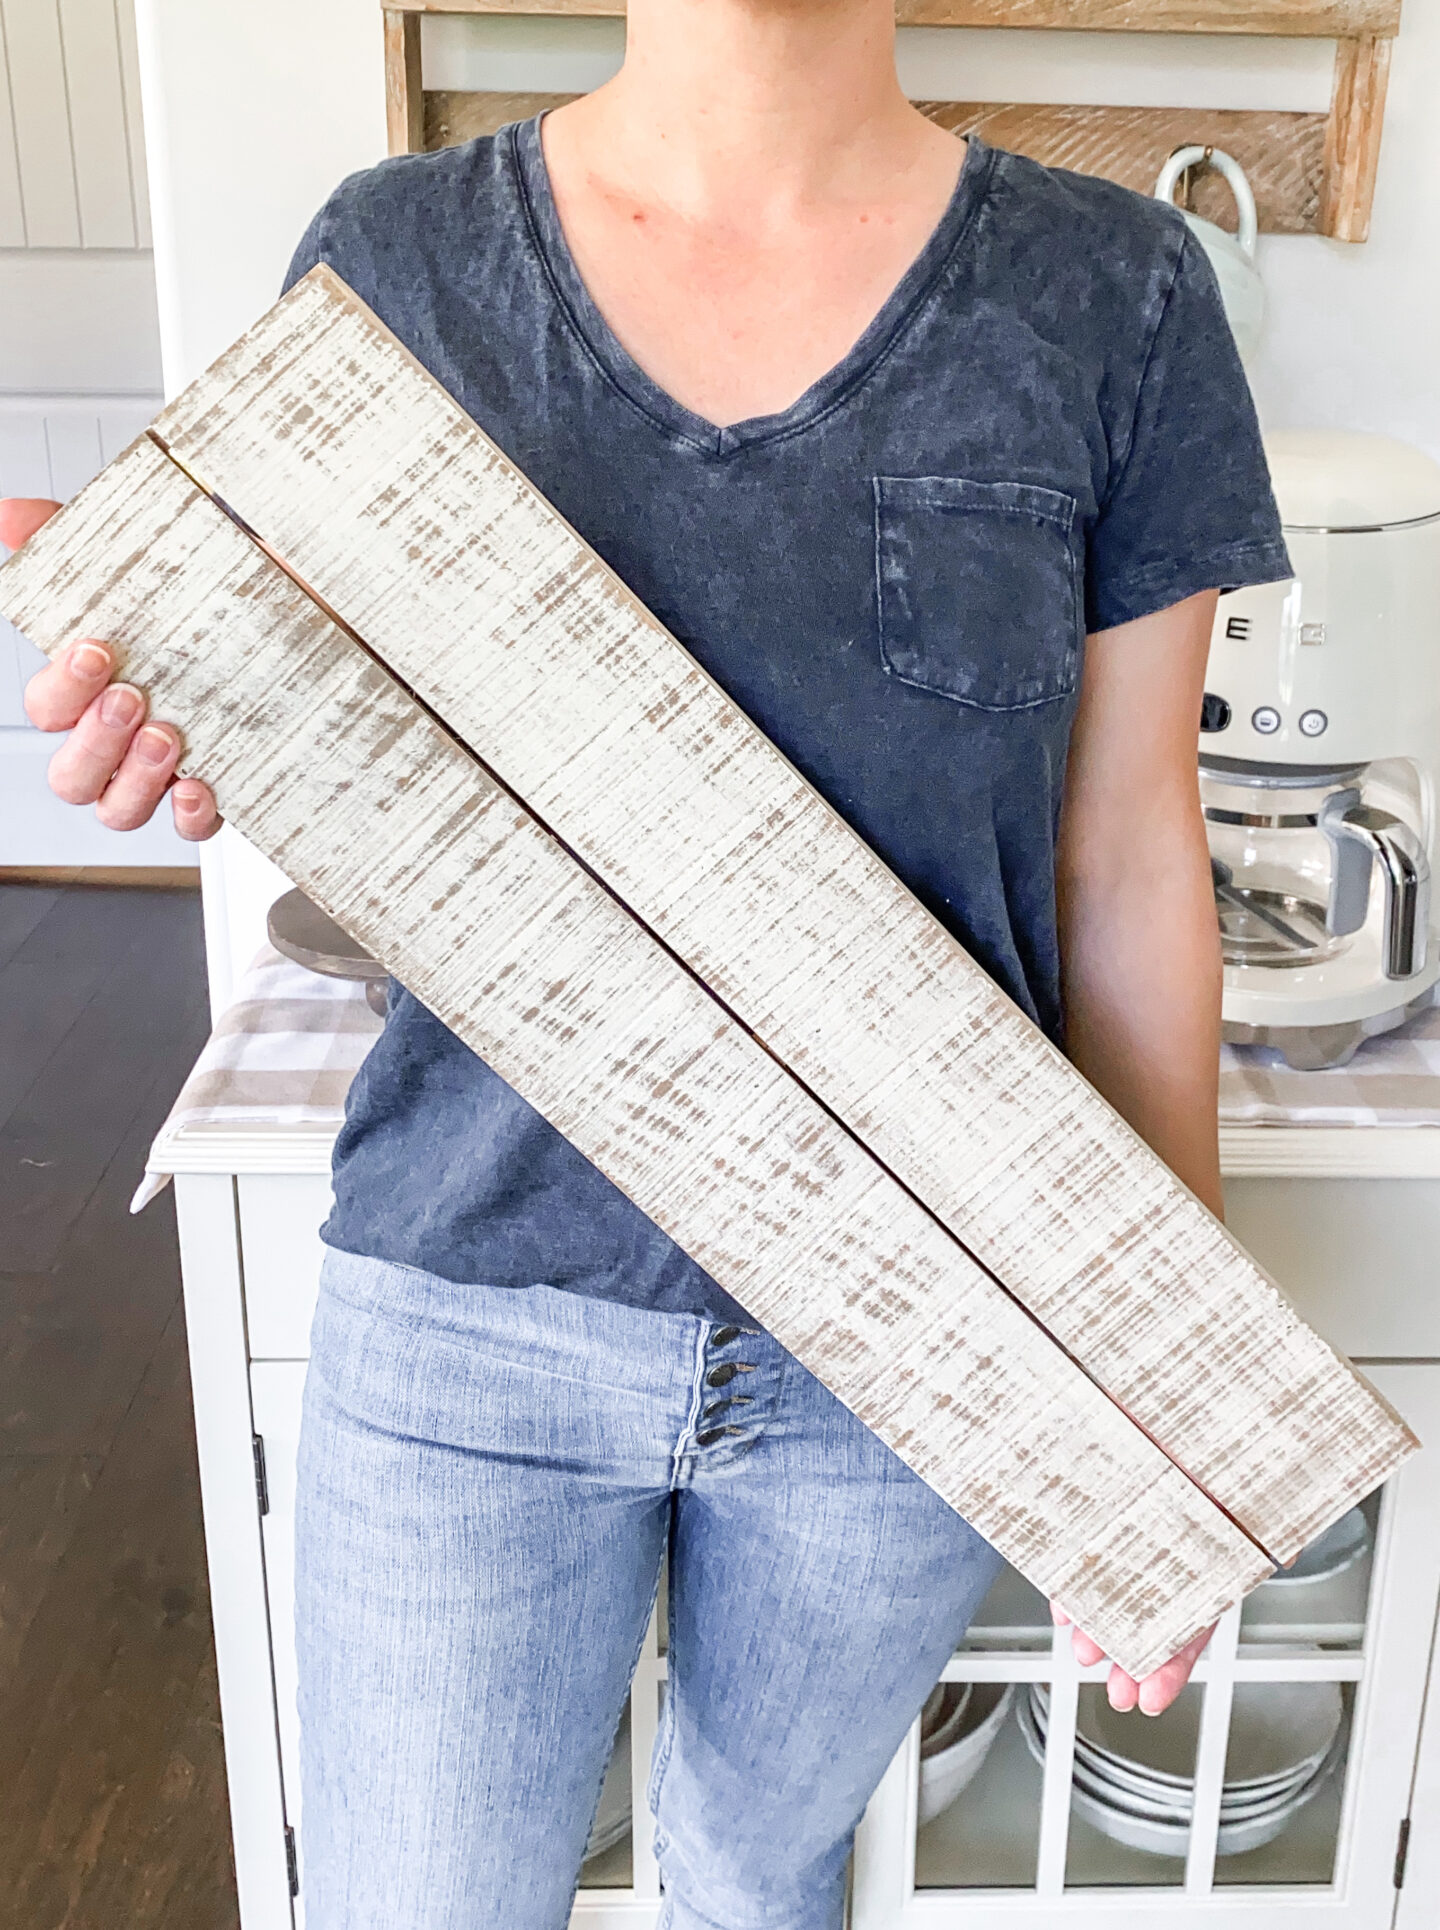
The wood plank I have here is from Hobby Lobby, but you can literally use ANY piece of wood to do this project on. Though I do prefer Pine because it’s really easy to work with.
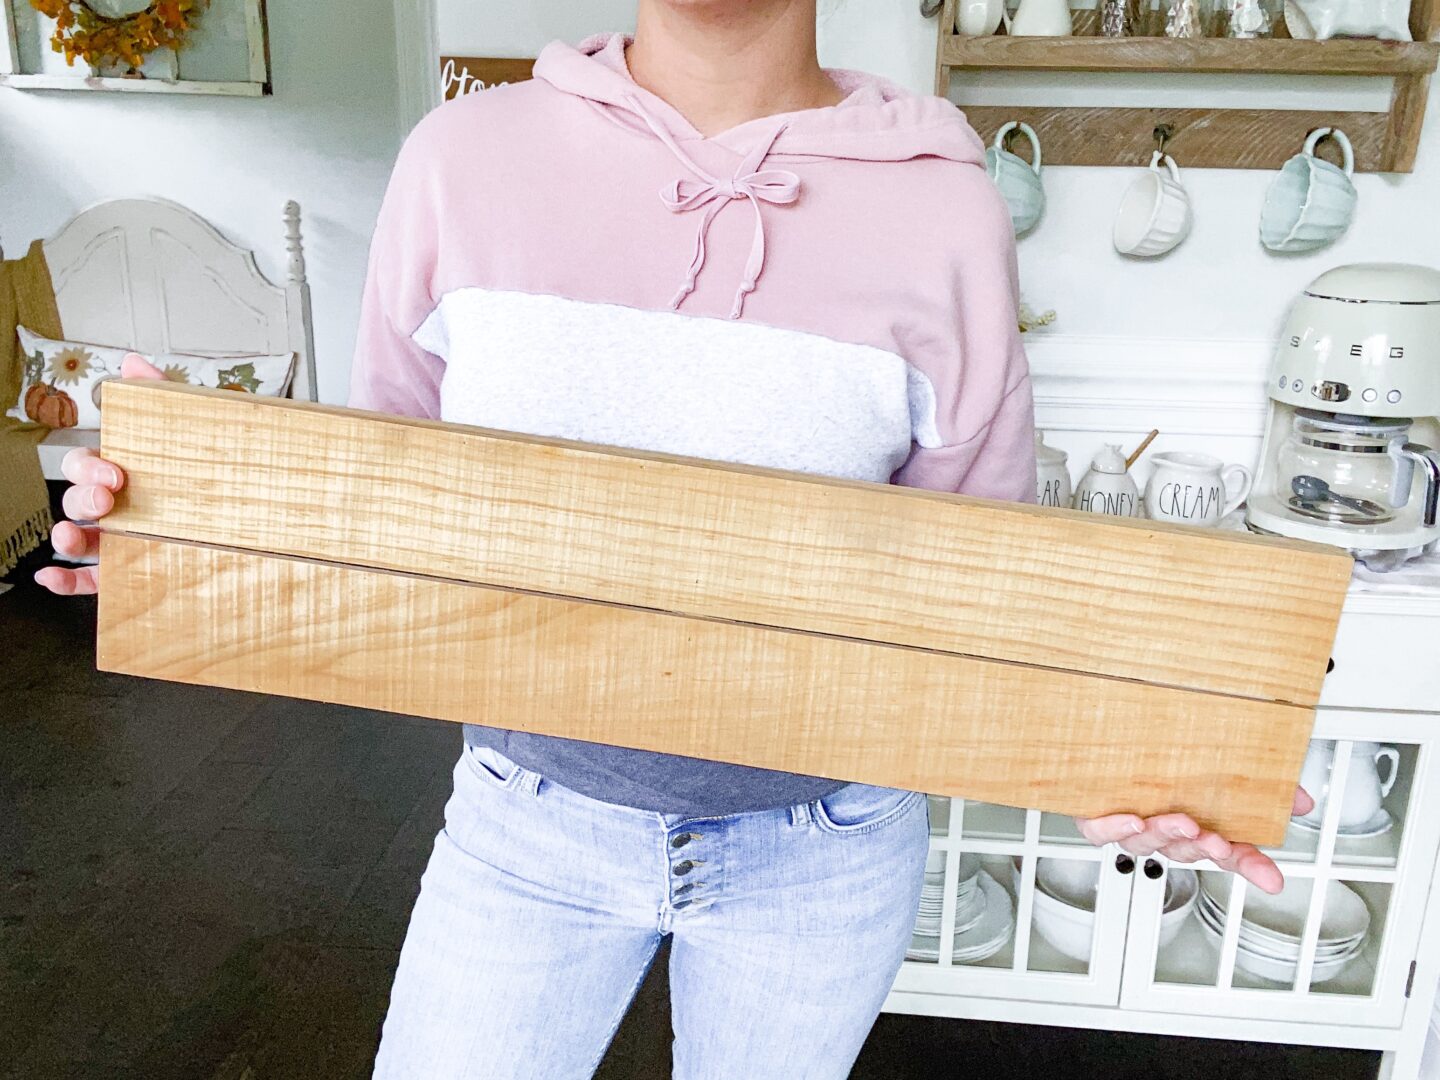
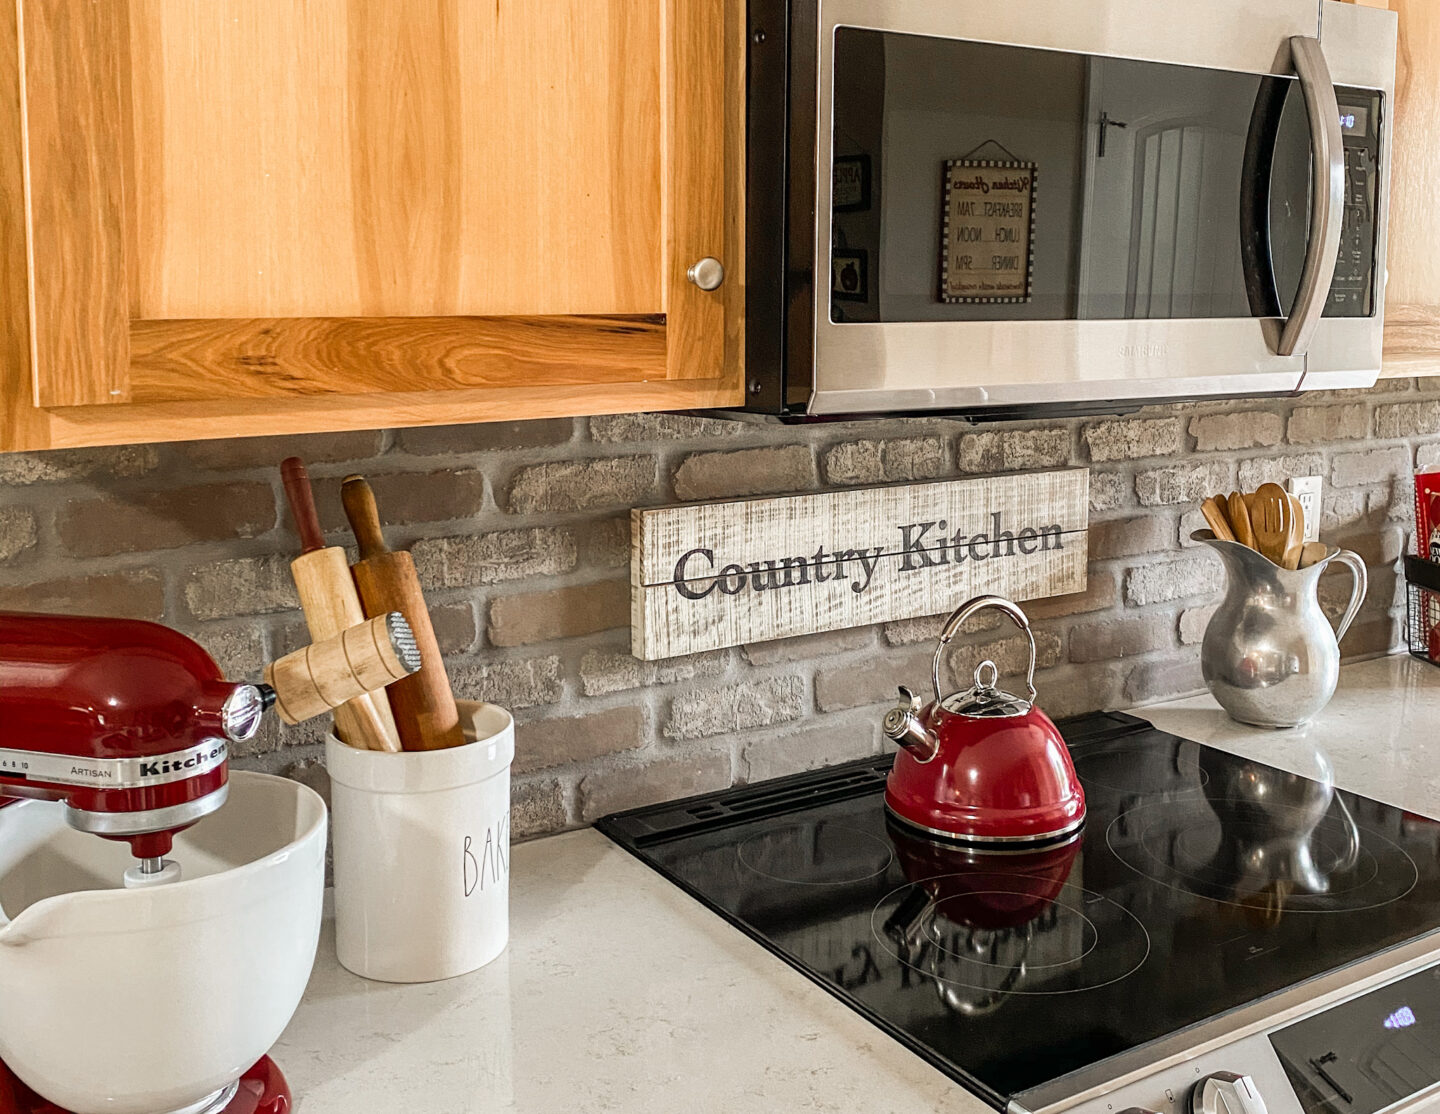
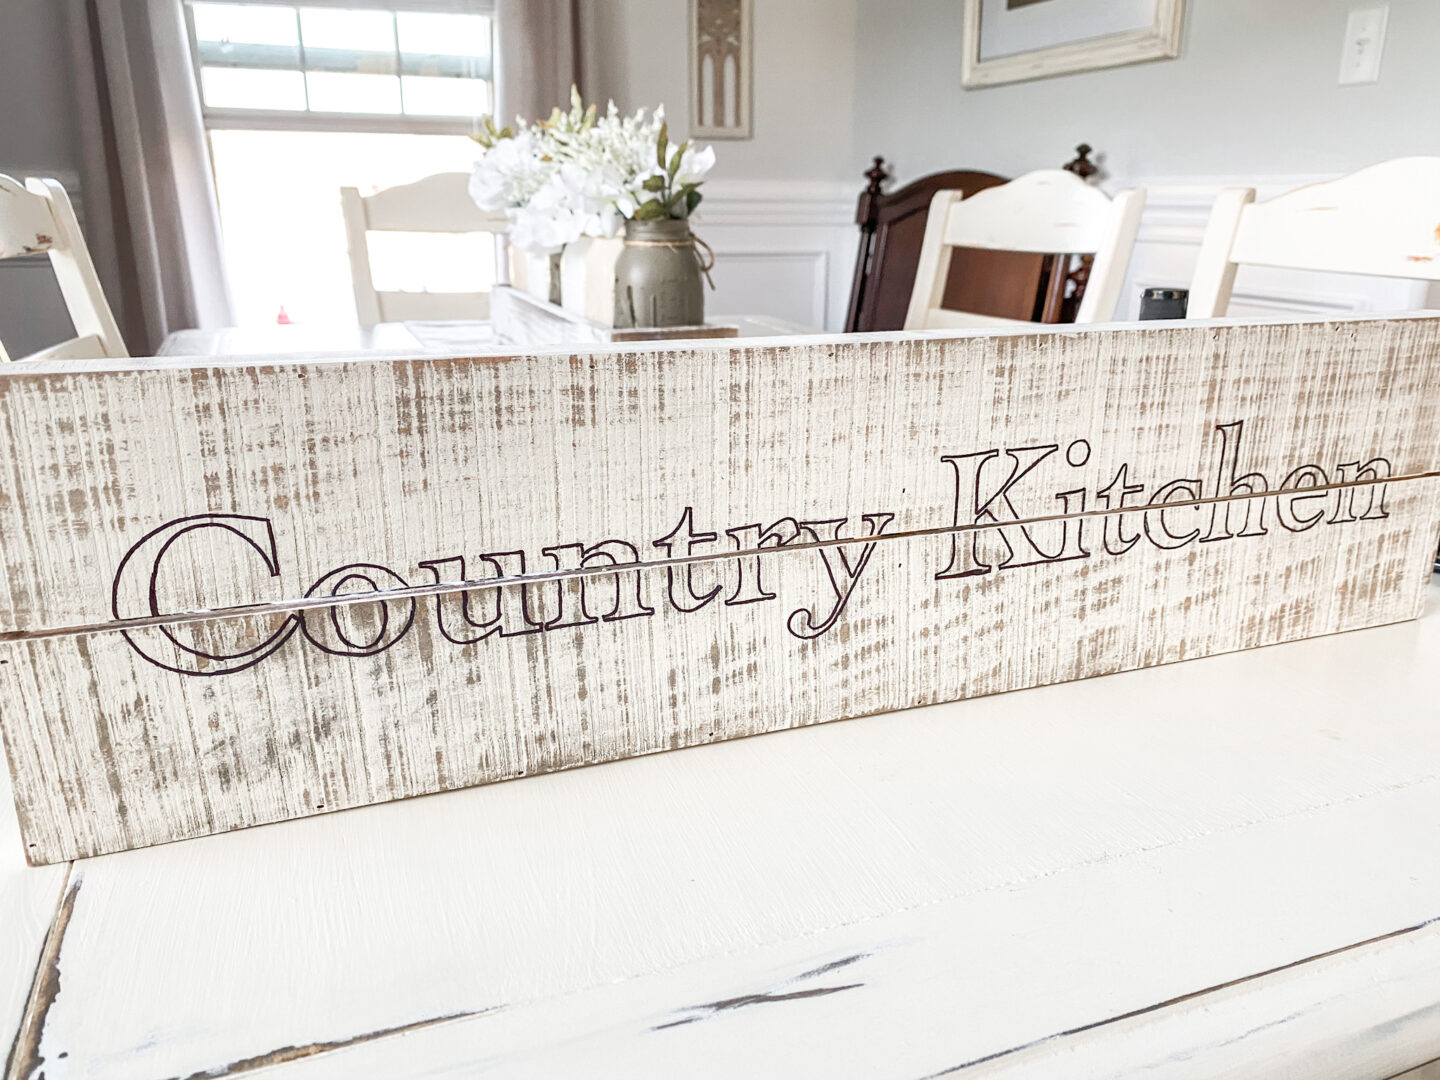
My project today is actually a Kitchen sign I wanted to make as a gift for my Mom! Her home is decorated in a Country Cottage style and it is absolutely adorable. I’ve been helping her as an Interior Designer ever since she moved in earlier this year and it has been so fun to decorate!
Where the Sign Will Go
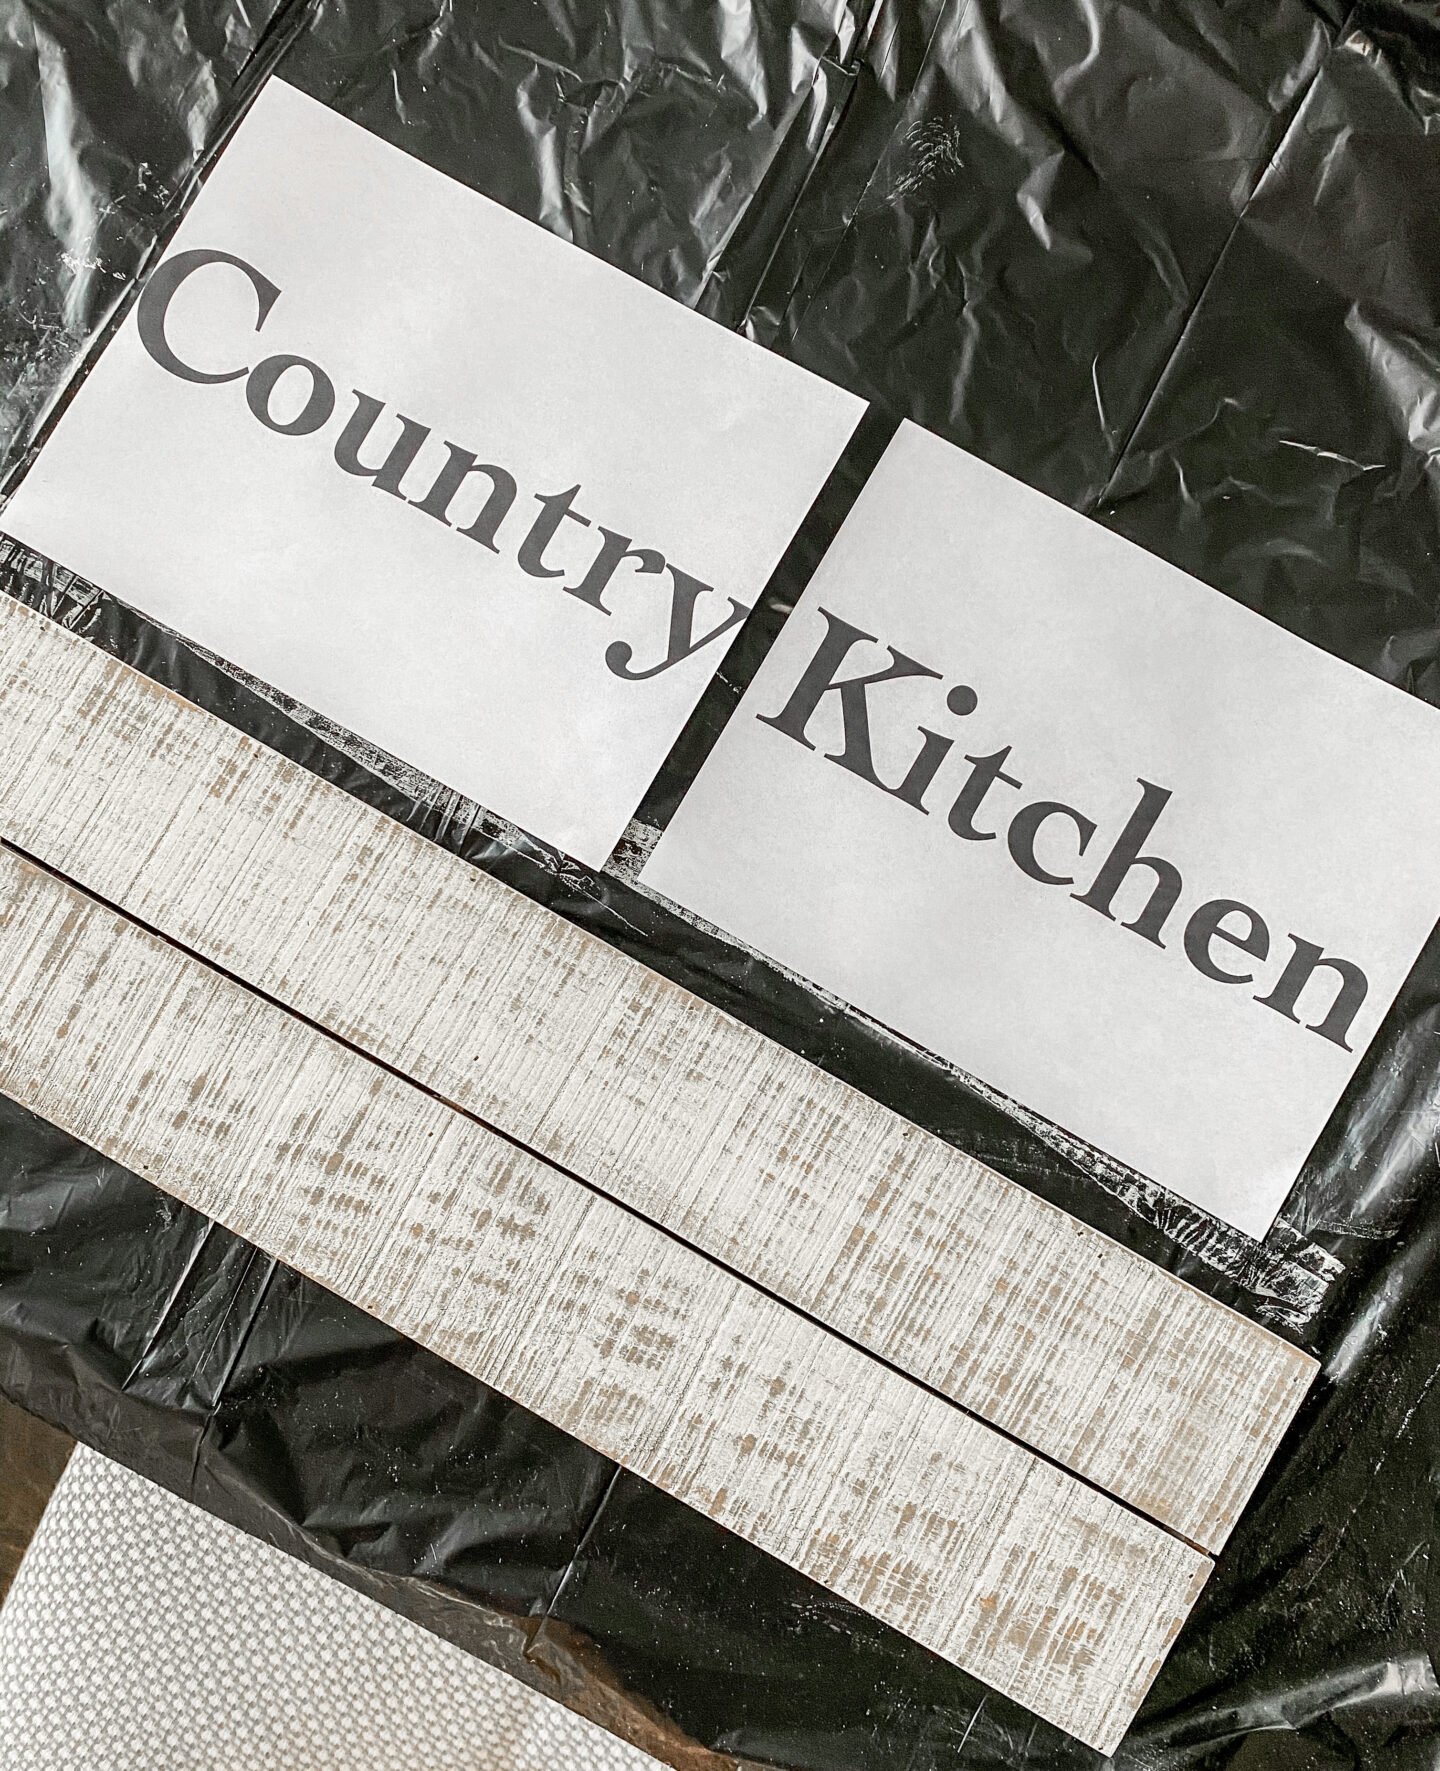
The space we want the sign is right above her Range in the Kitchen. It is the perfect spot for it! The sign I want to make for her will say ‘Country Kitchen’ on it and be designed to match her decor as well.

The First Step
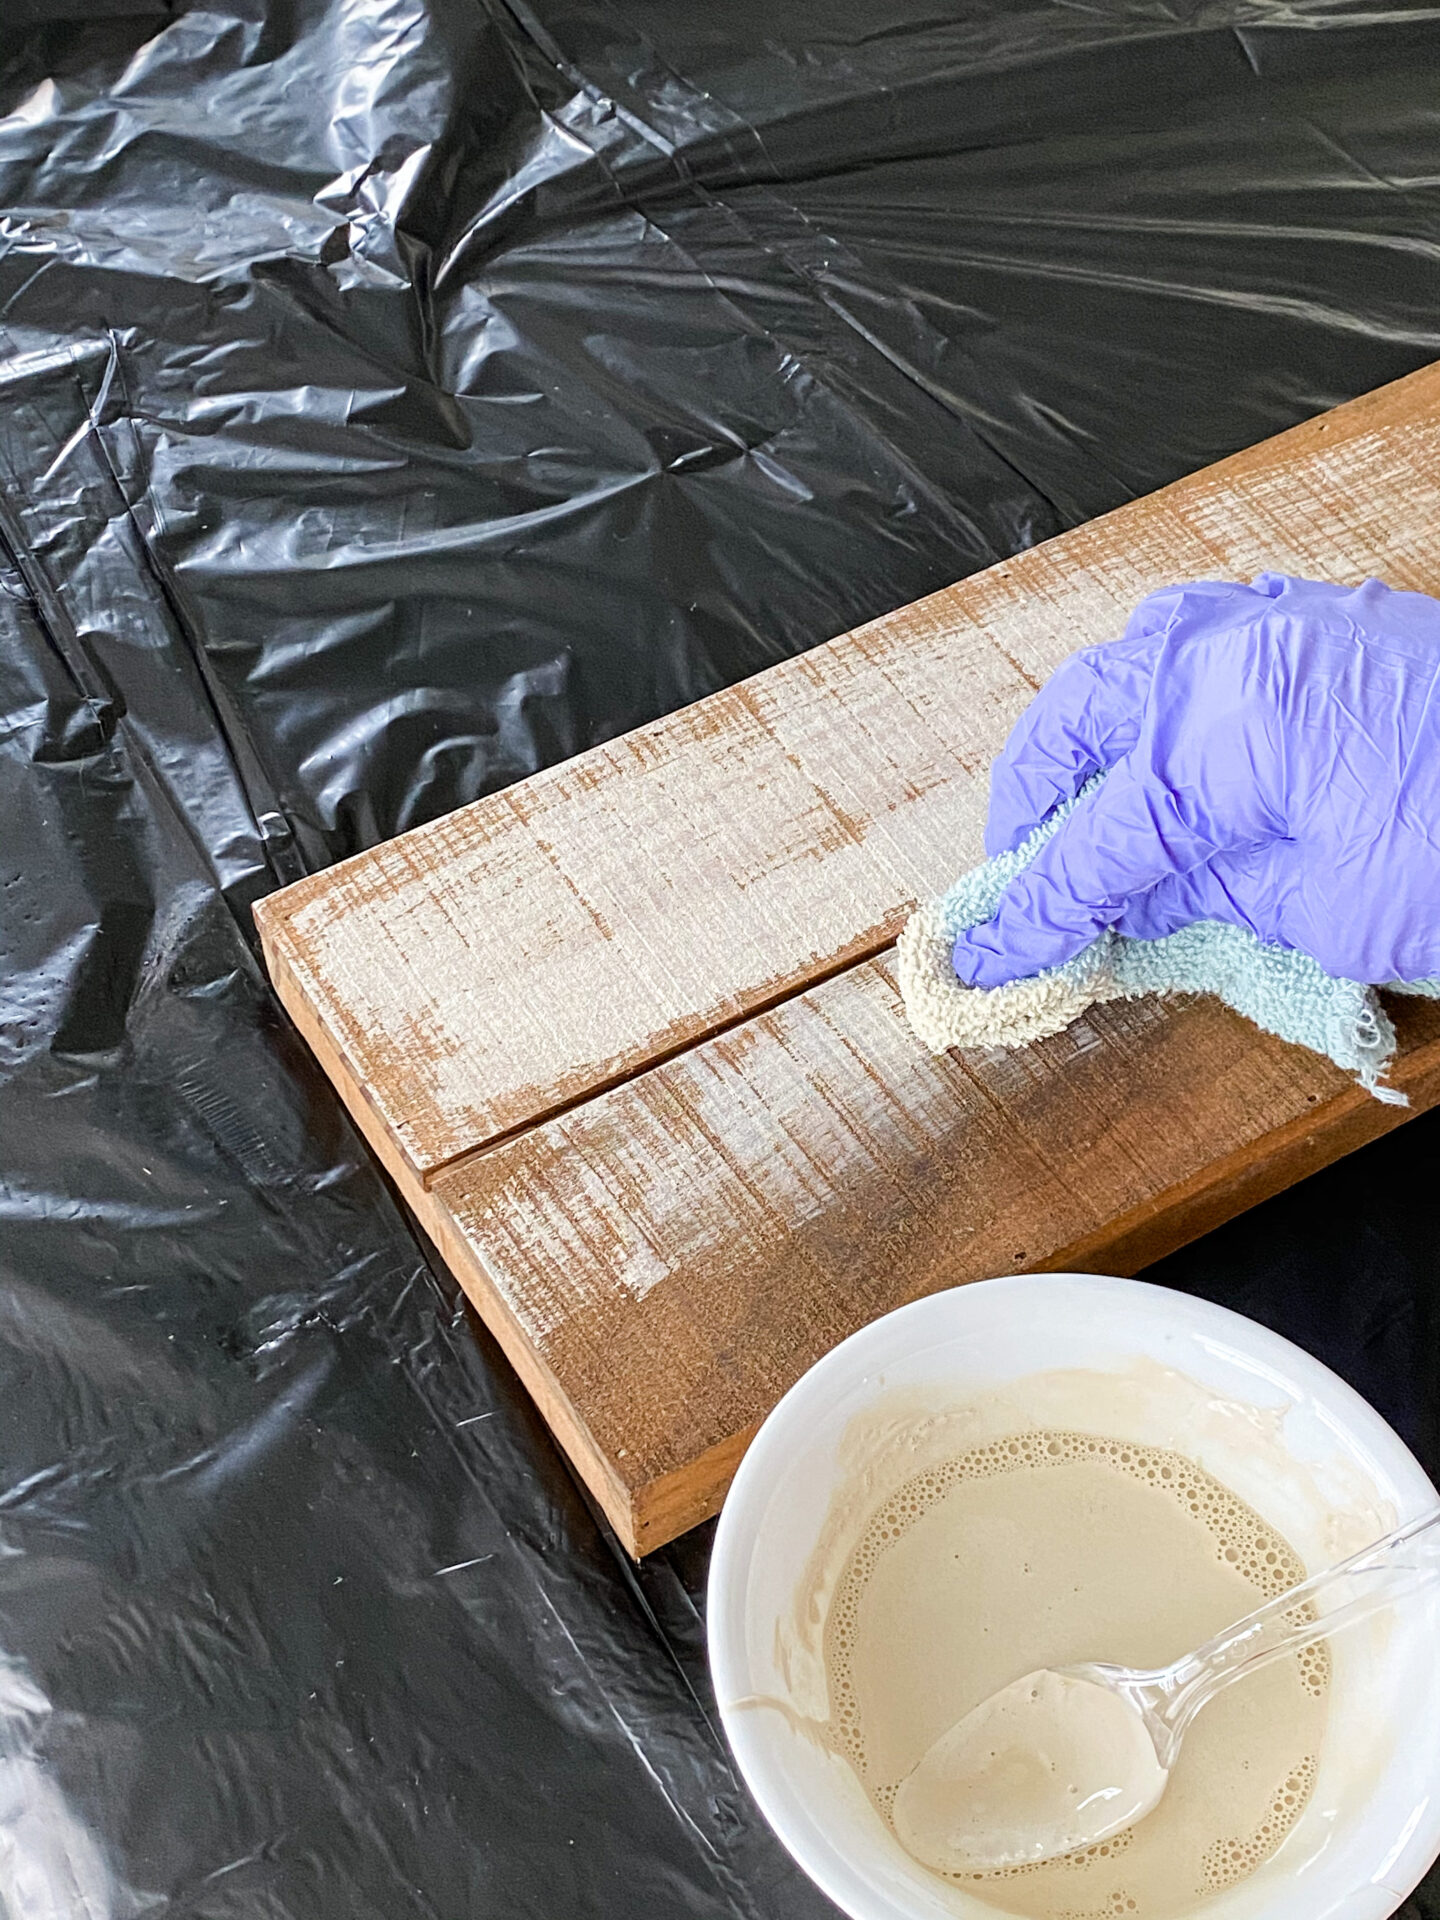
My first step in this project is to stain the wood. Normally, I might condition the wood first on a wood stain project, but because this is an undercoat, it is not necessary. I like to use the color Early American by Varathane for a lot of my projects.
Grab an old rag or paintbrush and evenly apply the wood stain to the wood. Make sure you have your surface covered with a protective material so as not to damage surrounding areas. After the stain has been applied immediately wipe the excess off with another rag. The longer you leave wood stain on, the darker it will be!

Once your piece is stained, let it sit for 24 hours before attempting to do anything else with it. The stain will need to fully dry and penetrate the wood prior to painting.

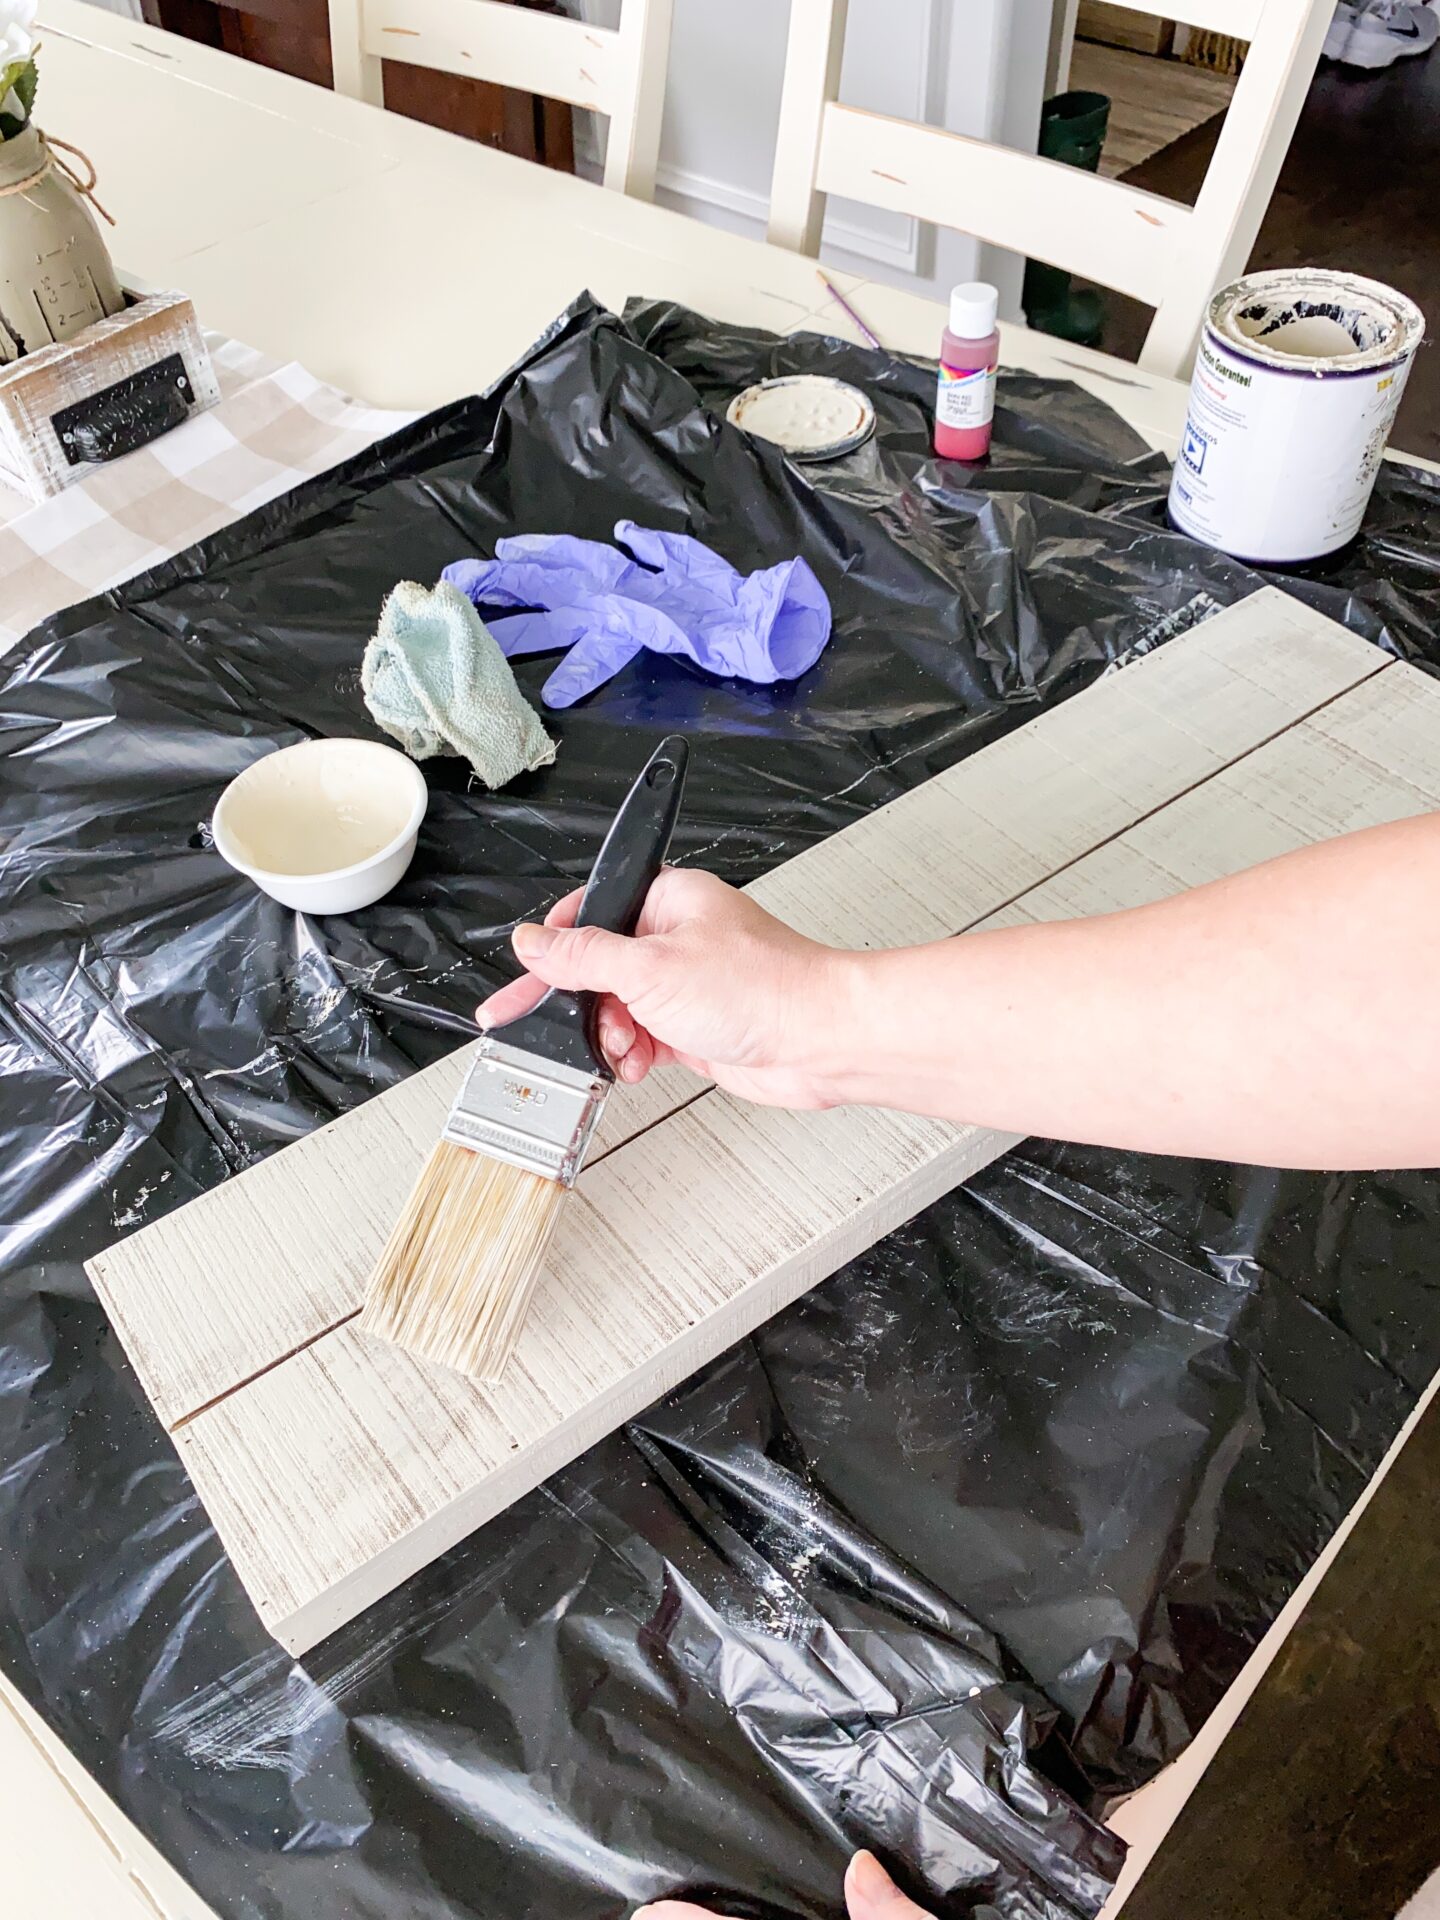
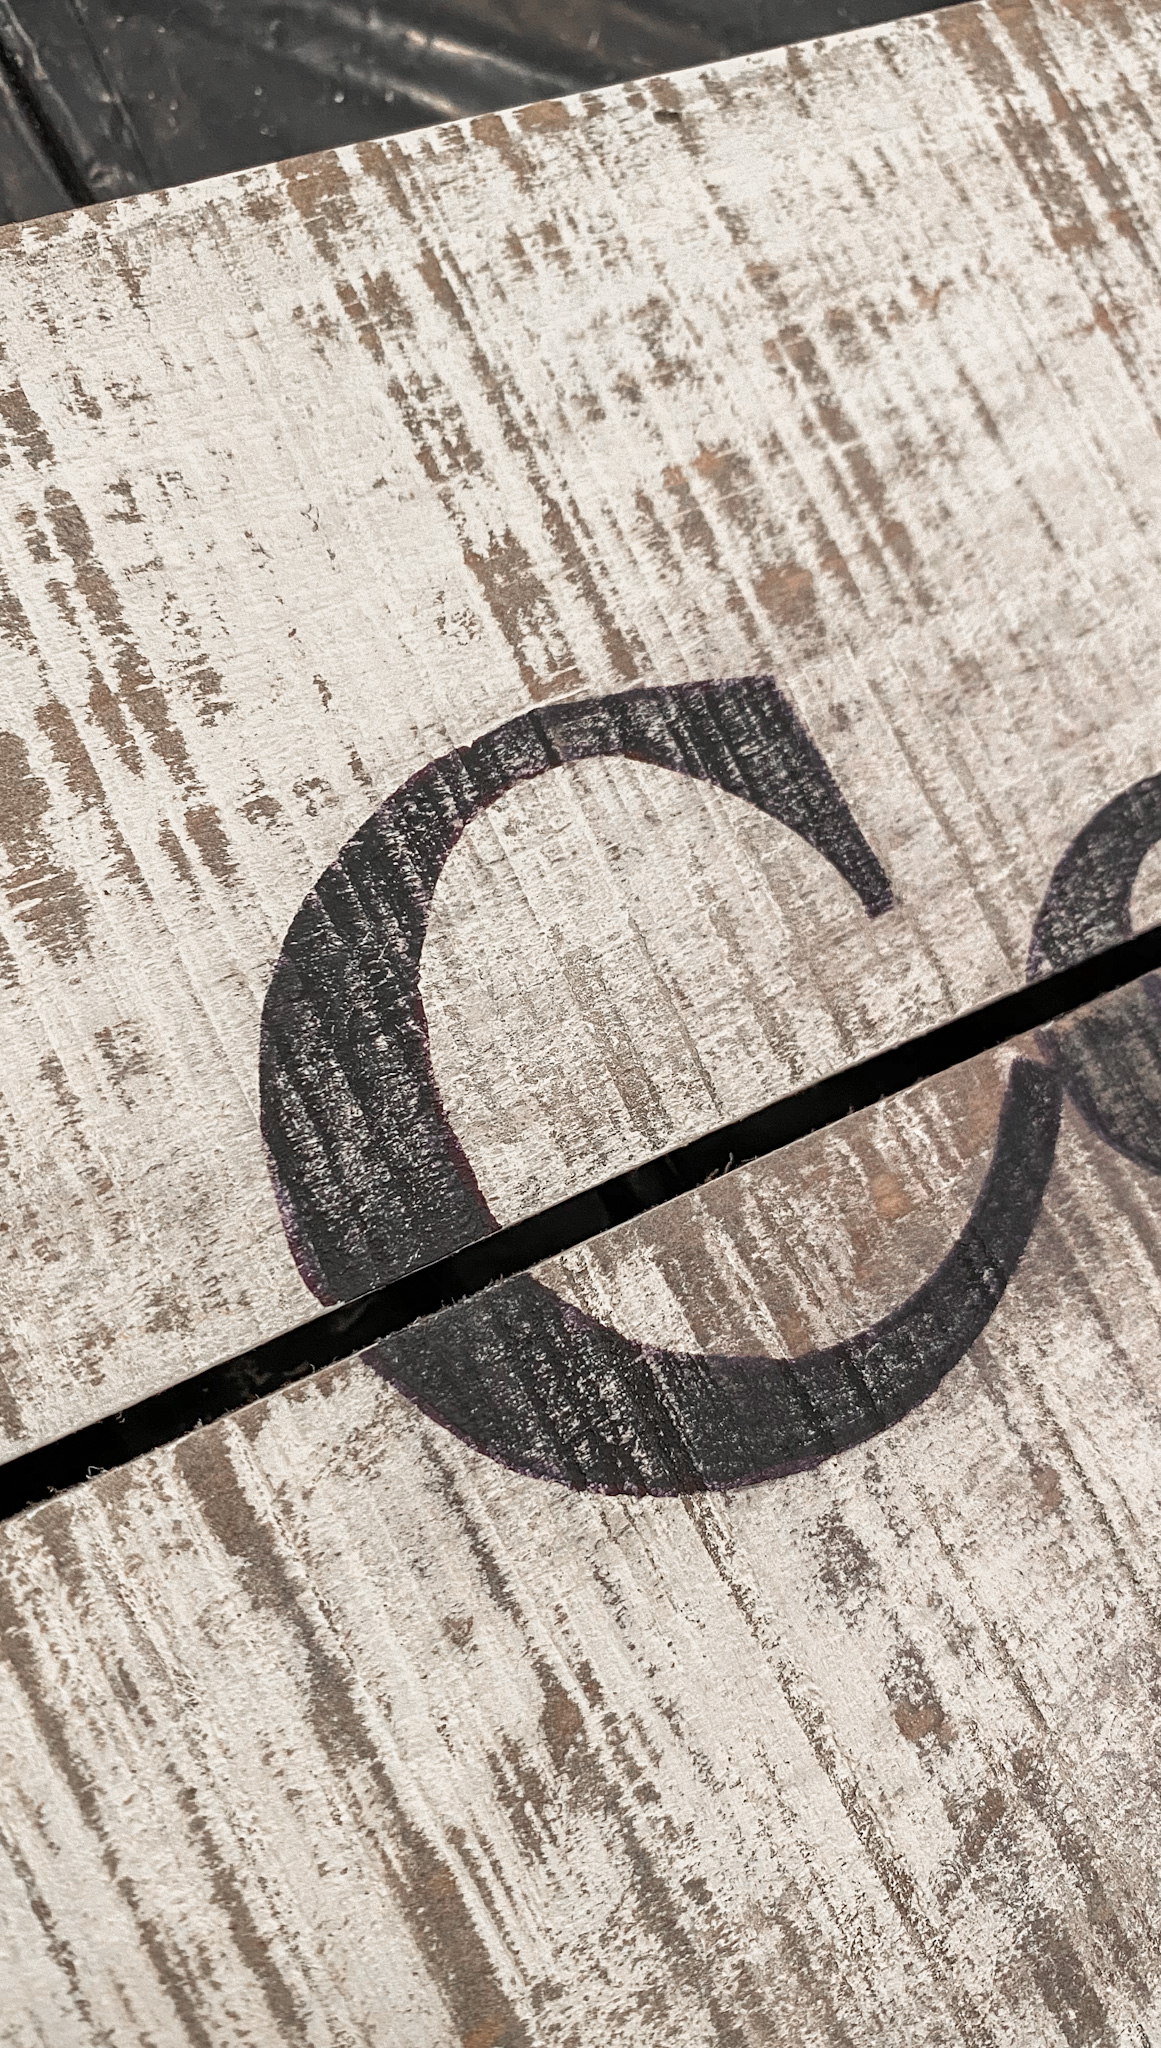
Once your wood has fully dried, it’s time to paint it! I like to use Renaissance Furniture Paint, and for this project, I am using the color Ivory Tower, which is a cream color. First, I whitewashed the wood by watering down the paint and applying it directly to the wood with an old washcloth. I allowed that to fully dry, and then lightly dry-brushed a layer of chalk paint over that.
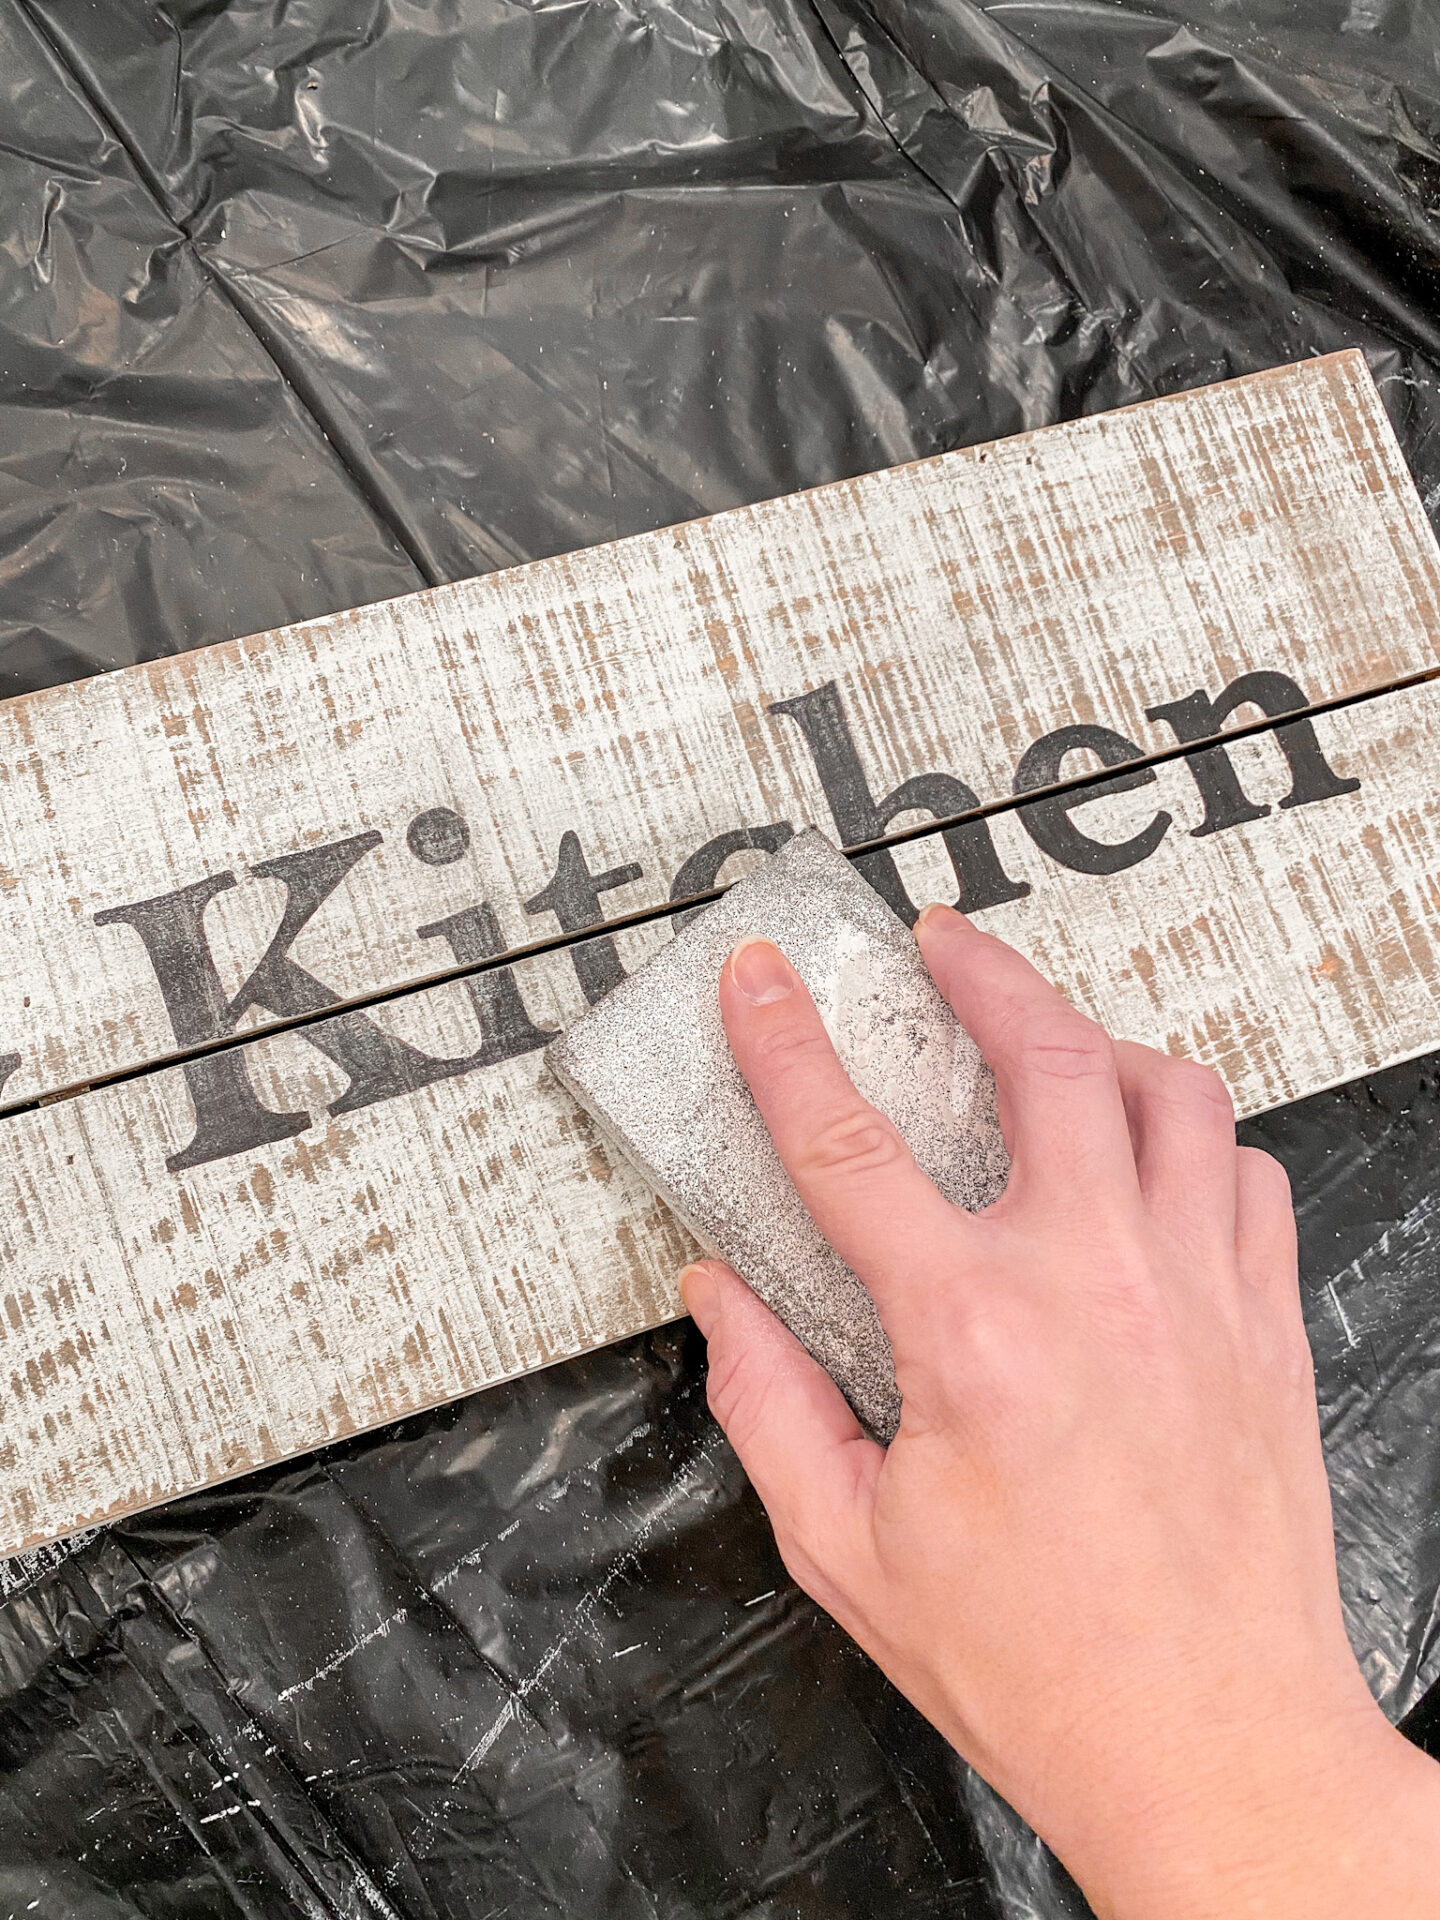
Distressing the Paint
I think one of the most fun parts of these types of projects is the distressing part, and it’s super easy too! After your paint has fully dried, grab your Mouse Sander and distress your sign as much or as little as you like. I really wanted the grooves and texture of the wood to pop through for this piece, so I focused on those.
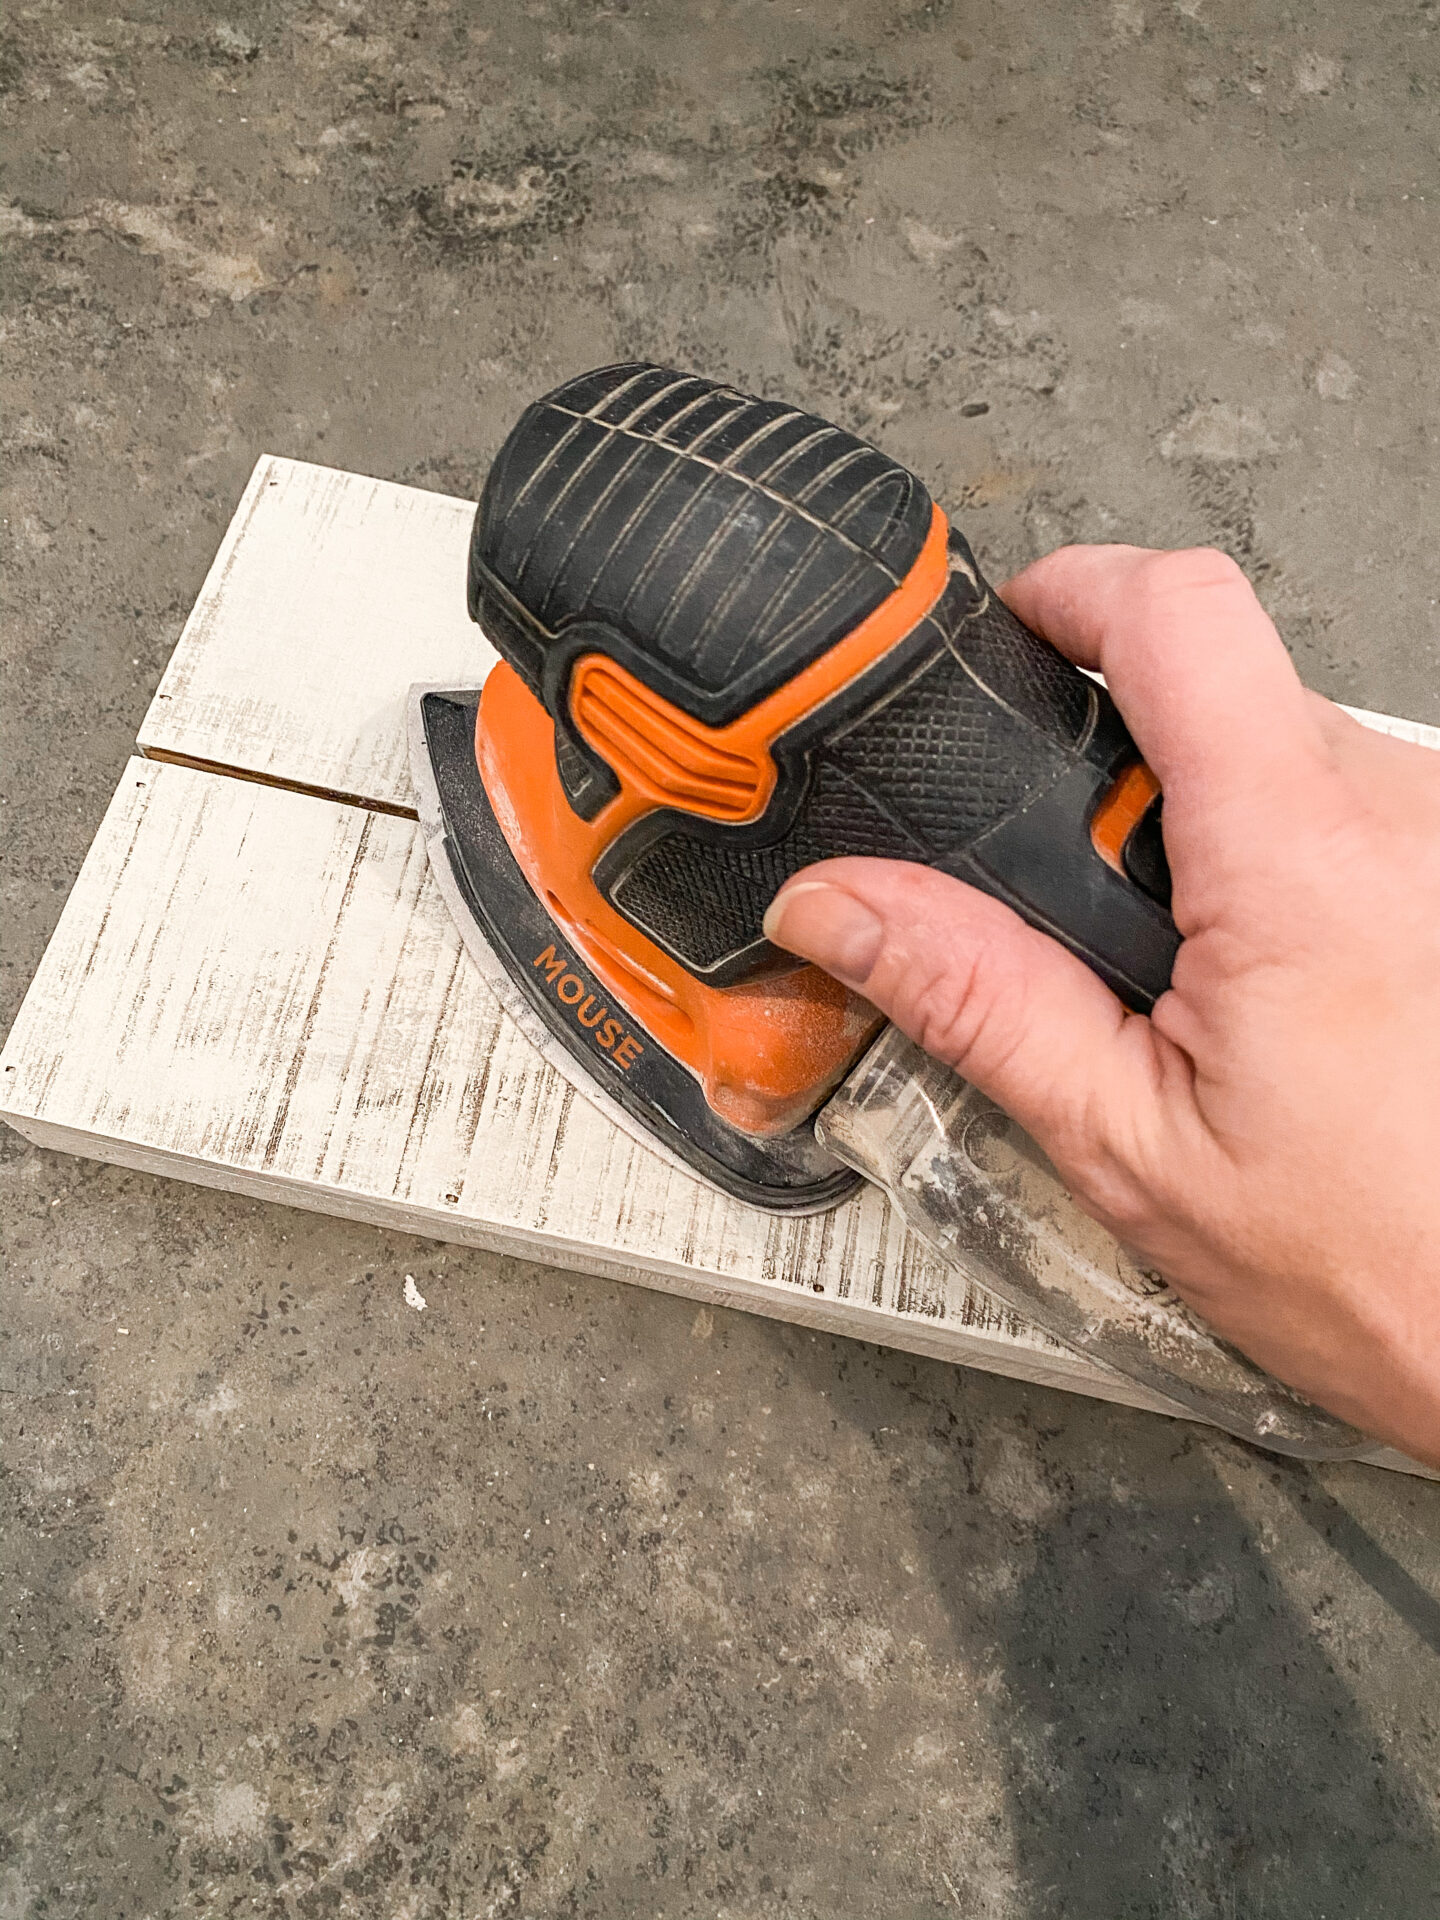
After you’ve sanded your piece, make sure to use a dry cloth and a vacuum to get rid of all the dust.
Choosing a Font For This Project
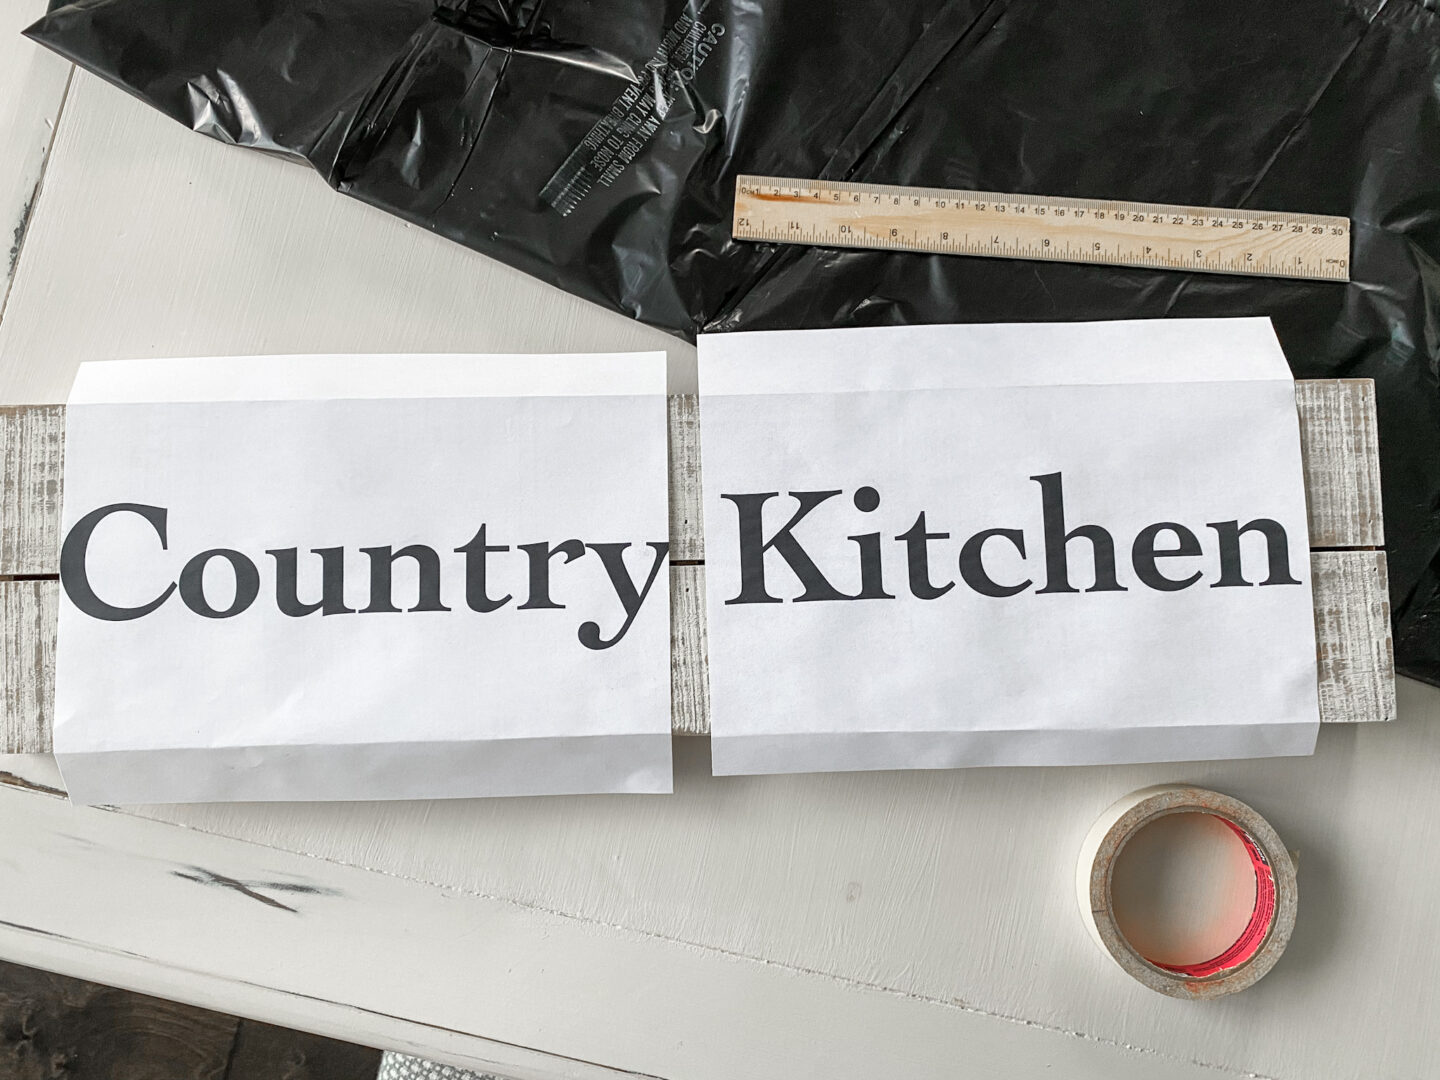
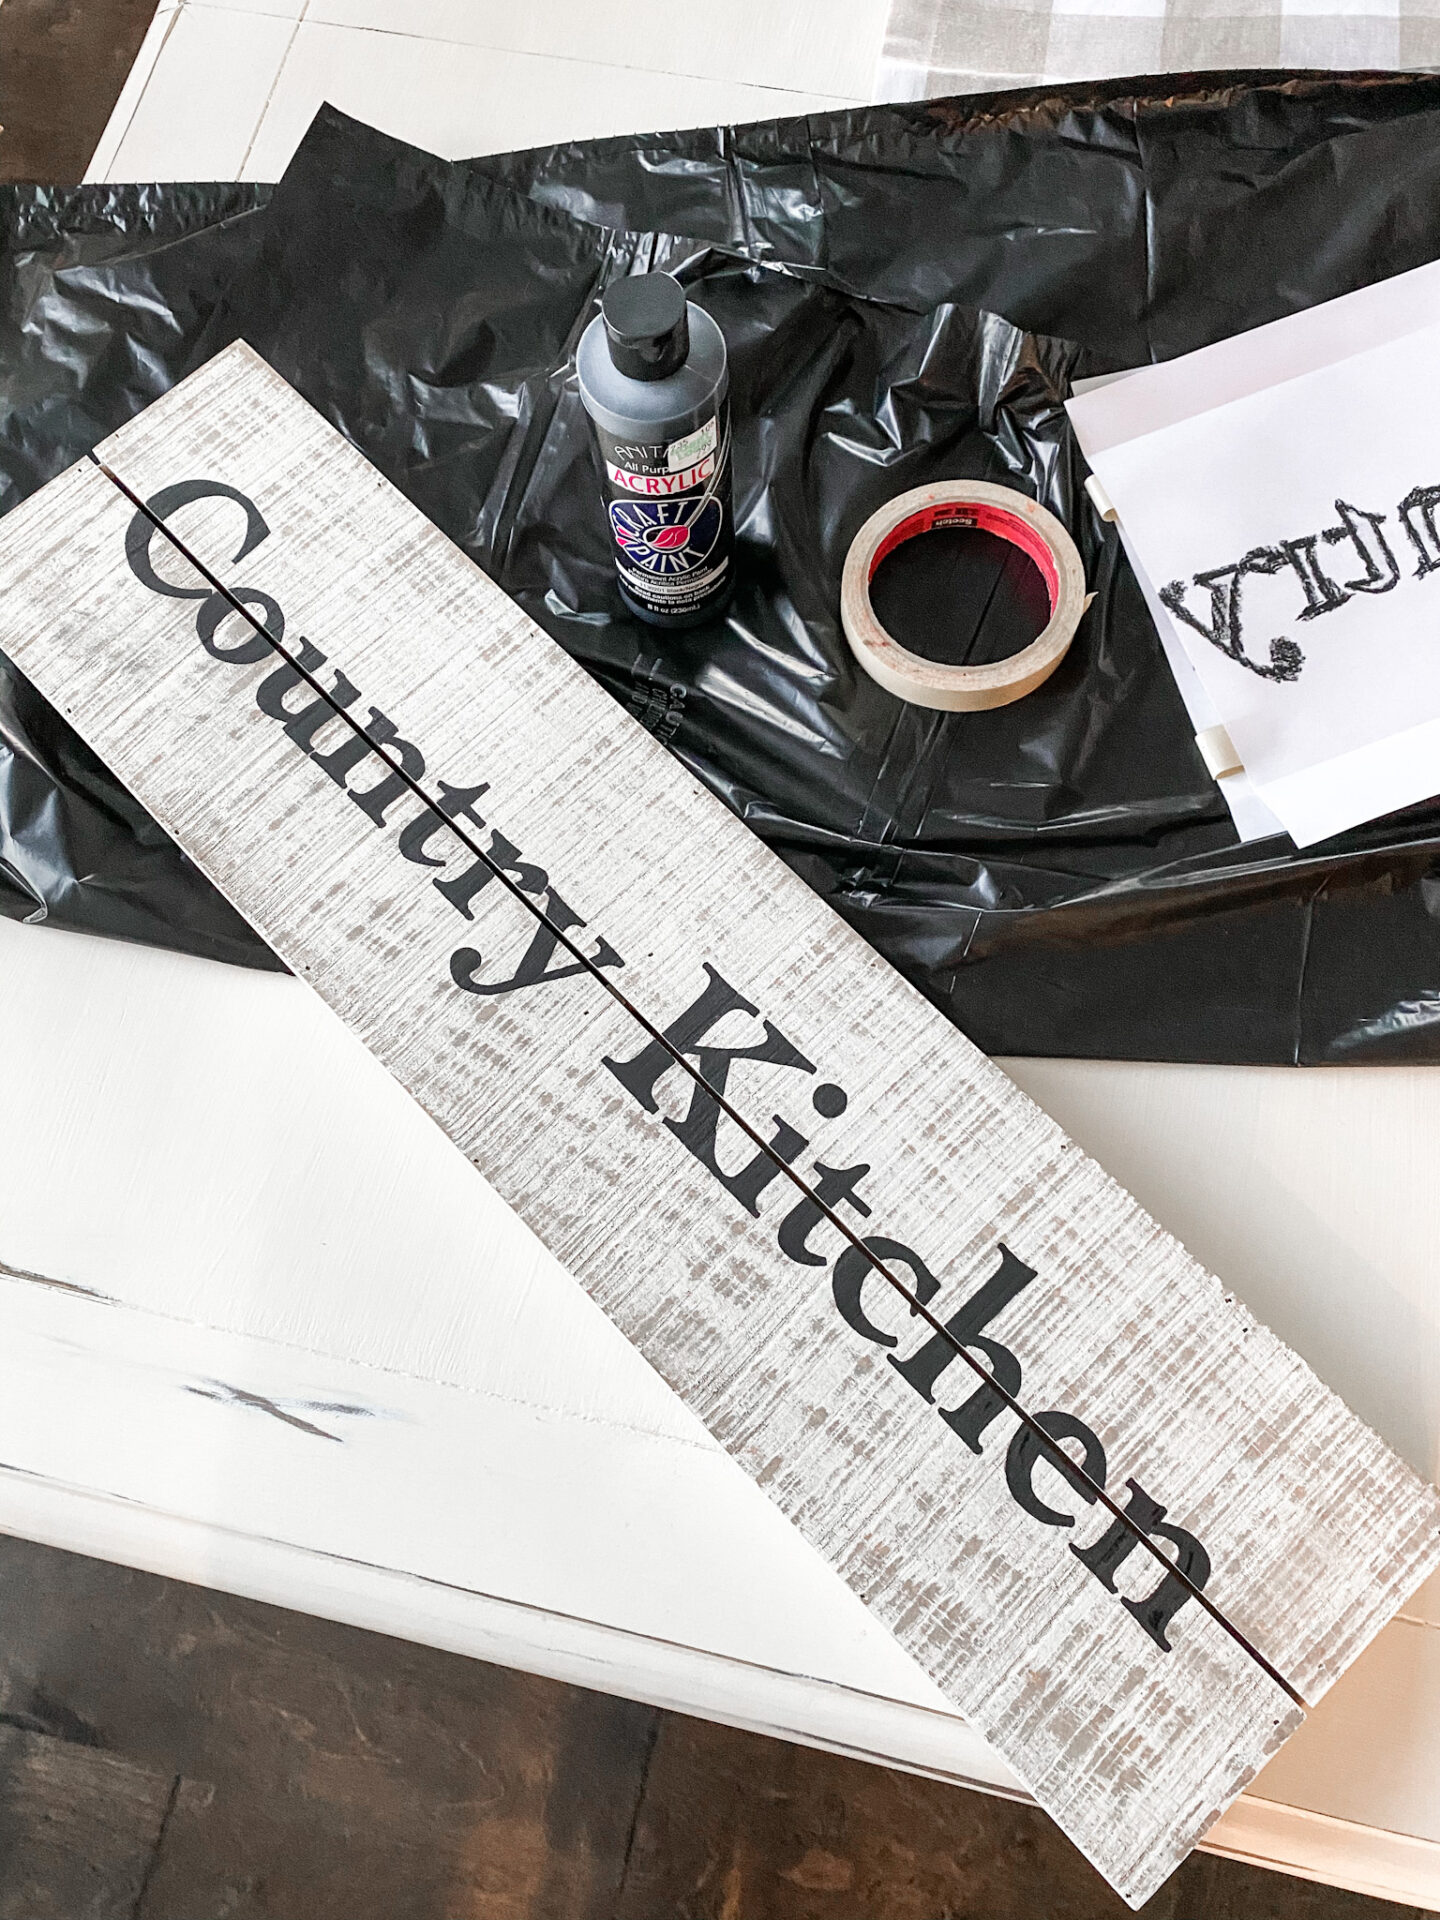
Choosing a font for this project took a few tries (okay, eight to be exact lol!) I made a mock-up of what I wanted this project to look like by using Photoshop, and I would send the images over to my Mom with different font options. The one she chose was ‘Cochin Bold’, which turned out to be a great Country-style font. Below is the mock-up I made for reference.

I designed this mock-up using the exact dimensions of the wood piece so that I could see how it might look when it was complete. When it came to printing out my font, however, it was just a little too big for the paper I was using. I had to shrink the lettering down a bit so that my font would fit on two 8.5 x 11″ pieces of paper.
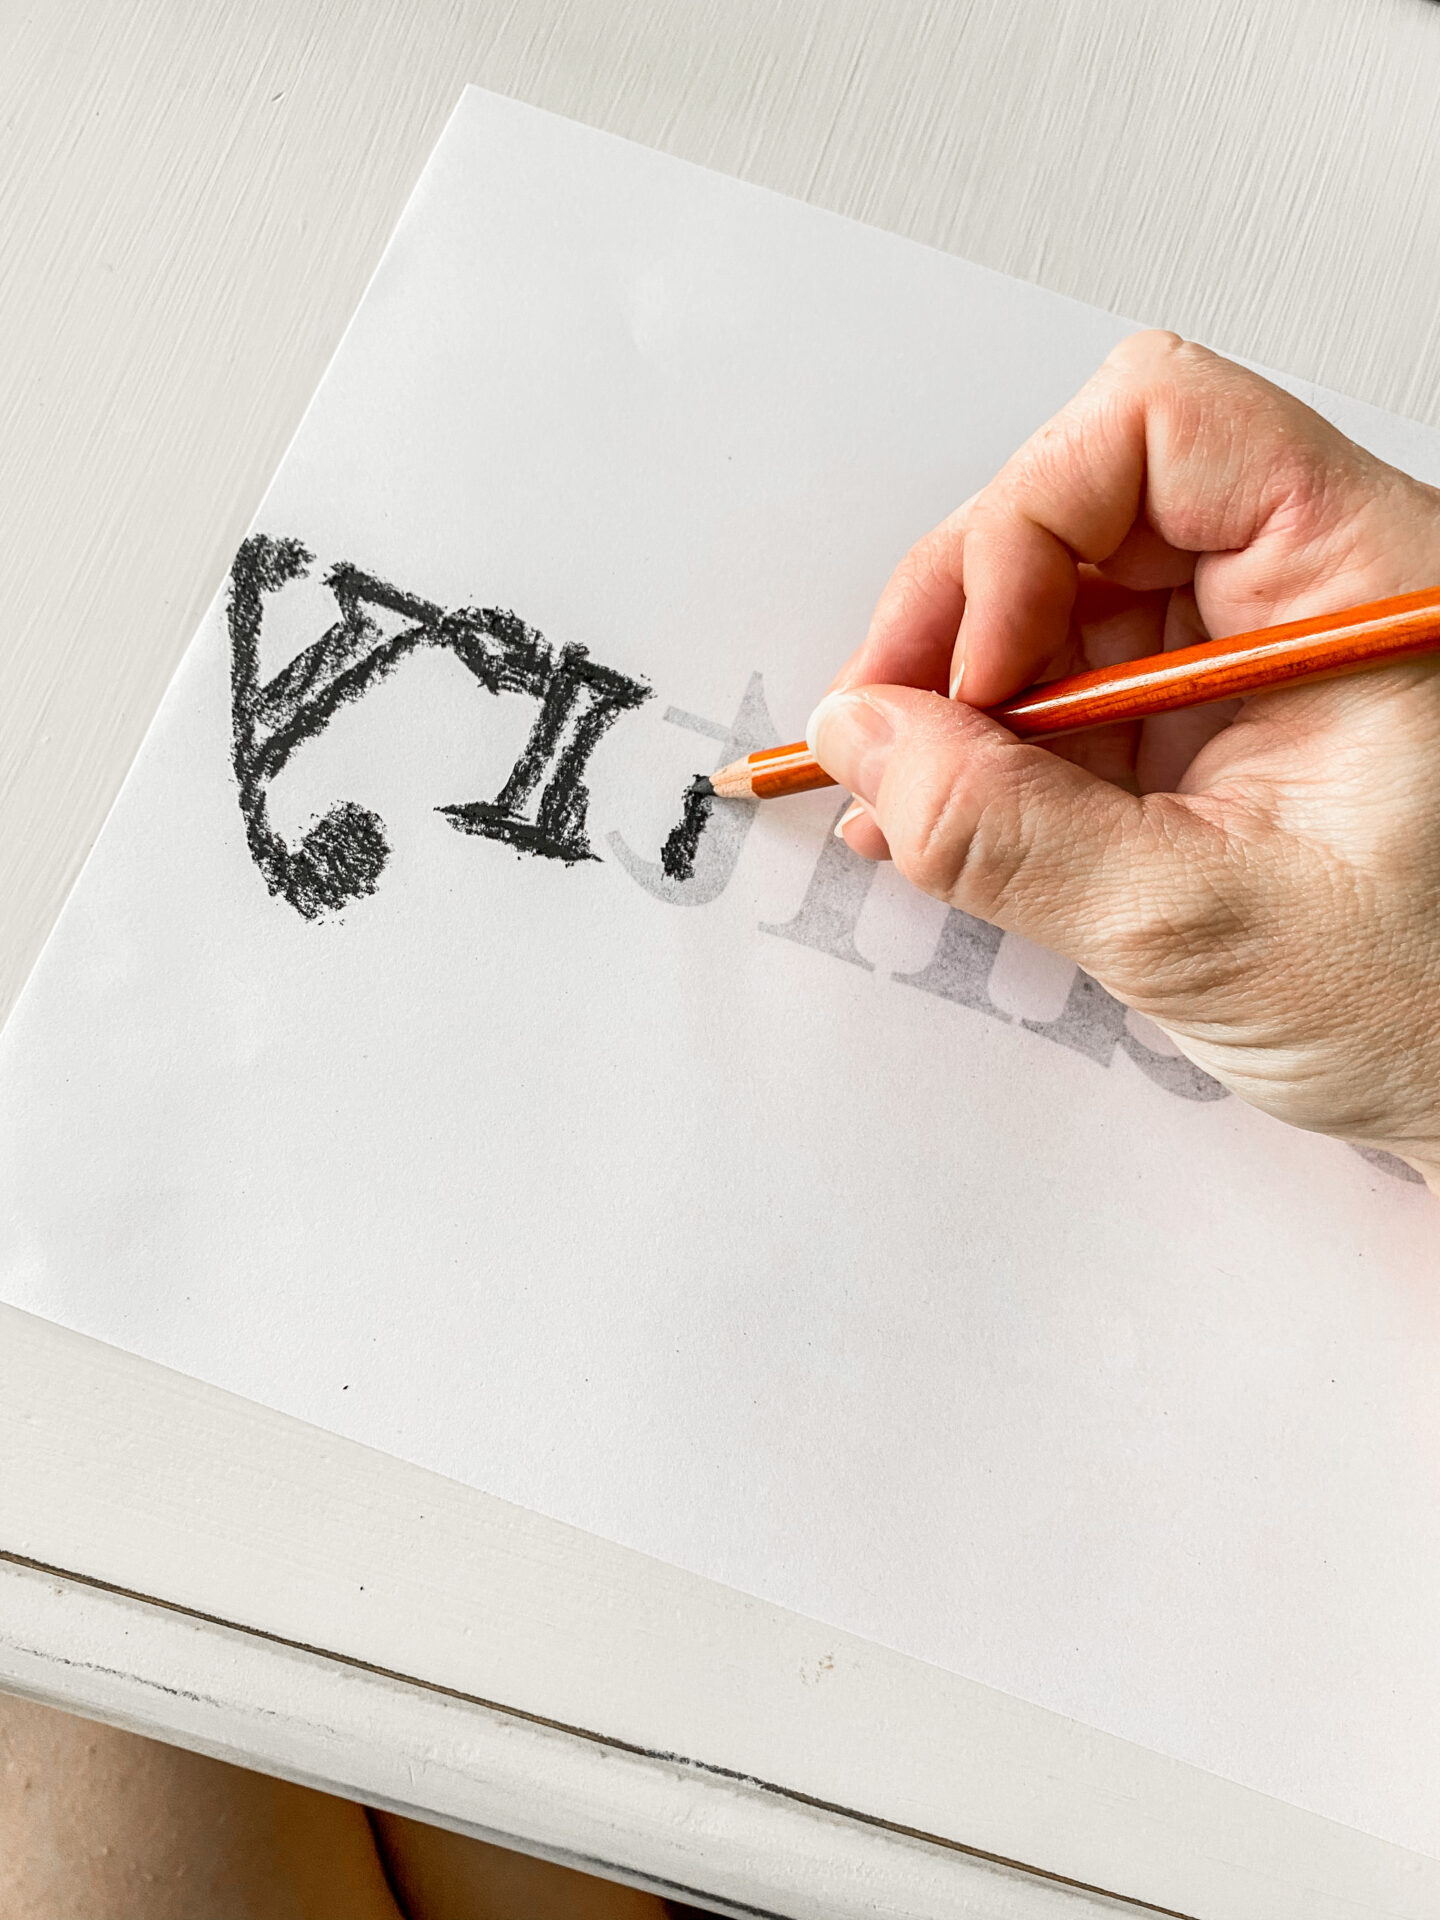
How To Create a Custom Sign Without a Machine – My Trick!
As I mentioned at the beginning of this post, I have one simple trick I use for painting fonts on project pieces. No machine or calligraphy skills required! I learned this trick when I was a Graphic Design Student in College, and it’s really stuck with me. Are you ready?! Let’s do it!
First Step: Have your printed words ready
Second Step: Turn your paper over and use a Charcoal Pencil to cover the lettering on the back
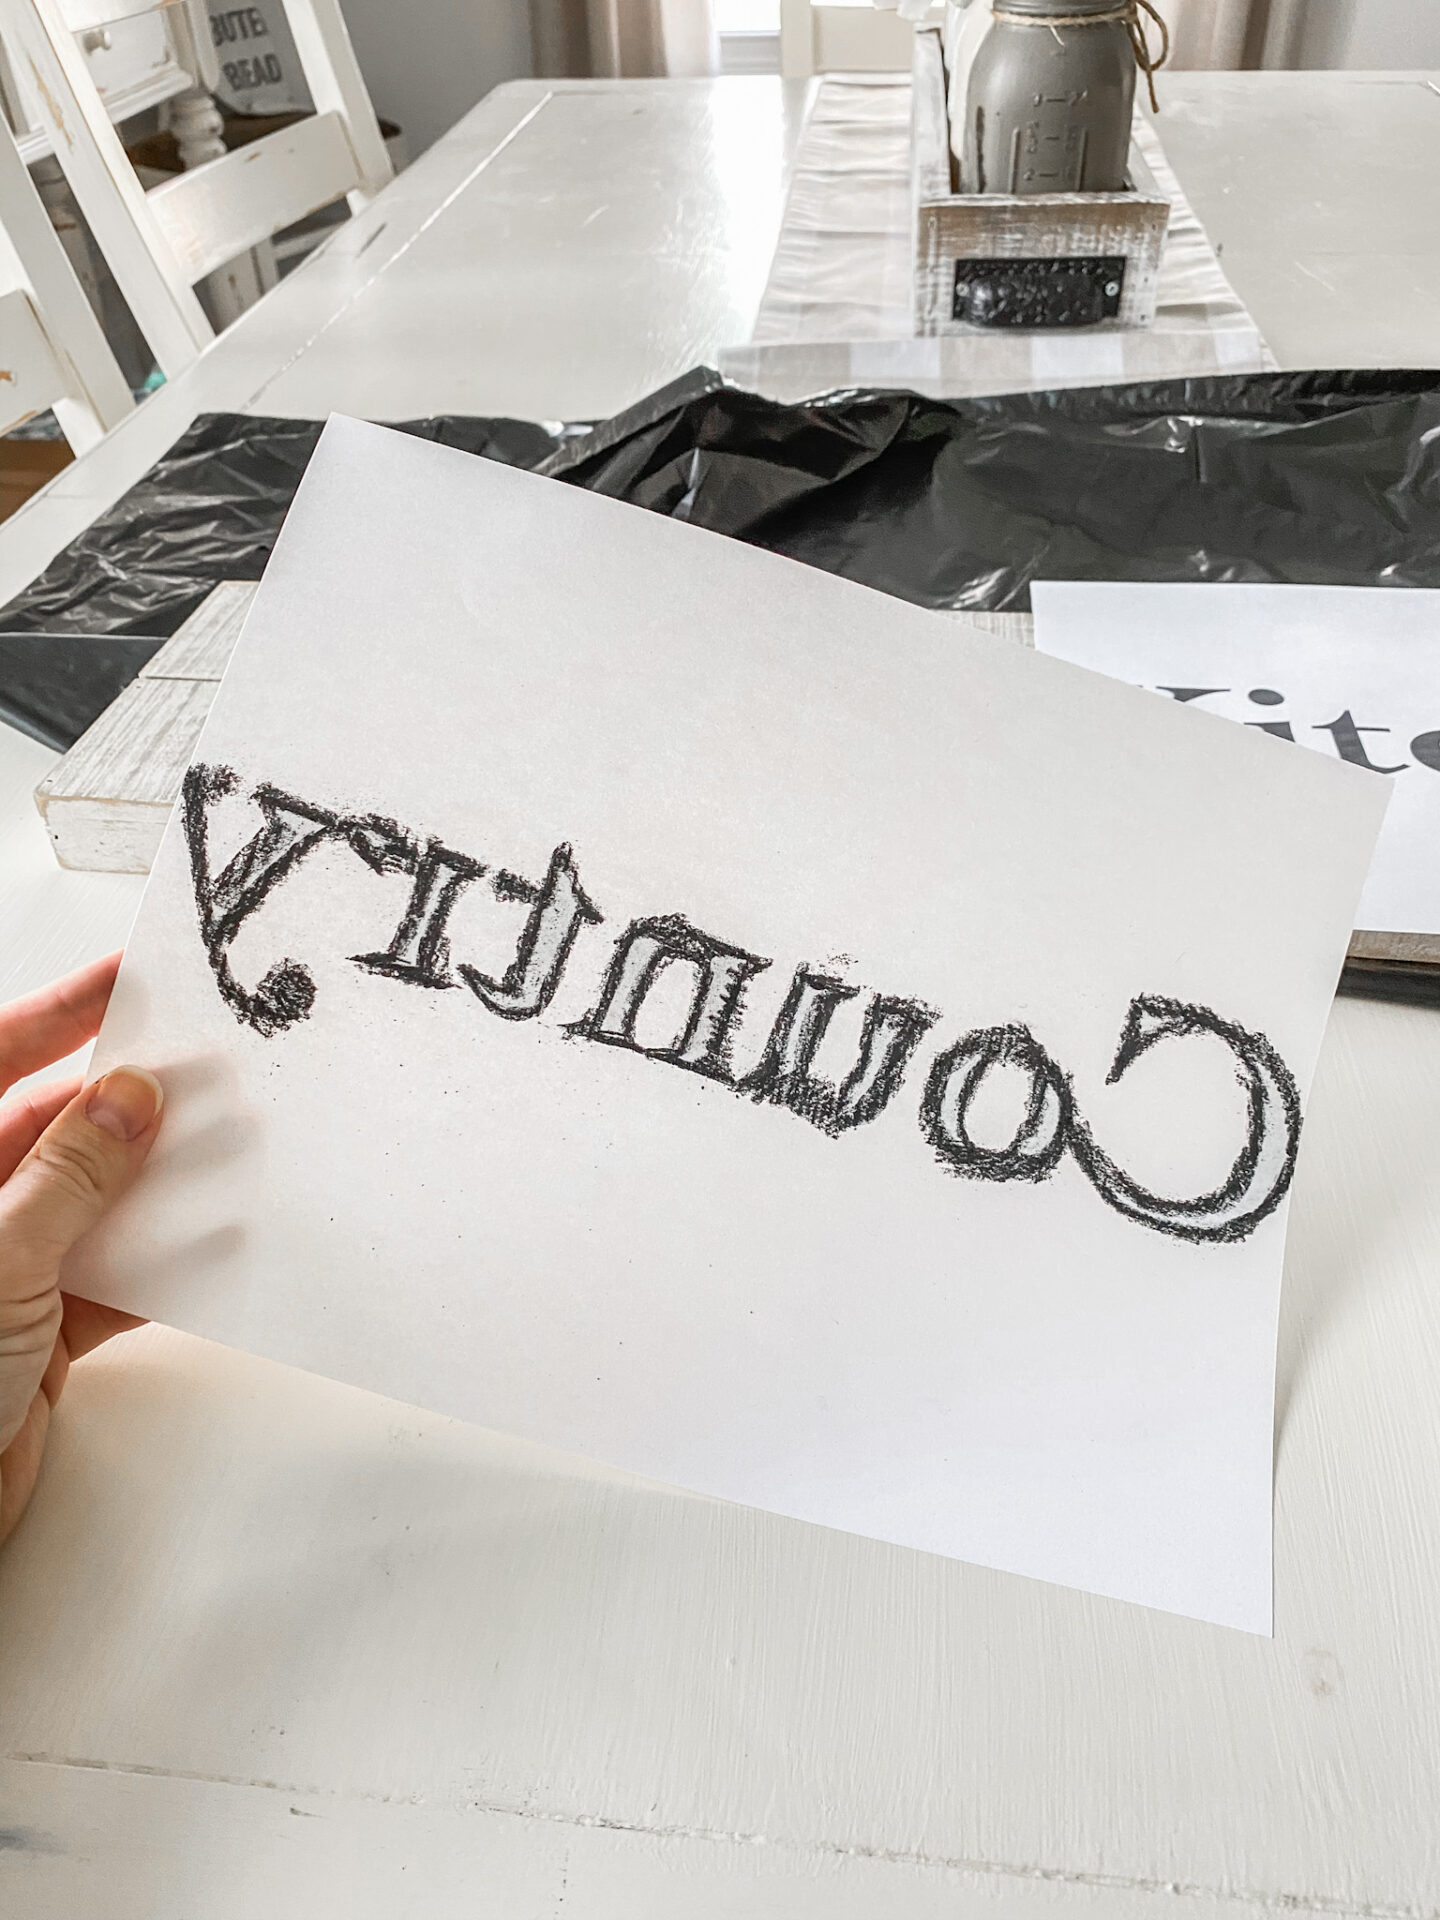
Third Step: Place your paper onto your project and tape it down to prevent it from moving
Fourth Step: Carefully trace each letter with a pen
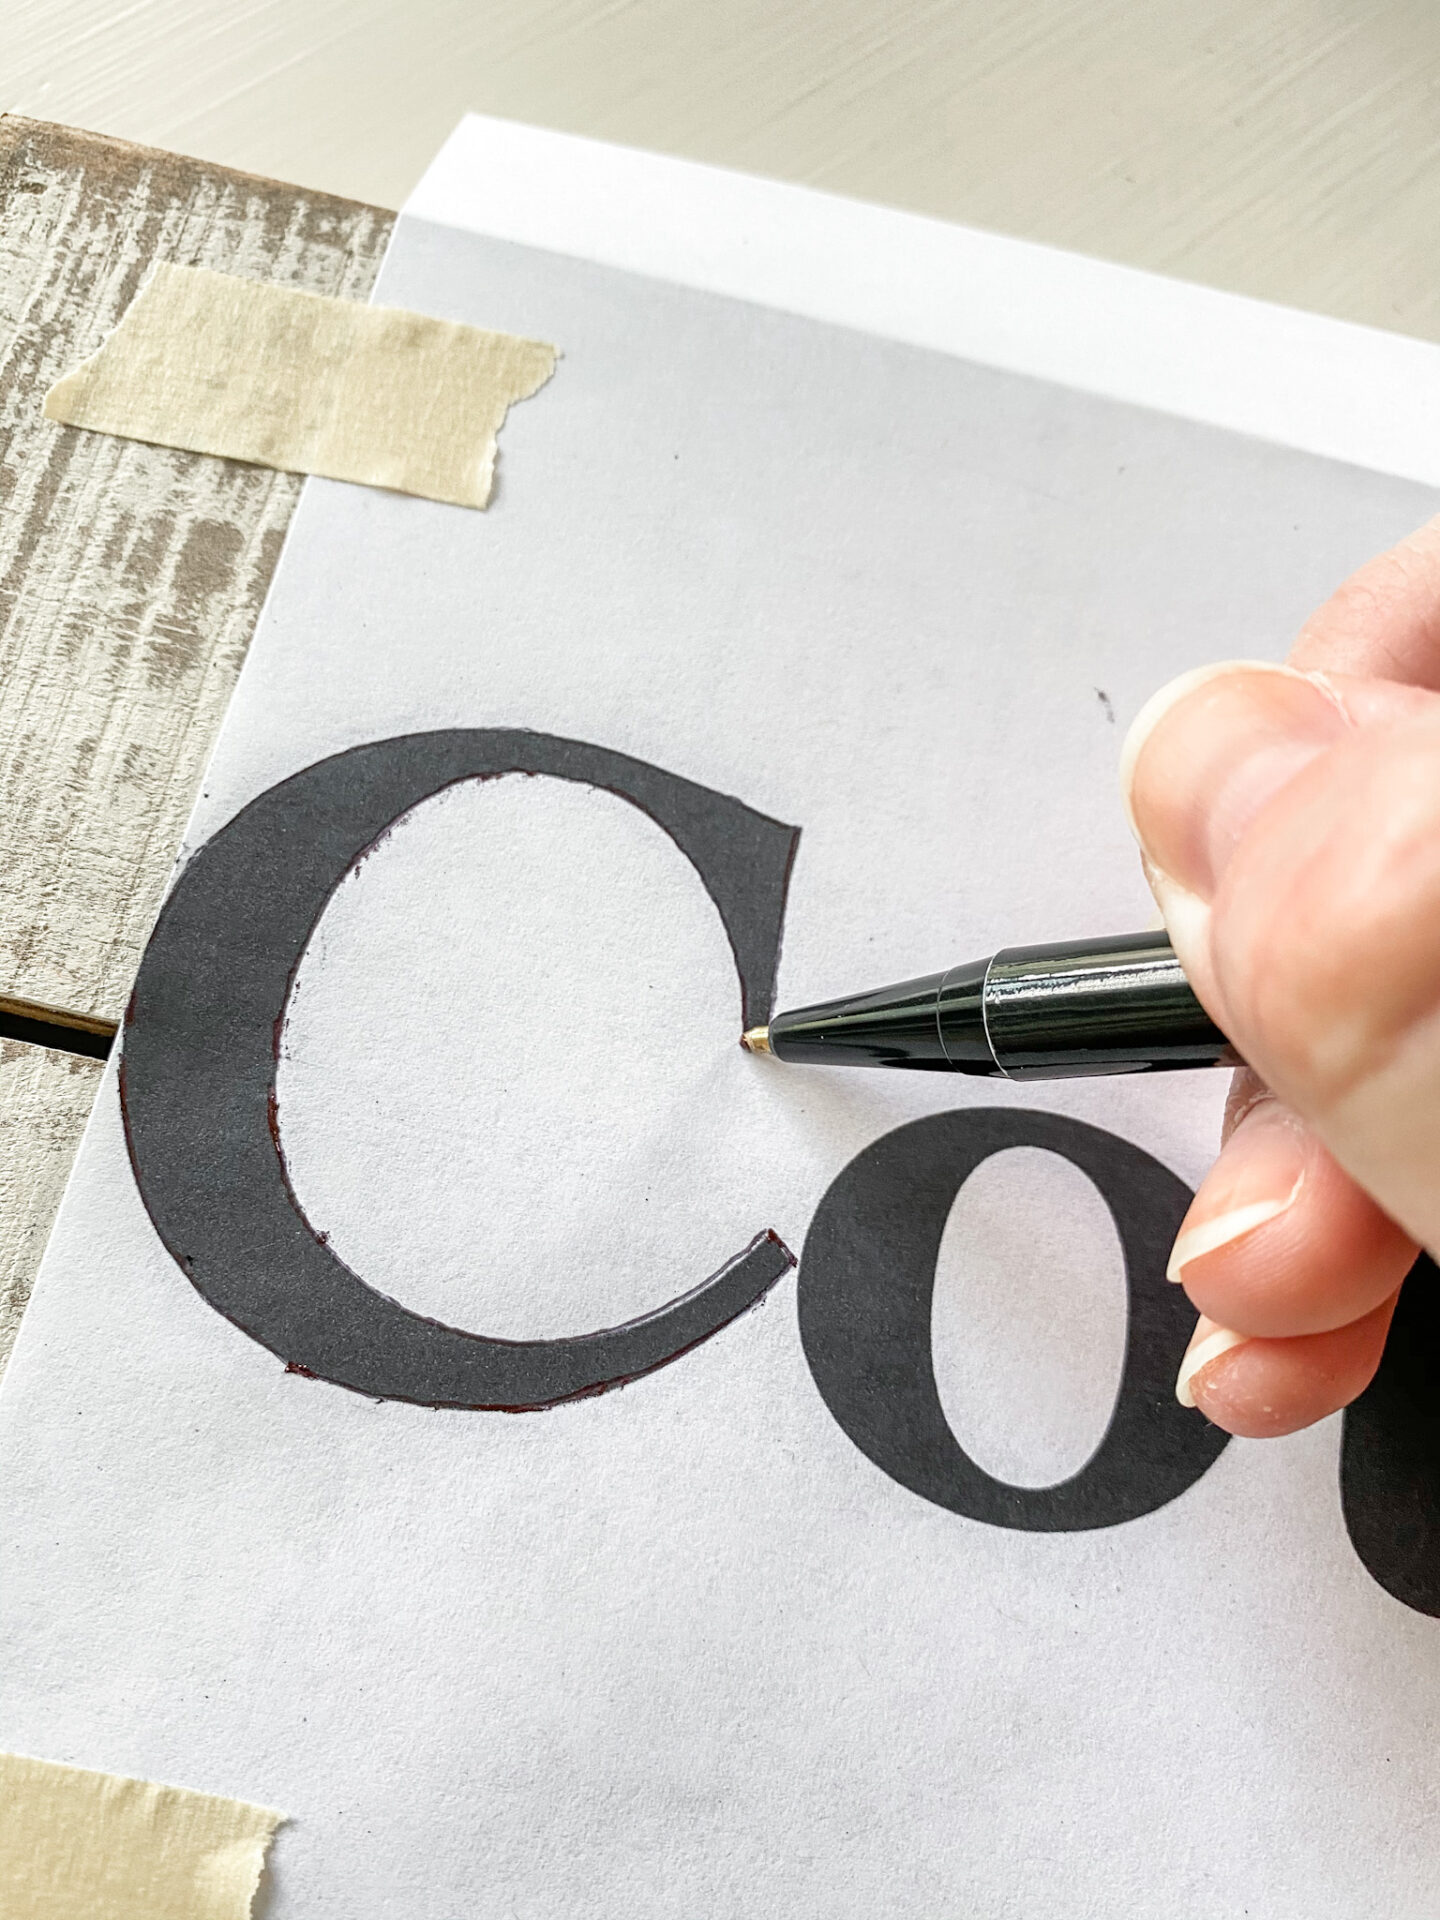
Final Step of this trick: Watch the magic!
Congratulations, you have just made your first charcoal transfer!
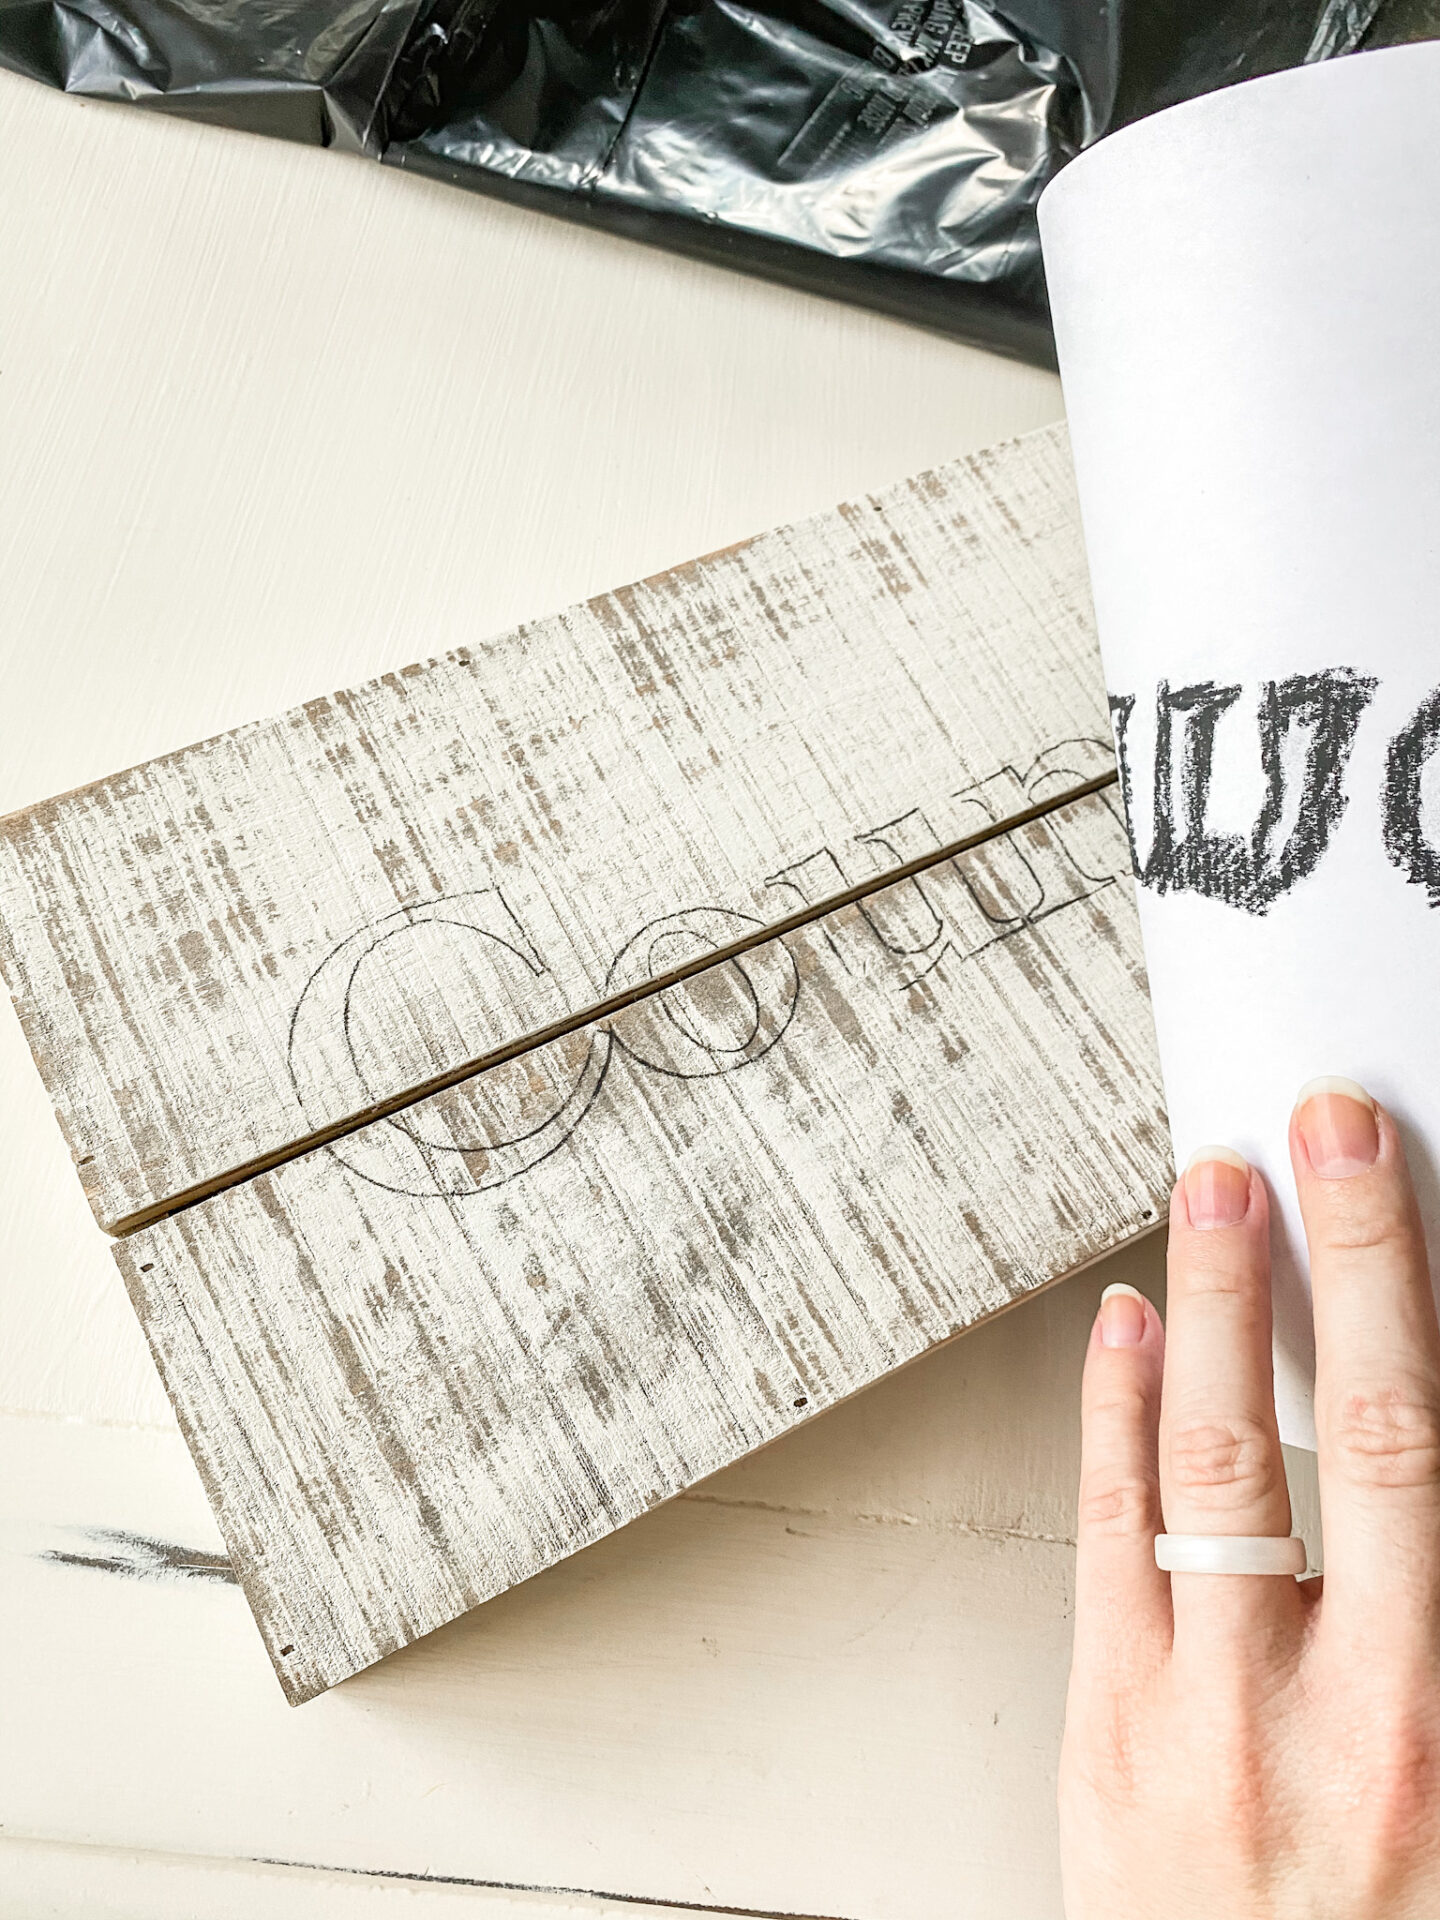
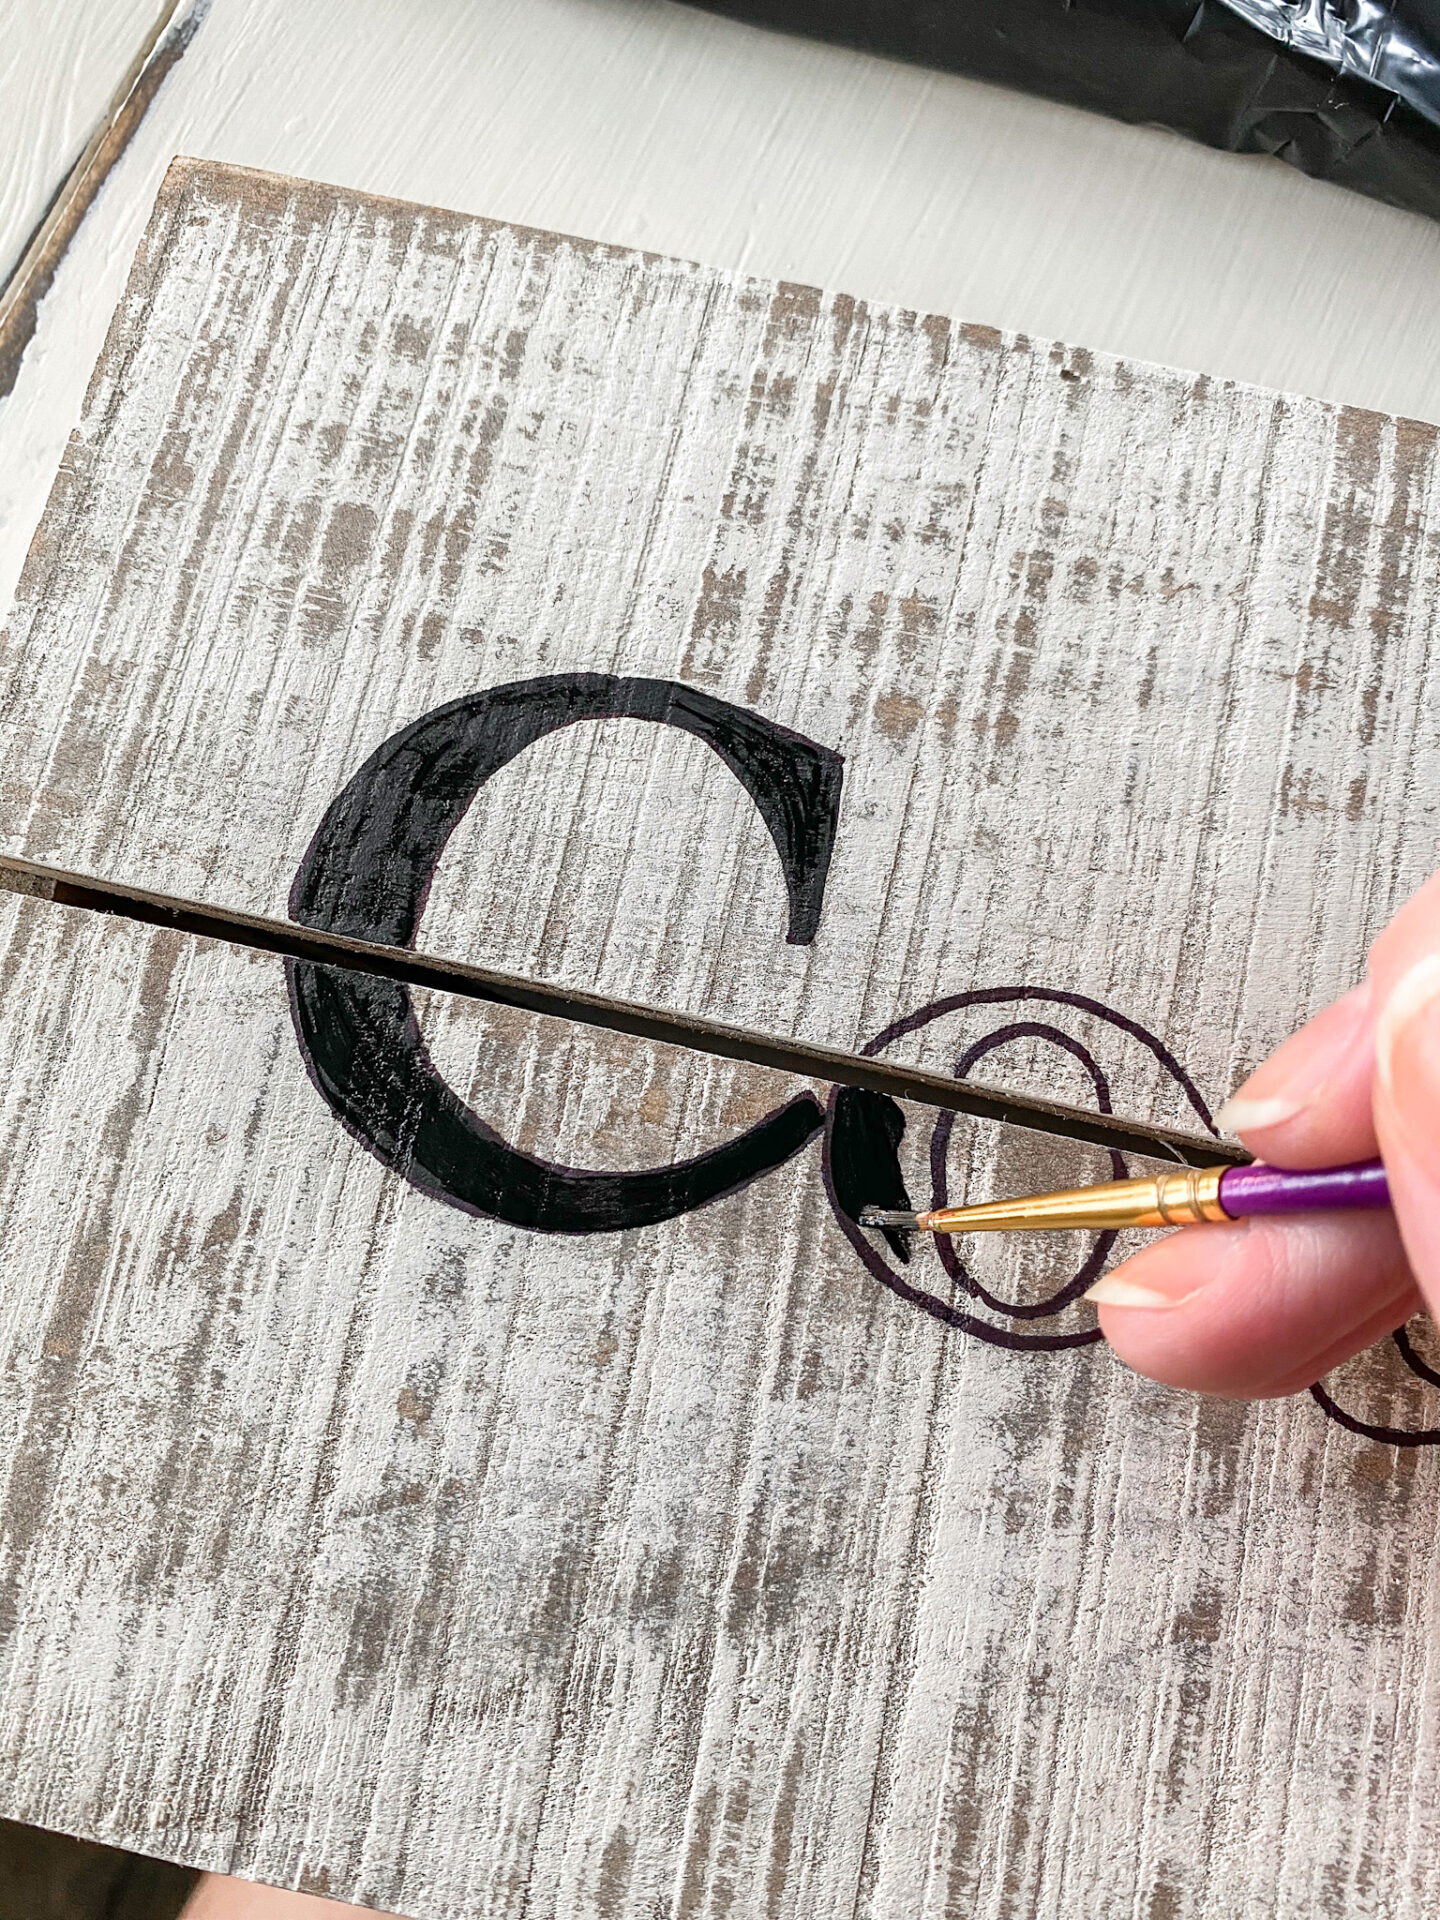
Following your successful tracing & transfer trick, you will have a few options on where you want to go with finishing your lettering. You can either paint directly onto the wood from here (if you have a very steady hand), OR you can outline the transfer in something a bit more permanent first.
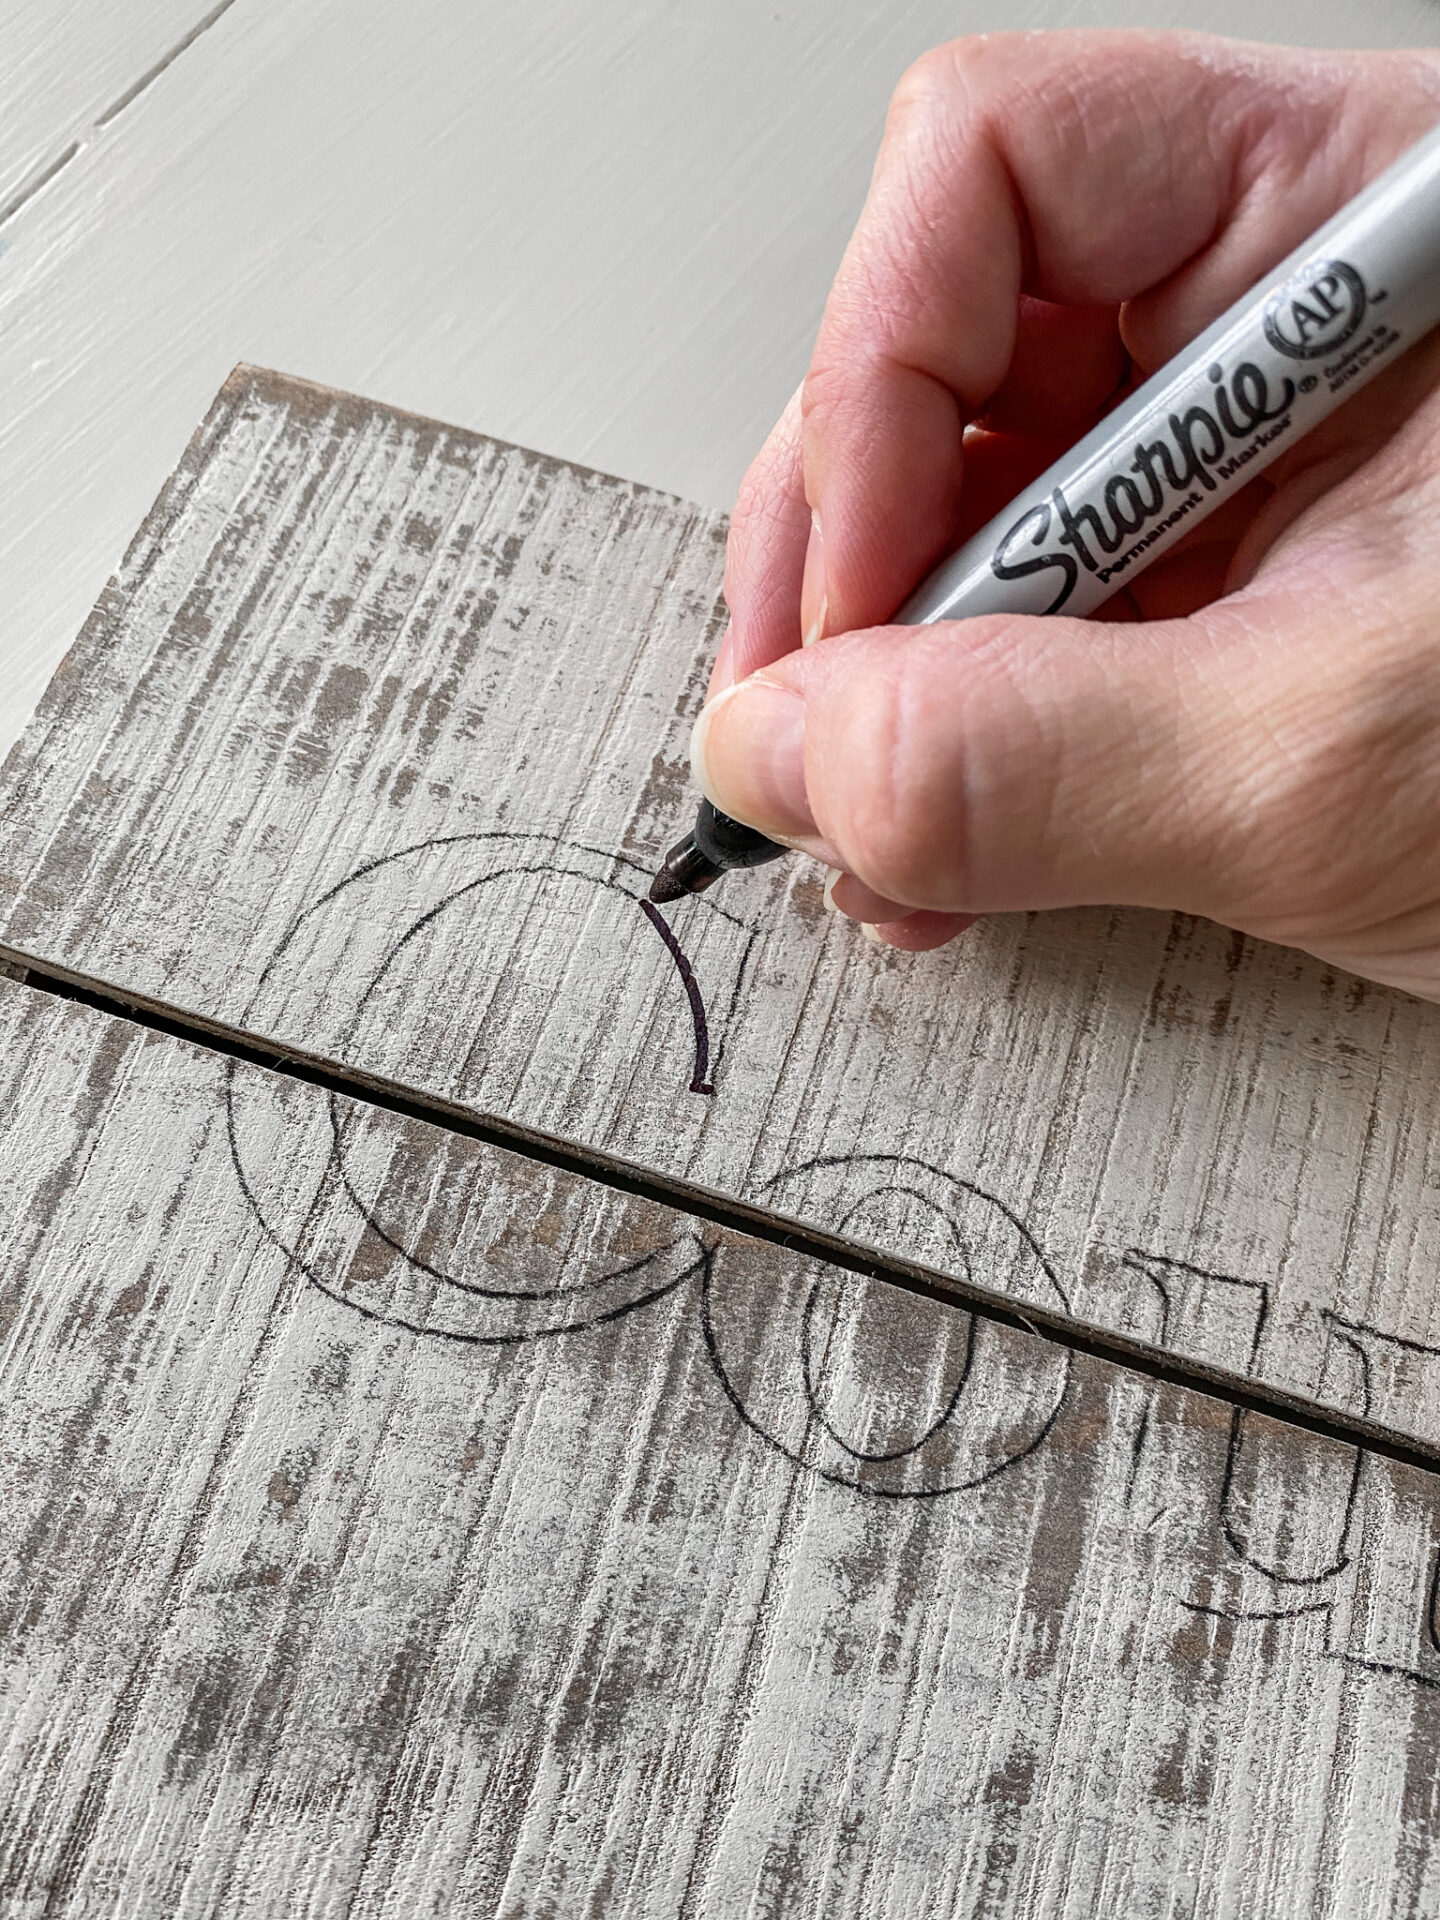
If you’re using black as your font color, a black Sharpie makes an excellent outline. The outline of the sharpie creates a little barrier for the paint and really helps you stay in the lines better.
Painting the Letters
Too easy right? I love this trick! Let’s paint the letters next. I like to use permanent acrylic paint for the lettering. Today I am using a fine-tipped art brush, but on other projects, I may go bigger or smaller depending on the size and shape of the fonts.
Slowly and carefully fill each letter with your paint, making sure you stay in the lines as well as possible.
Almost Done…
We’re so close to being done now, guys! Only a couple more steps, promise. You could definitely stop here if you plan to only mount this on the wall, but because we are using this in the Kitchen, above the range, we need it to be a wipeable surface. We also want it to look older and a bit more Country! If you’re looking for the same results, keep reading.
The next step to make the sign look a bit more authentic and old is to slightly distress the lettering. You will need to make sure your paint has had plenty of time to dry before this step! If your piece is 100% dry, grab your sanding block and gently distress each letter.
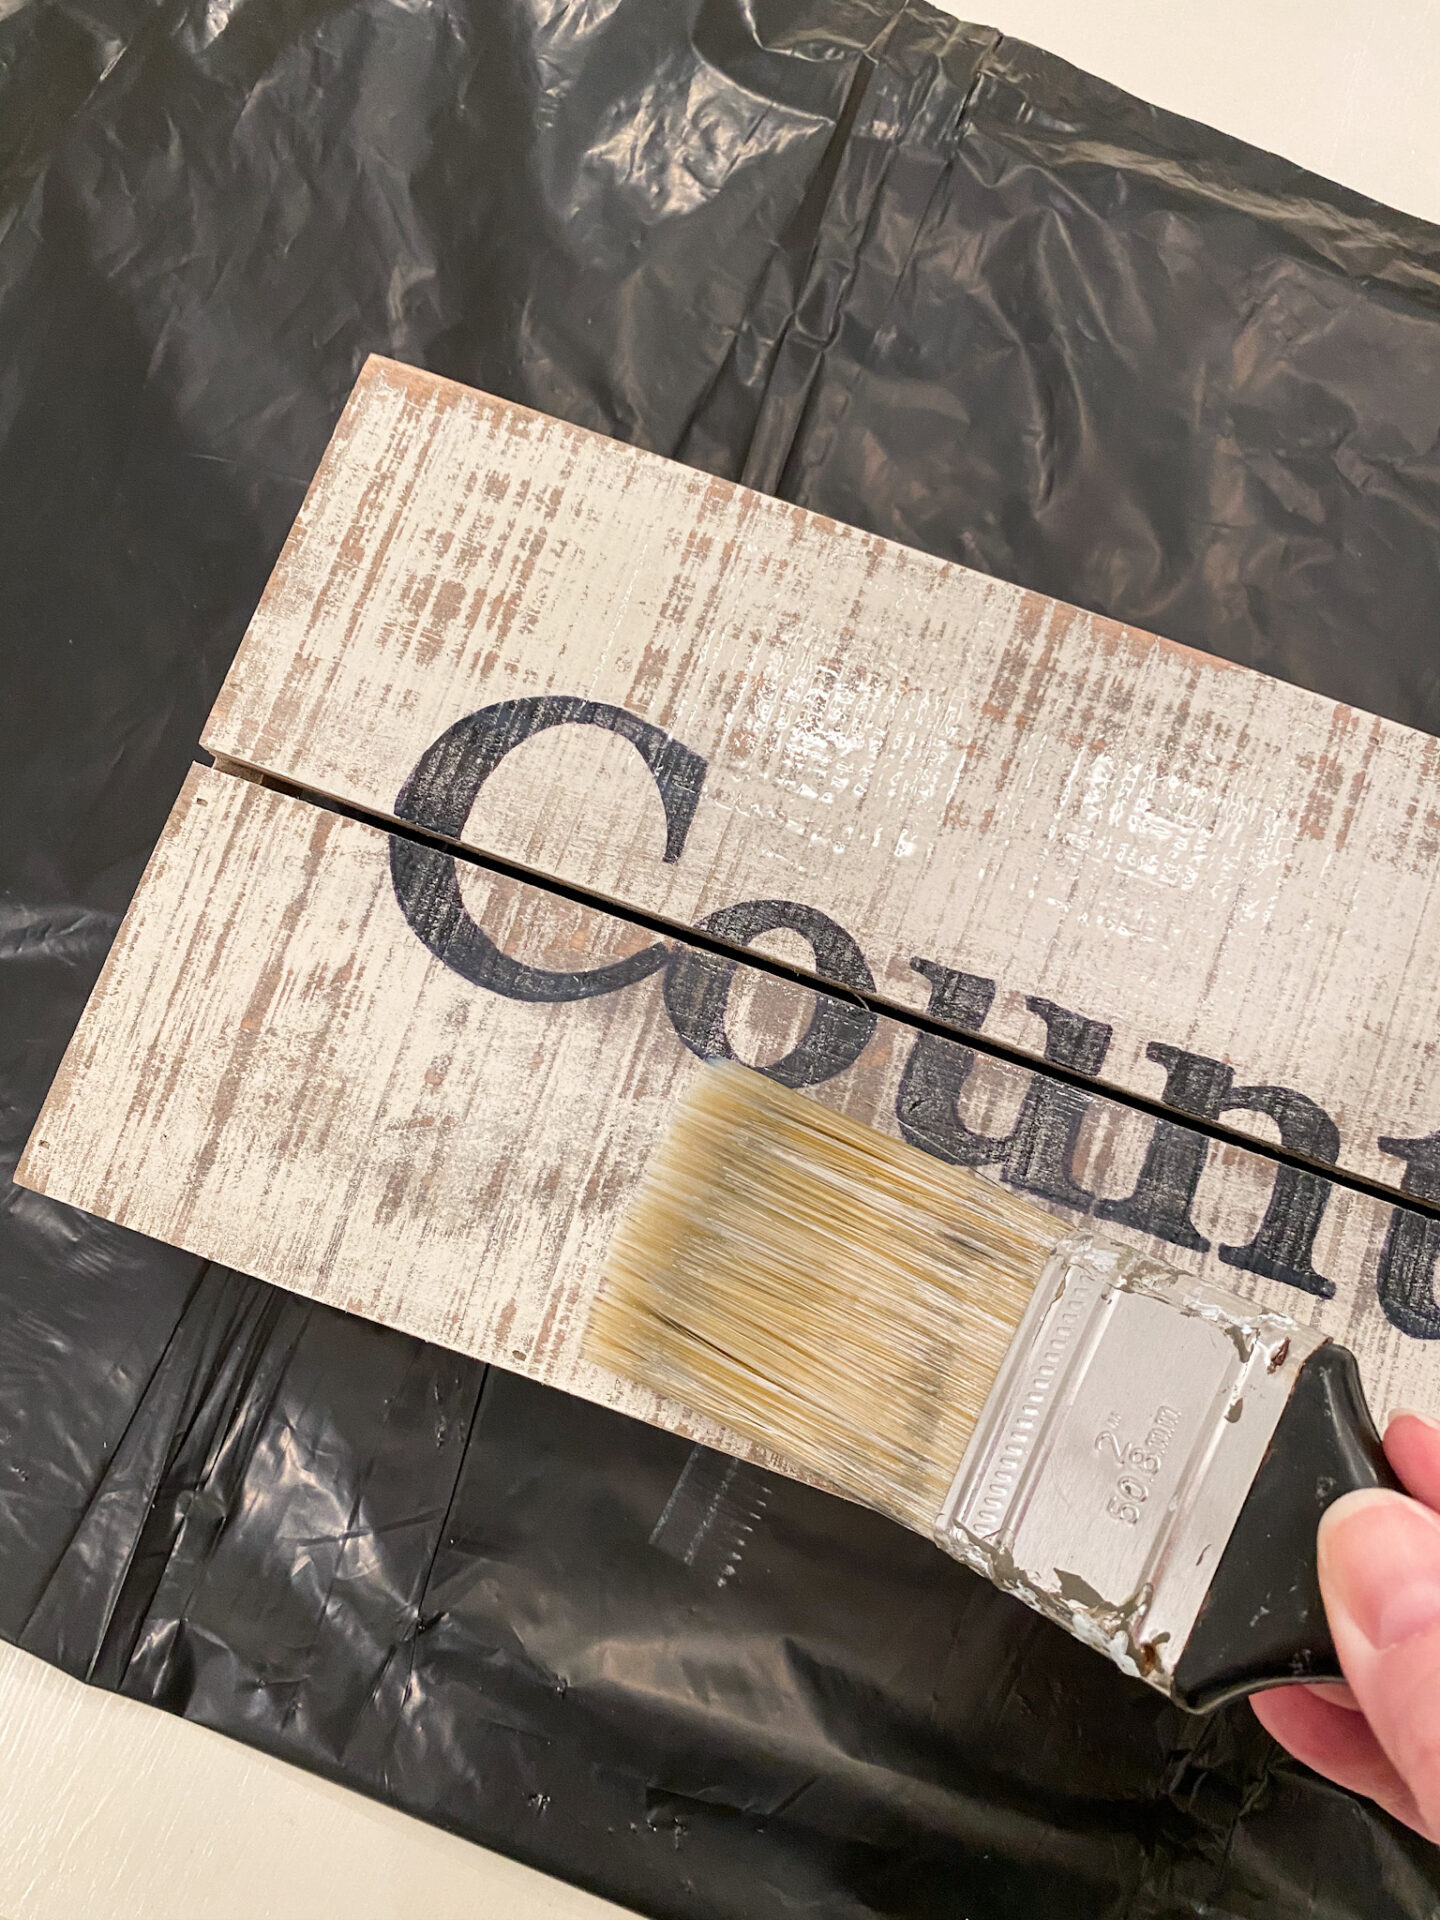
Final Step: Let’s Seal It!
One of the things I like about sealing a project piece is that it will darken lettering as well as wood undertones. So the parts that may seem a little too light right now will be the right shade when I’m done!
The sealant I like to use on all of my pieces is Polycrylic water based protective finish by Minwax in the Clear Satin finish.
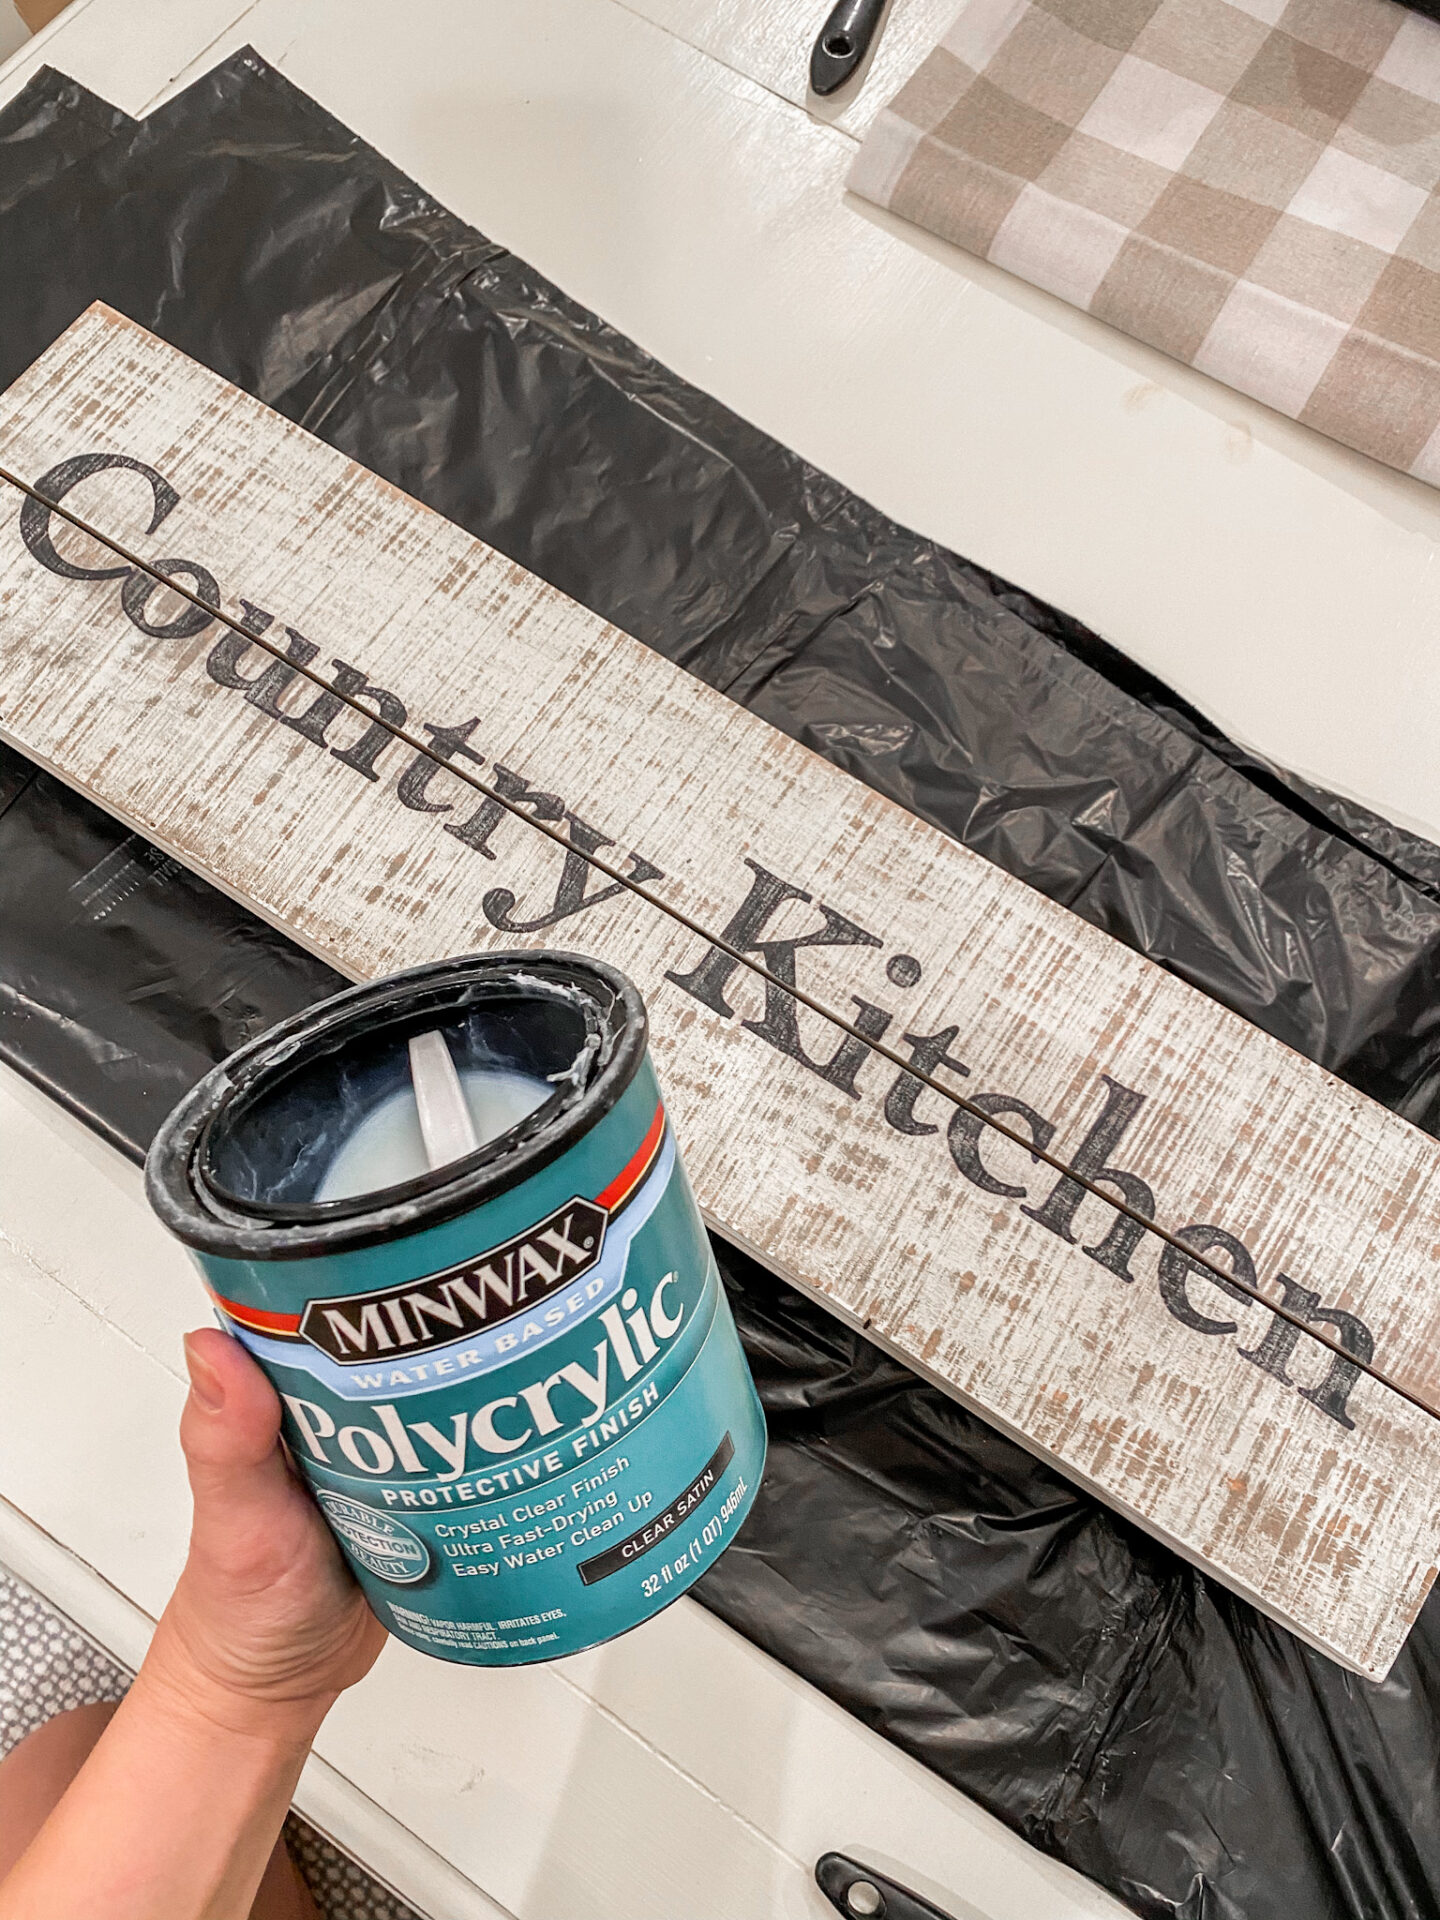
FYI: One thing to be careful of with painted fonts when you’re sealing them is to do it very gently. If you brush too much or too hard, the words will smear!
Project Complete! Now to hang it
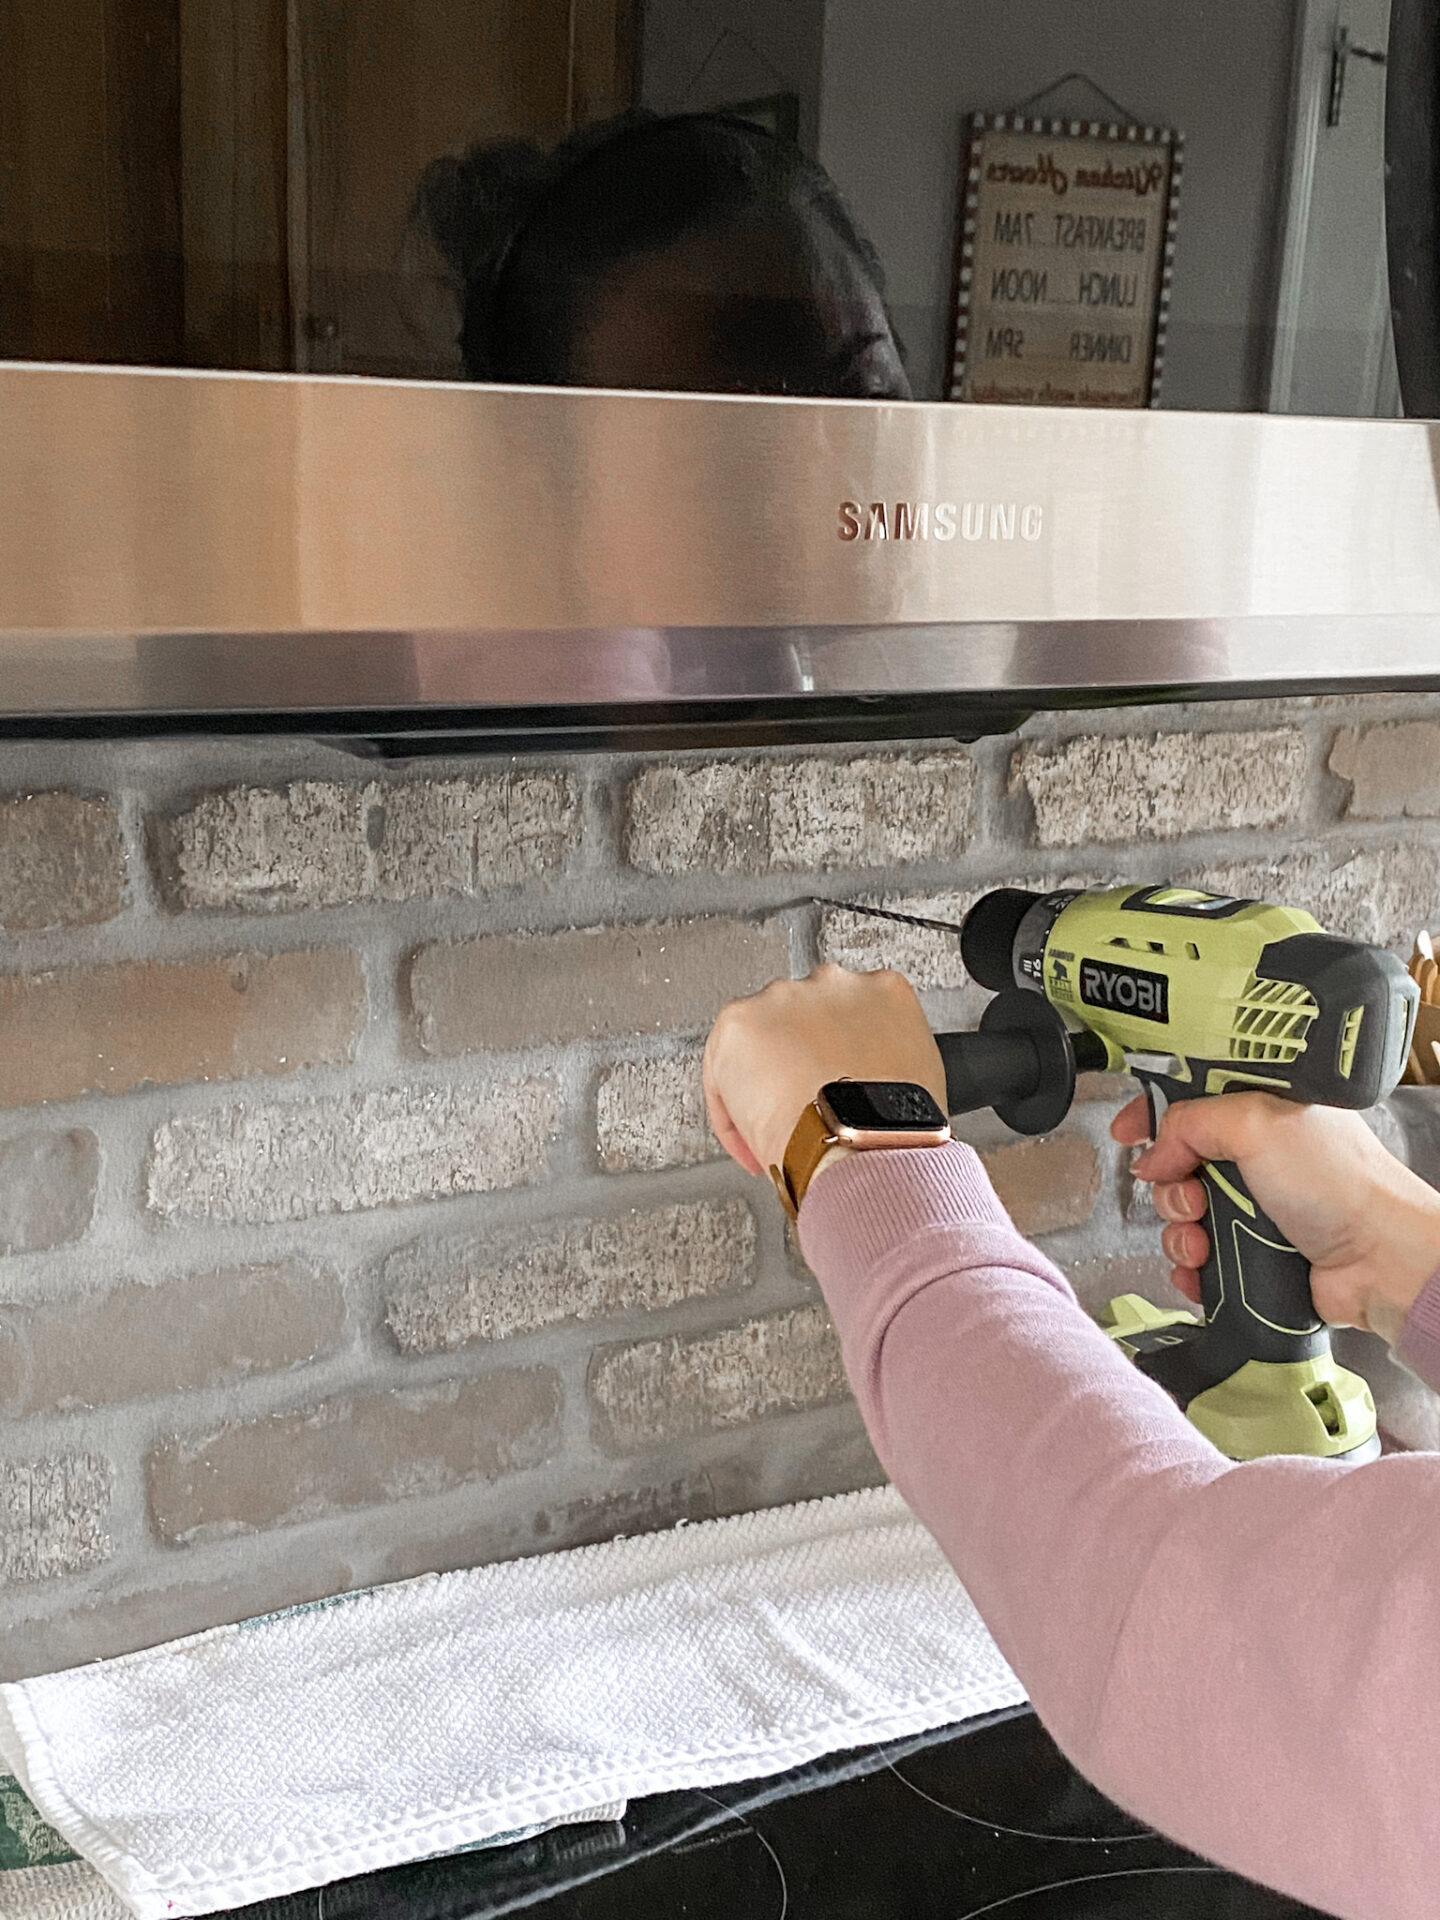
Now that our project is complete, we need to hang it. I am so excited to see how this sign looks above my Mom’s stove! Because I am hanging this onto brick I will be using my hammer drill to make things quick and easy.
To learn more about hanging things onto brick surfaces, visit my blog post for How To Install Farmhouse Shutters Onto a Brick House!
The Big Reveal!
Comment below and let me know what you think of the finished result! Did you like this How To? Please share with your friends!


Do you Pinterest? Make sure to SHARE this image below so other people can find this post!