

Hi friends! Welcome back to my Blog for another fun How To! It feels like not too long ago I was posting about my littlest, Colton, moving from his crib to a toddler bed. You can check out that Blog post HERE! Now, we are celebrating him moving into a big boy bed. Today I am going to show you step by step How To Chalk Paint an Old Bed to Make It Look New!
You may know by now, but I LOVE to take old things and paint them to give them a refresh! Suddenly, something that was screaming for a makeover can just look beautifully new again. All you need is a little bit of chalk paint, a little bit of know-how, and a few other supplies!
What you will need for this project
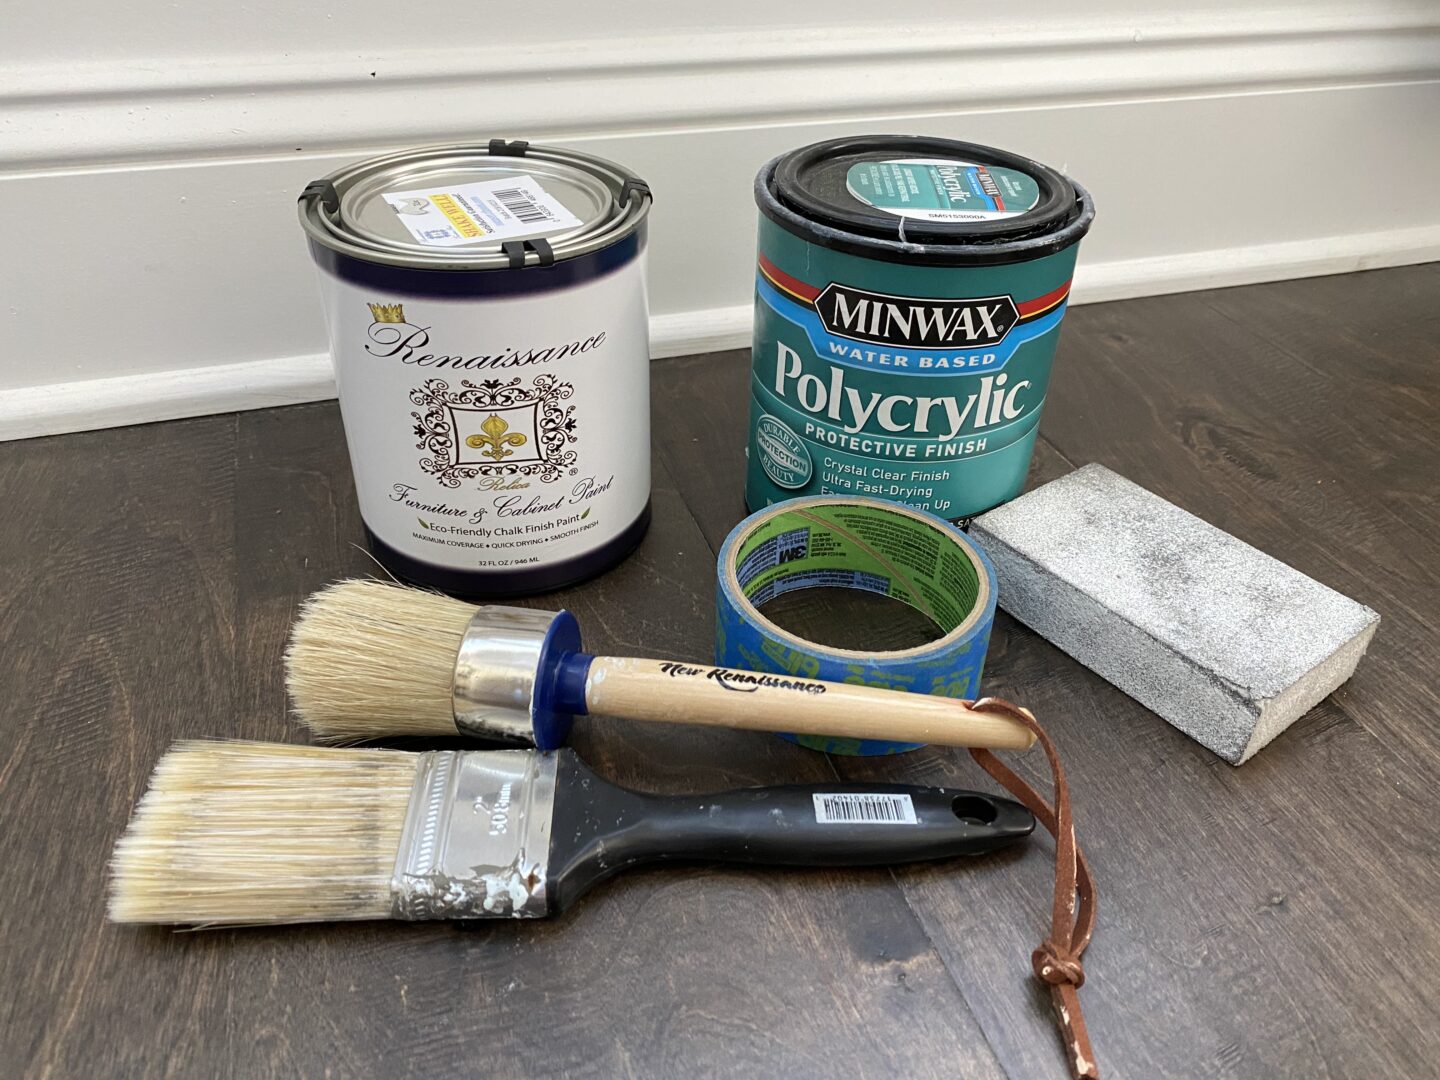
- Your project piece (in my case, an old twin bed)
- Chalk Paint in your choice of color
- Polycrylic Water Based Sealer in a Satin Finish
- Fine and Rough Sanding Sponges
- Chalk Paint Brush
- Smooth Surface Paint Brush
- Painters Tape
- Furniture Risers
My project piece

At first glance, this piece already looks pretty good, right? Up close, it was very scuffed, and very used. Also…very red! Which is totally not my color for my home lol. I did purchase this on Facebook Marketplace for only $75 though, which made it a great project piece! Similar beds to what I was after that were already completely finished in the style and color I was after were upwards of $500 elsewhere. This brings me to a good point: If you can’t find something within your budget, thrift find something and paint it! You get the same look for way less than half the price!
A Little Background
It took me quite a while to get around to this project! I kept putting it off and putting it off because I wasn’t sure my toddler was ready for it yet. Potty training has been going well for the last few months, with very few accidents at night, so I finally decided it was time!
I purchased the bed first with the intention to refinish it, and we purchased a dresser and nightstand for his new room as well. The nightstand and dresser will be refinished at another time, and I may do a Blog post on how they turn out, so if you’re interested in that please let me know in the comments! Are you ready to learn How To Chalk Paint an Old Bed to Make It Look New? Let’s get started!
Let’s get started

I thought about it for a while before I got started on this piece. I thought, how should I get started on this? Should I do each piece individually? Or should I build it and then paint it? I ended up coming to the conclusion that painting it while it was built was the best way to go about it.
The Bed


When painting furniture, you have to prep! Clean the piece you will be working on, 50/50 warm water and vinegar solution is a great choice for cleaning pieces prior to painting. Also, make sure to cover flooring appropriately if you’re using something besides chalk paint! The chalk paint I use is super easy to clean up, so I usually go without a protective cover. You may also need to use furniture raisers (pictured below) for when you paint the feet. It makes it way easier and less messy!

After you have raised your project piece, now is a great time to grab your painters tape and tape off any areas that you either do not want paint on or that do not require paint. I am taping off my bed rails on the inside, so this area will stay the reddish wood color. The reason why I am leaving them untouched is because they will not be seen! Why do all that extra work right? It’s like painting the back of a dresser lol!

The Paint Color
The color I chose for this project, and will also be using on the dresser and nightstand later on, is the color Alabaster from Renaissance Furniture Paint. I love this color! I usually always use their Ivory Tower color for furniture, but because this bed is for my son, I wanted something a bit more neutral. Alabaster is a mix between a light gray and tan. What do you think of this color?

Using Renaissance Furniture Paint is one of the easiest things I’ve ever done. It is thick, a little bit goes a long way, and it goes on smoothly! It also usually only takes two coats of paint to fully cover a project piece. Did I mention it also goes onto almost any project piece without sanding or priming prior?! Like seriously, the BEST paint.
Time to paint

As I mentioned, you do not need to prime or sand before painting with this chalk paint. I just paint directly onto the piece and there’s already such great coverage with just one coat! Also, this is NOT sponsored, I just genuinely love this paint lol!

Starting with the bed rails seemed to make sense to me. Then I started working on the head and footboard.
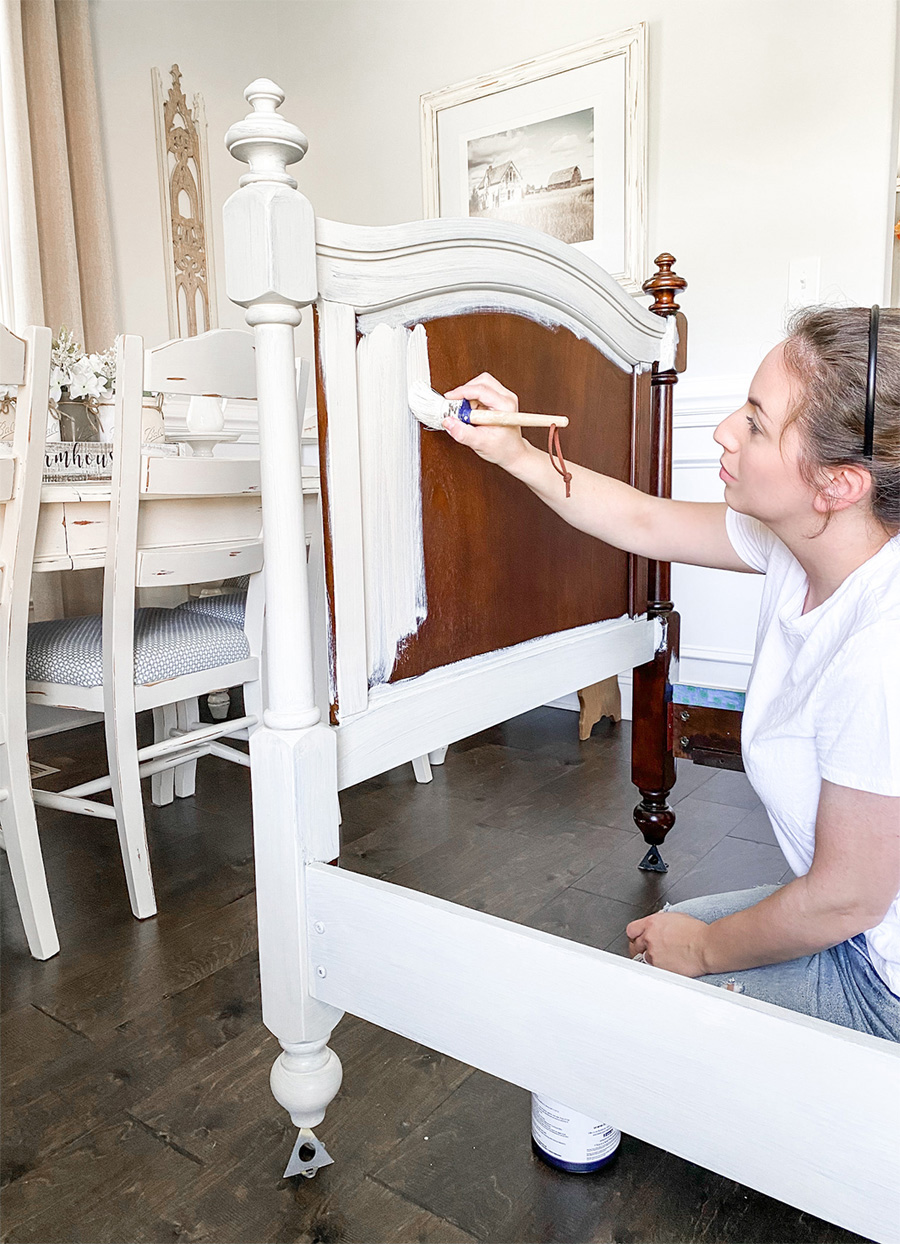
The First Coat

Check out that coverage, y’all! Bye-bye red bed, hello slightly white?? At first this coat worried me! I was like, wait, isn’t this supposed to be taupe? You can’t go based on the first coat though, the second coat definitely made this color shine!
Prepping for the second coat

One of the best pieces of advice I can offer to someone looking to paint their furniture using chalk paint, is to make sure you gently sand using a Fine Sponge Sander in between coats. This smooths out your finish, which in turn allows the next coat to go on smoothly as well. Make sure you use a tack cloth or vacuum in between sanding to get all of the dust off!
Second Coat


Now that the second coat is on and has completely masked all that red (YAY), it’s time to add the details that really make this piece shine!
Distressing: It’s all in the details
Distressing a project is one of the most exciting and fun parts! It’s like you’ve waited the entire process just to scuff up your freshly painted project haha! But I love it, it makes each piece unique!


The last step: Sealing your project
This final step will not only protect your project but also give it a beautiful sheen. I like to use the Minwax Polycrylic Water-Based sealant in the Satin Finish. You will need two coats to finish this piece off, and sand gently after the first coat.


After you let the final coat dry completely (usually 24 hours), you are safe to move your project piece to its new location!

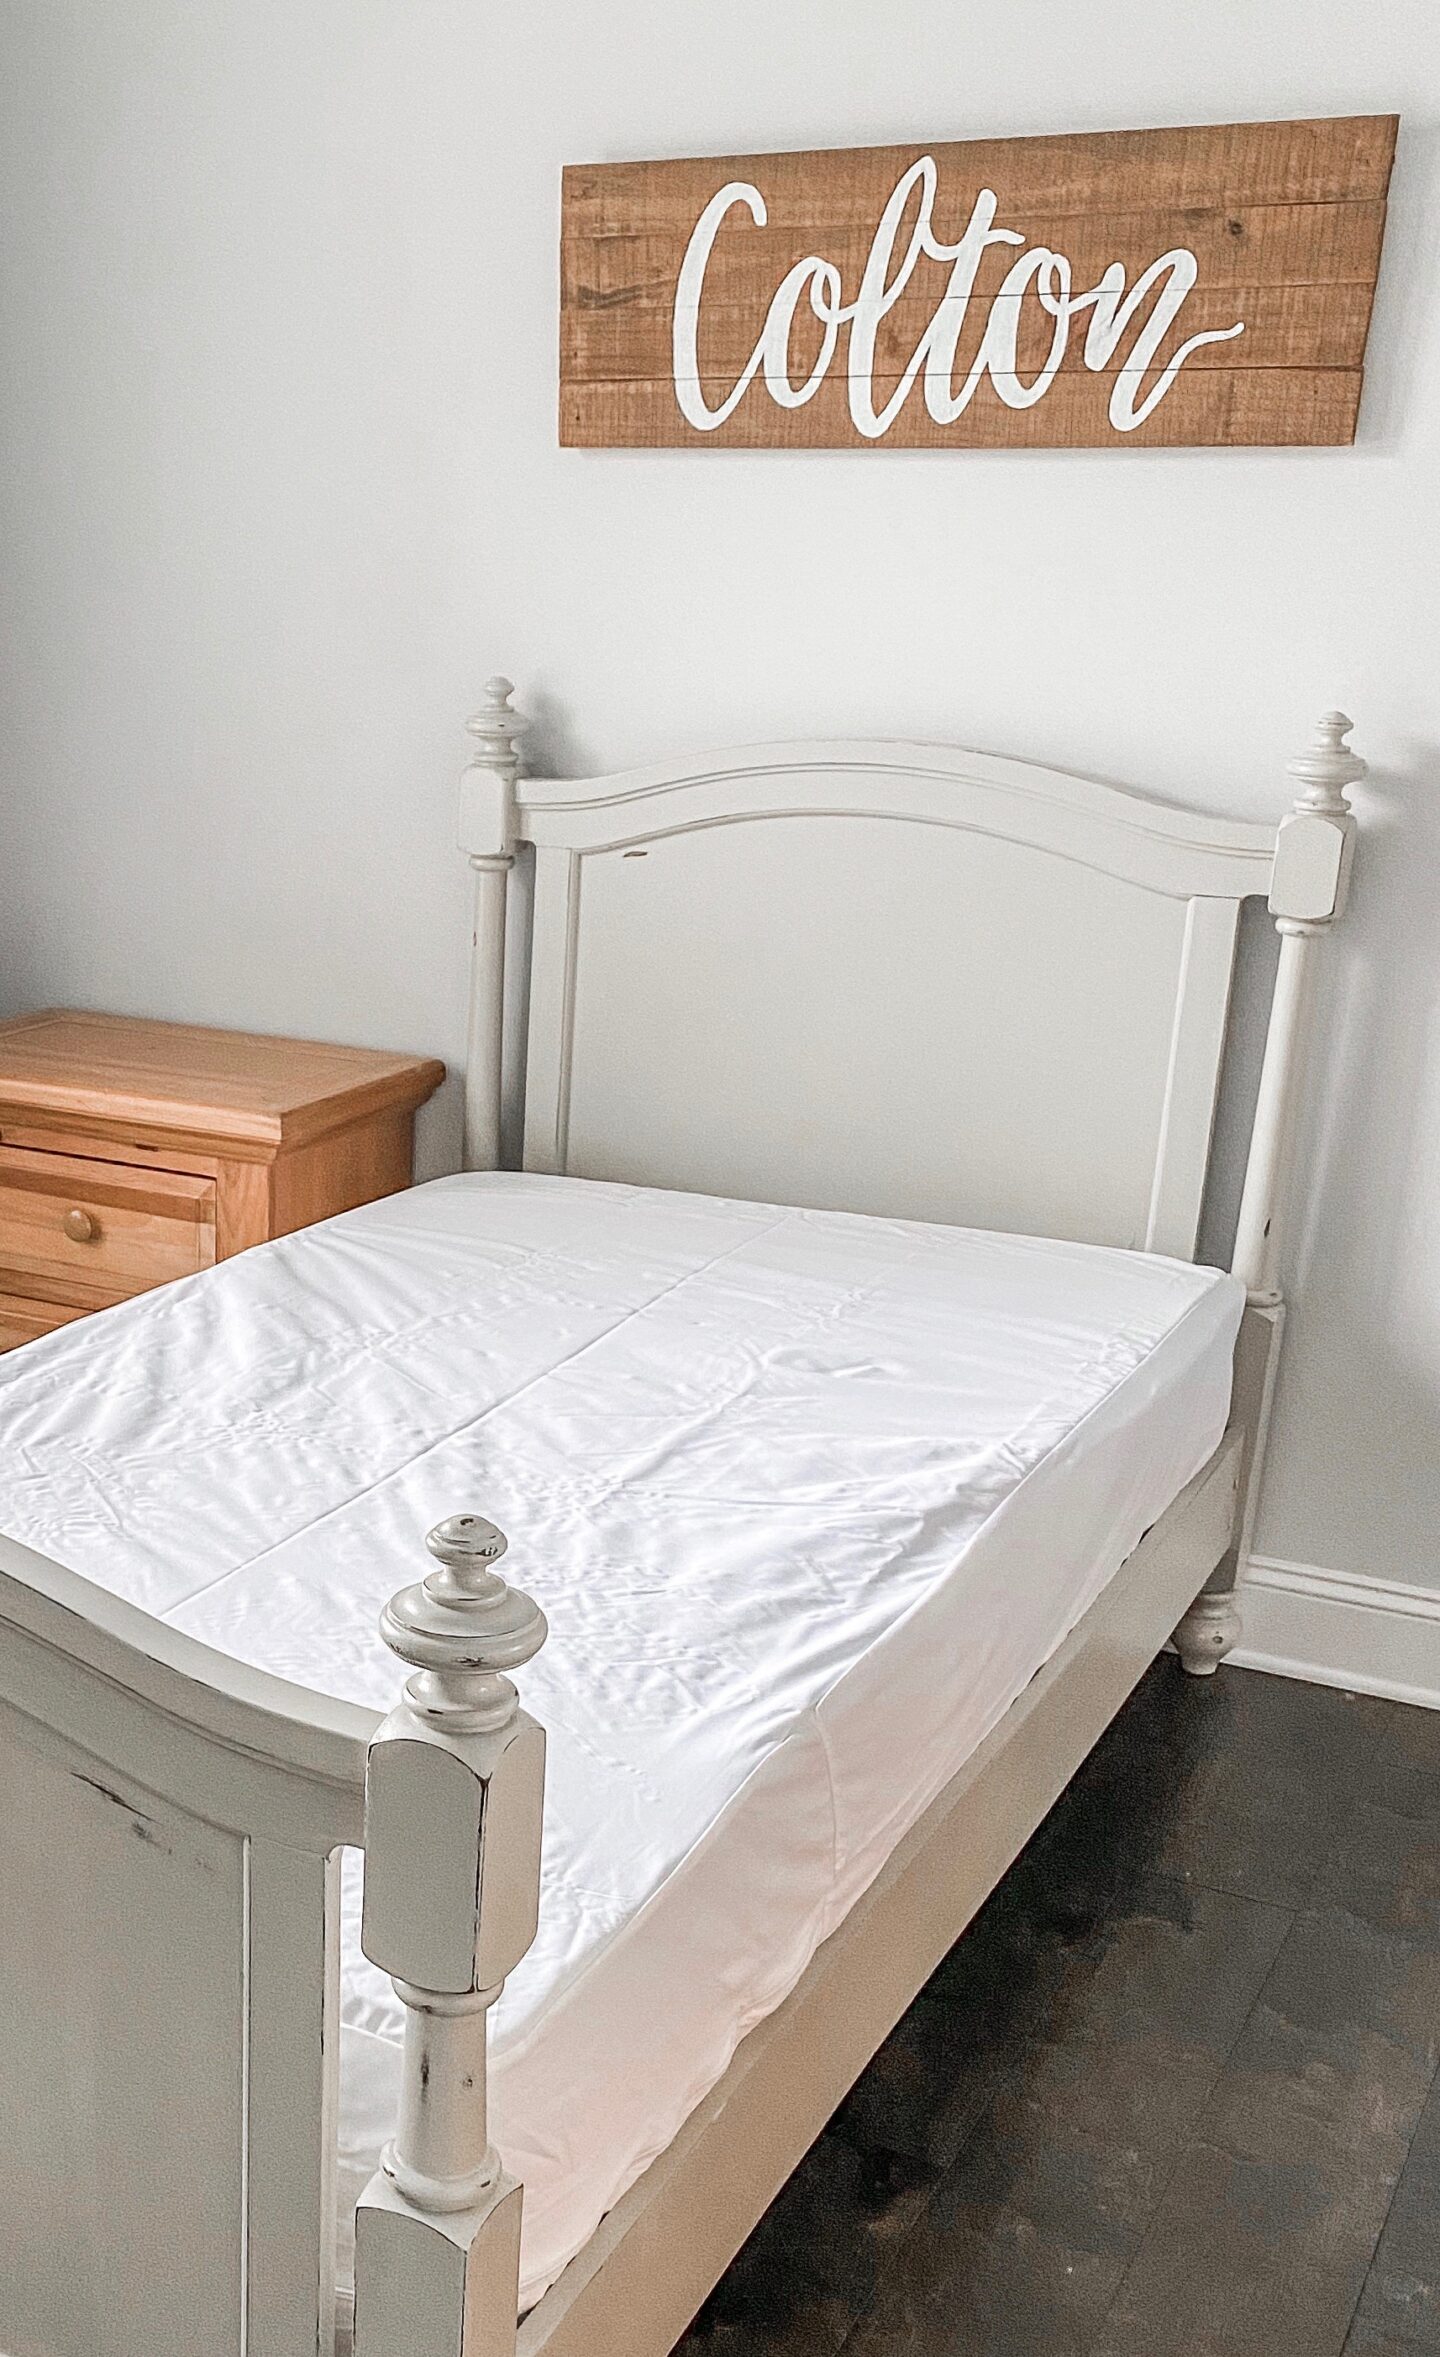
I am loving how it turned out! It’s the perfect gray/tan color for this room. I can’t wait to paint the dresser and end table now. You might be able to notice a faint orange glow on the right side of the bed here, and that is the reflection of the dresser lol! So please keep that in mind when looking at the next few photos.
Bed Slats
This bed only came with 2 slats, which meant we had to get our own to make the bed usable. We went to Home Depot and had them cut us several extra slats. All I had to do was drill holes and screw them into the rails…which sounds easier than it was, but I got it done lol!

The bedding
The next step was adding the mattress and the bedding. This part is one of my favorites because it brings everything together! The bedding I chose came from a few different places. I’ll link them below for you!

- Comforter Set – Target
- Duvet insert – Amazon
- Sheets – Amazon
- Mattress Protector – Amazon
- Decorative Lumbar Pillow – At Home, but no longer available (find a similar one HERE)
- Mattress Topper – Amazon
I can’t tell you how important a mattress protector is on a bed for kids, you guys! Not just for babies or toddlers, but all kids. You never know when someone might have an accident, get sick, or spill something. Better to be safe than sorry!
Now that we have the mattress, topper, and mattress protector on top, it’s time to add the bedding!
The Reveal!

The sheets I use on my kids’ beds are all from Amazon! They have a brushed cotton feel to them, so they are super soft and cozy. Each set comes with two pillowcases, a flat sheet, and a fitted sheet. The fitted sheet also stays in place really well due to the elastic straps on the bottom. They’re also very budget-friendly! I highly recommend them. The set shown here is in the Mint color.

The comforter set is beautiful! This is the Stripe & Stitch set from the Hearth & Hand with Magnolia collection at Target. Very much a Farmhouse vibe to this set, which was perfect for this bedroom. This room is right off the entryway in our home and the door is always open, so it was a MUST that both the bedroom furniture and bedding match the rest of our decor.
Everything came together so nicely! I REALLY can’t wait to refinish the dresser and end table to match now!

Let’s see what the big boy thought of his new bed!
I think it’s safe to say he loves it! And the best news ever is that he has slept so well in his new bed ever since we put it together. He hasn’t fallen out even once, and he sleeps in much longer too!


What do you think of this project? Did you love how it turned out? Comment below and let me know your thoughts! Hopefully, you now know How To Chalk Paint an old Bed to Make It Look New! If you have any questions please feel free to reach out.

Love this post? Make sure to share and Pin the image below!


Love this tutorial Kate! Thanks! Your project turned out AMAZING! I have a set of dining chairs that I found on FB marketplace for $25 and I can’t wait to refinish them (after hubby and I do a few repairs)-I’m thinking chalk paint although I’ve never used it before. I wondered why people choose to use chalk paint but you mentioned a few reasons in your post-and I love the distressed look you got on your LO’s bed. I have to refinish my dining table too but I can’t decide if I want to paint it as well– would you recommend chalk paint for a dining table?
Author
Thank you!! I love the idea of a chalk-painted dining room table and chairs, but it is a LOT of work! If you look through the photos in this blog post, my table and chairs as well as my hutch have all been refinished using chalk paint. It was a ton of work, but I LOVE how they turned out! It’s worth it
It look so good! I’ve used Annie Sloan chalk paint before, but I’ll try the Renaissance brand next time just to compare. 🙂
Author
Thank you! I love the finish and application of the Renaissance, and the coverage is amazing!
Hi Kate! Love the turn out of your sons bed. I loved it so much I bought everything you listed in your blog including the same Renaissance paint you used for Colton’s bed. I’ve done a table with chalk paint before but it wasn’t something to the magnitude of doing a bed. Do you need to sand the bed down and apply primer before using the Renaissance paint? I heard people say it’s best to do this but I noticed you didn’t in your project of your son’s bed. I was just wondering???
Author
Hi Debbie! Sorry for the late response, I’ve been on vacation 🙂 Depending on the stain of your wood on the bed, you may need to prime first! Especially if your bed is a Cherry Wood, you will want to skip the polycrylic and chalk paint and just use something like a Behr Satin Interior paint. If you are painting over a black painted surface, I suggest using a primer first to make the paint hide easier. Otherwise, you should not need to sand or prime! The Renaissance Furniture paint is super easy to use, and has great coverage.