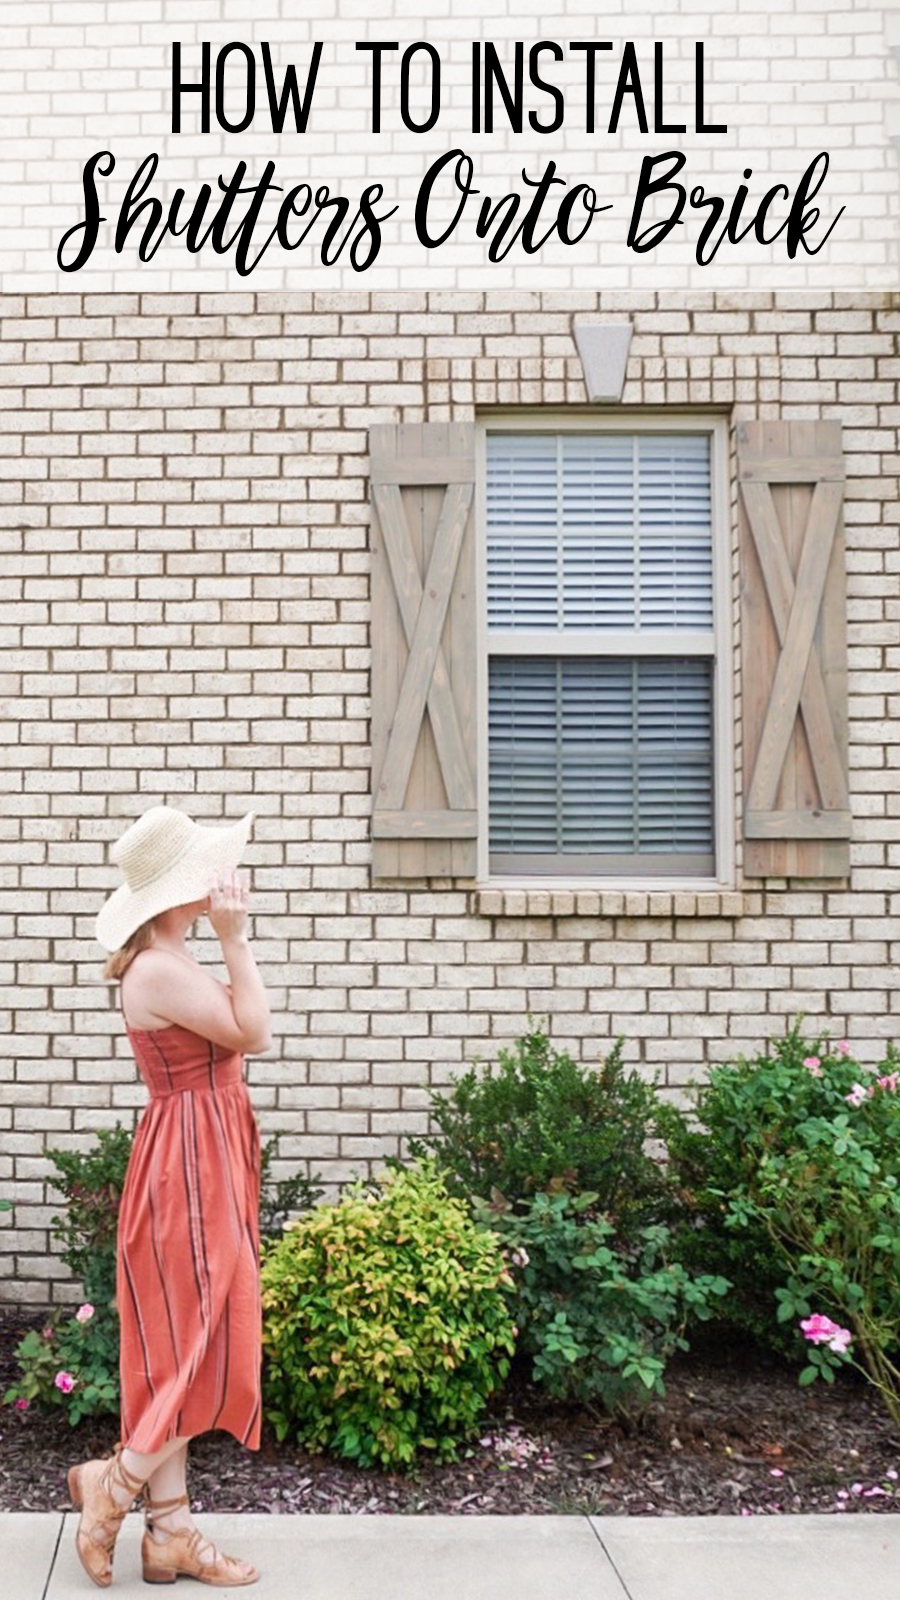

Installing shutters not only instantly adds curb appeal, but also charm to your home! And though saying that looks good on paper, installing shutters (or ANYTHING) onto brick is actually more difficult than you think…at first! Having the right tools for the job makes all the difference. Today, I am going to show you How To Install Farmhouse Shutters Onto a Brick Home!
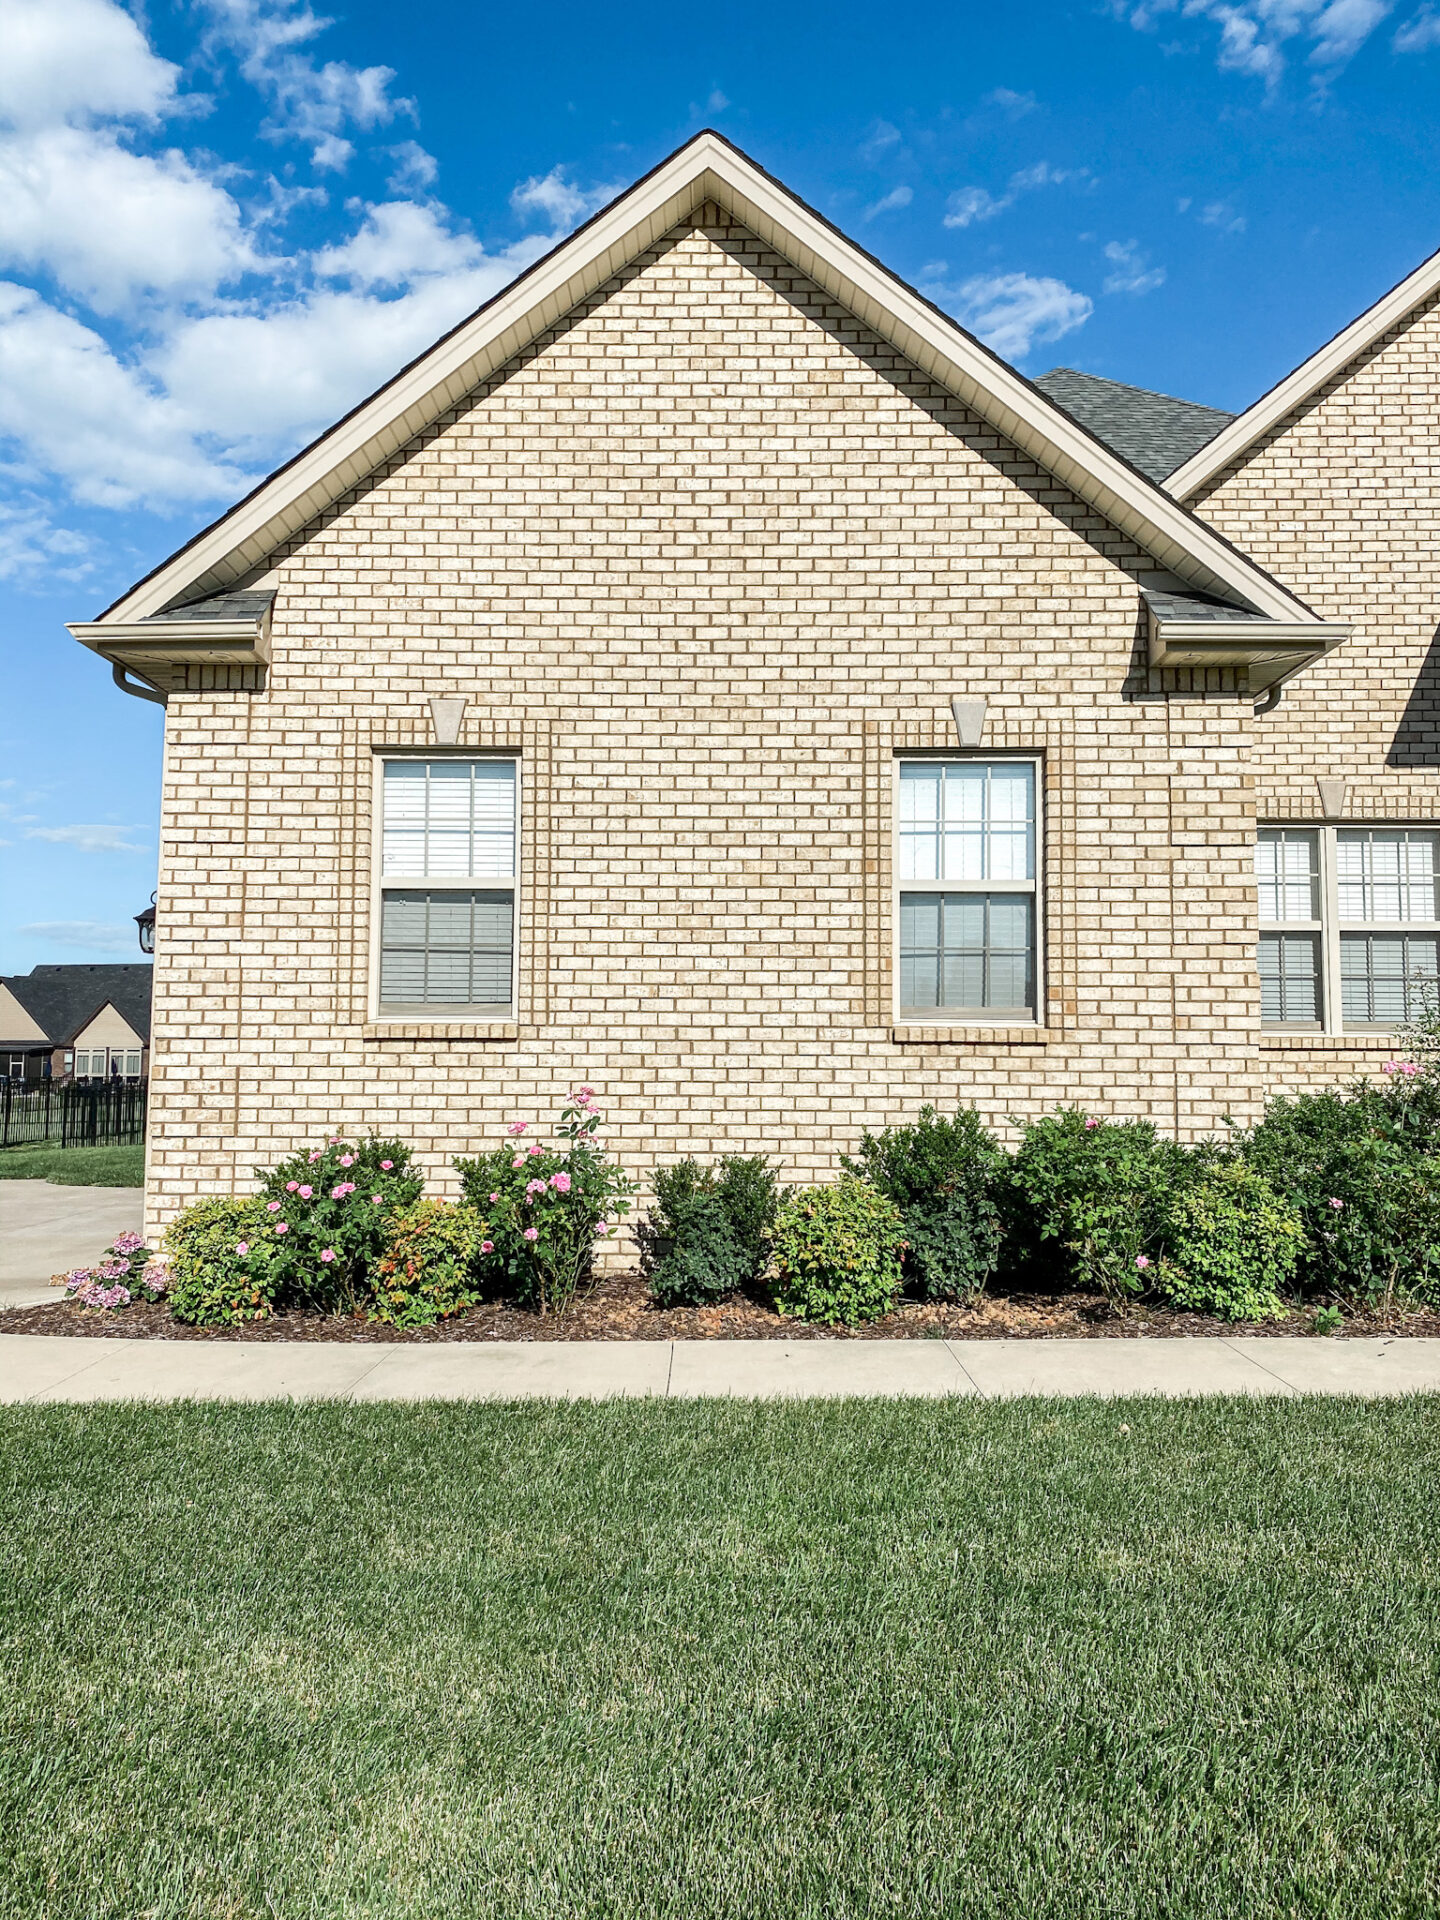
Let’s start with the BEFORE
Before, my house actually looked just fine. It was attractive, but it was just lacking something, and after seeing a neighbor of ours that has similar brick tones with super cute farmhouse shutters, we decided that was just what our home needed!

Shopping For Shutters
Shopping for shutters for your home is actually pretty easy! There is a wide variety you can choose from in different materials. The shutters that my husband and I decided on we found on Amazon first. Unfortunately, they were just a bit too long for our windows, so we ended up purchasing ours from homedepot.com instead and they were just right!
Dogberry Shutters
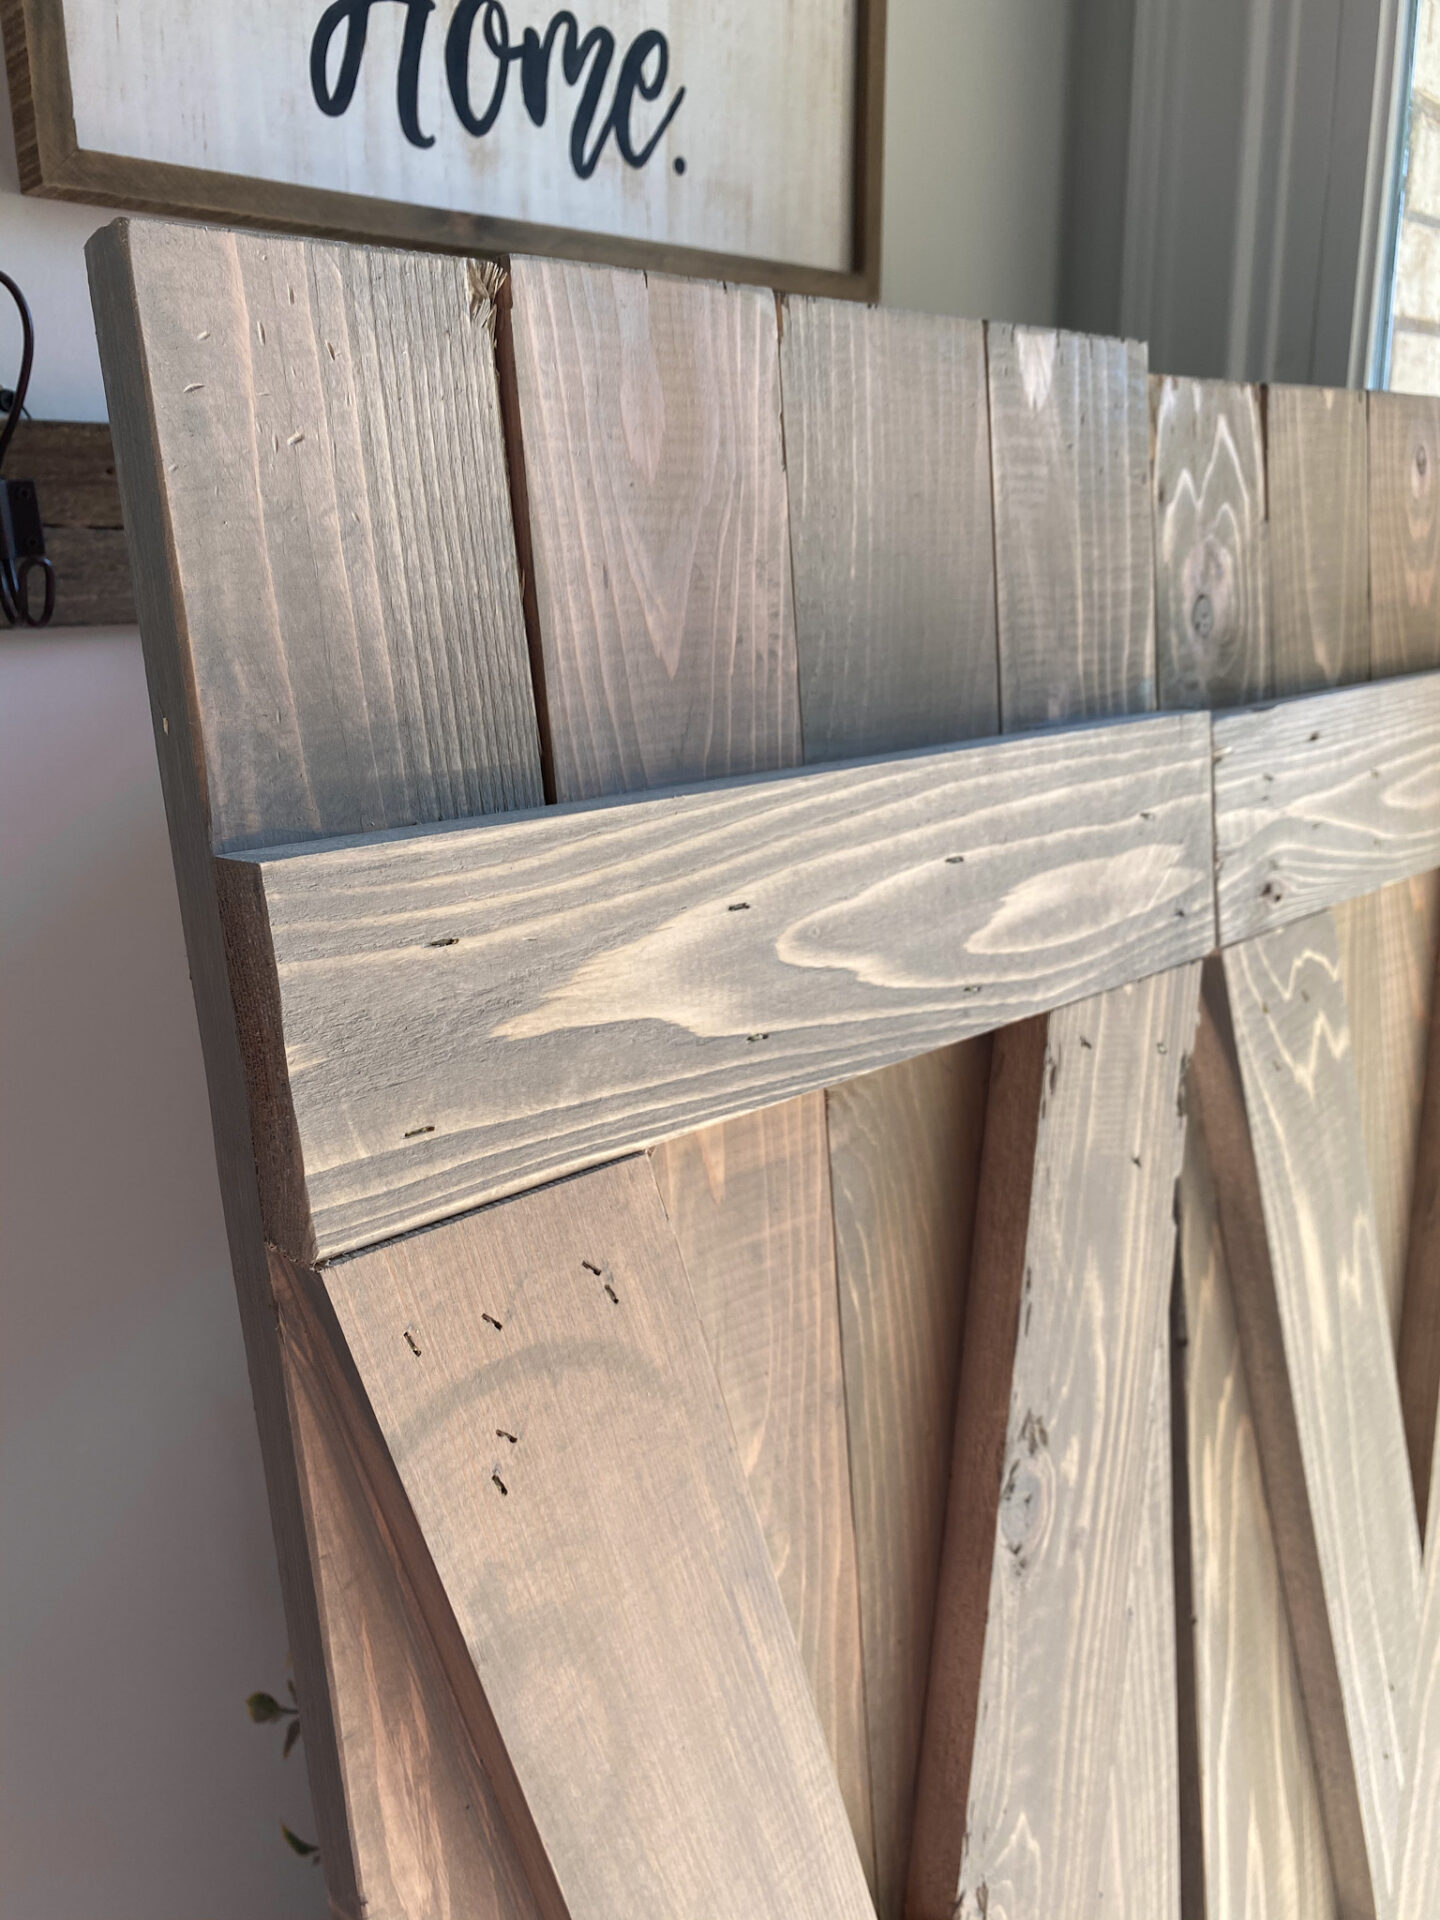
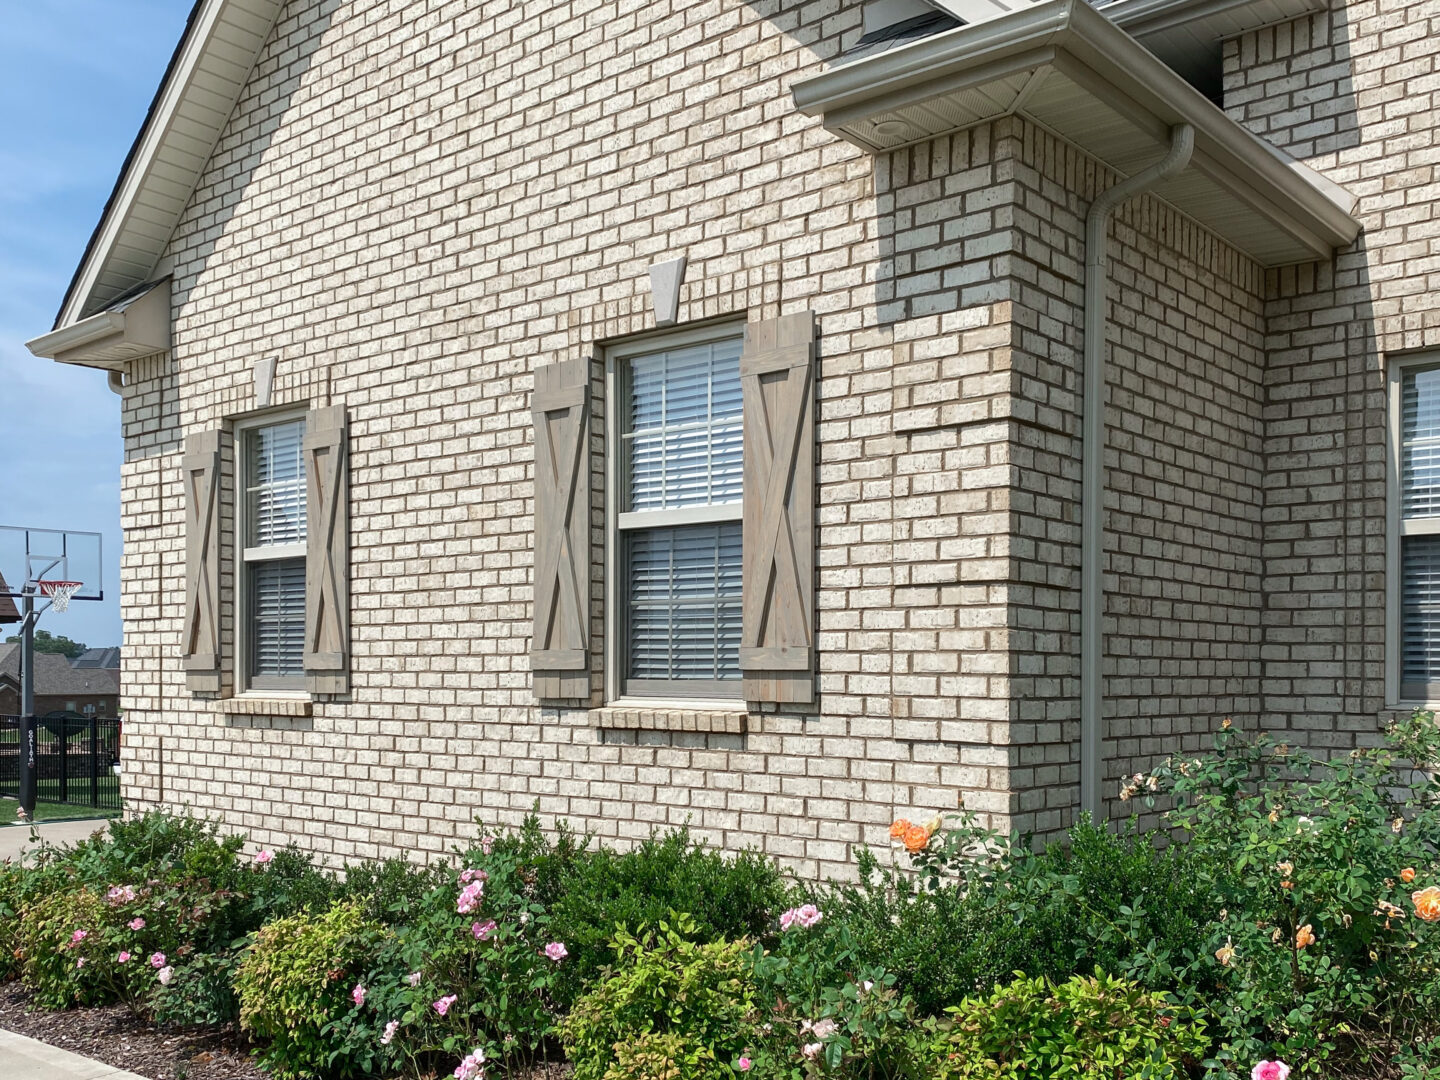
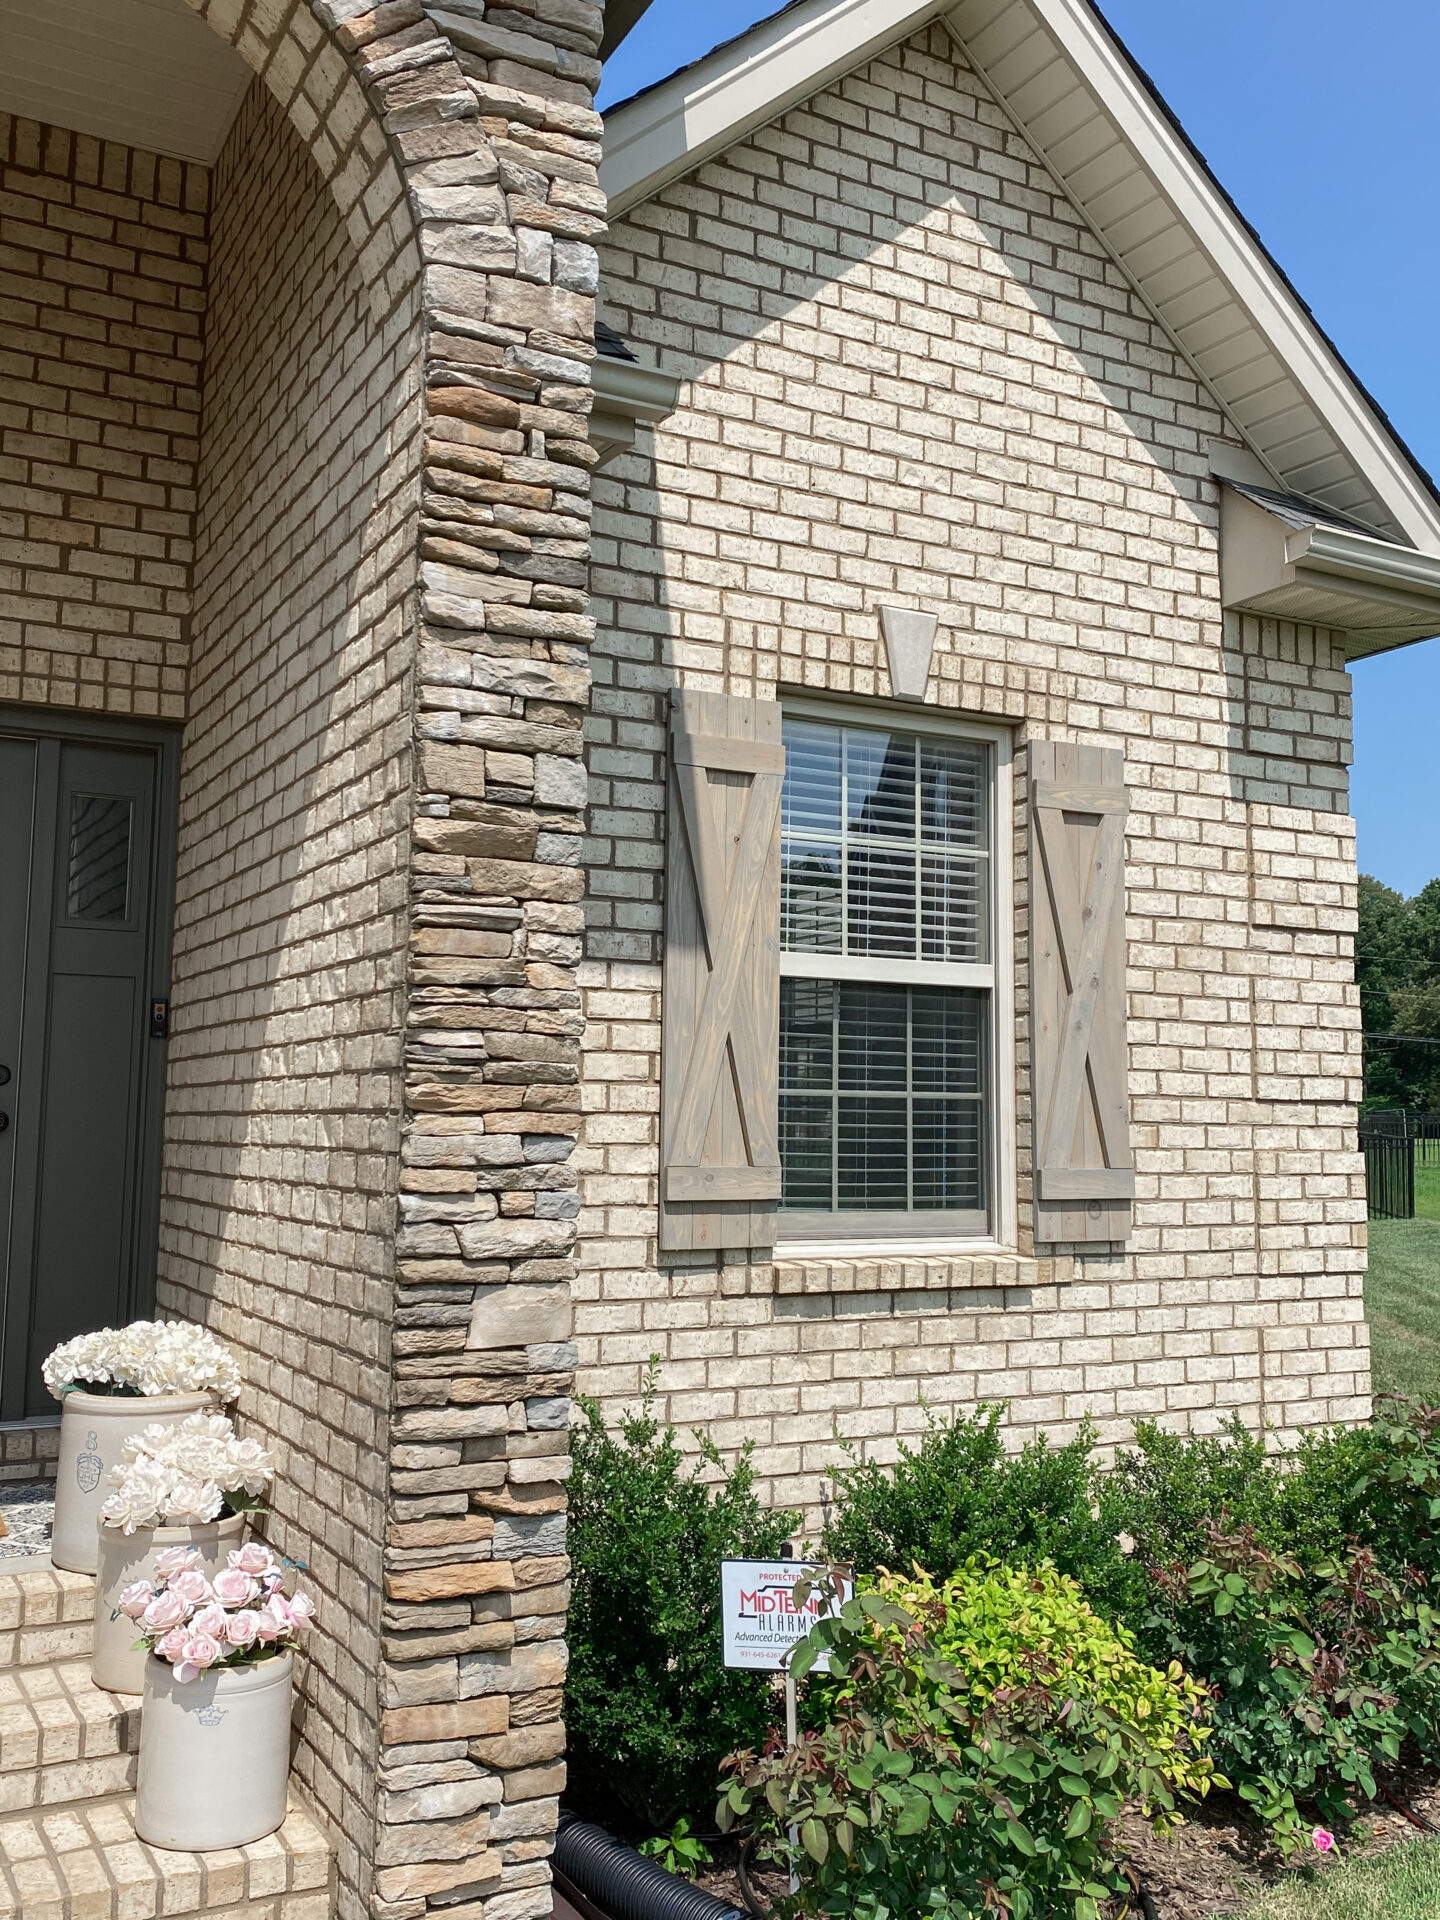
The shutters we purchased are made by Dogberry and, I have to say that, they are just beautiful! Solid wood, well-made, and they also come in a variety of colors. The color we chose is the Stone Gray, which I felt really complimented the brick and stone on our home.
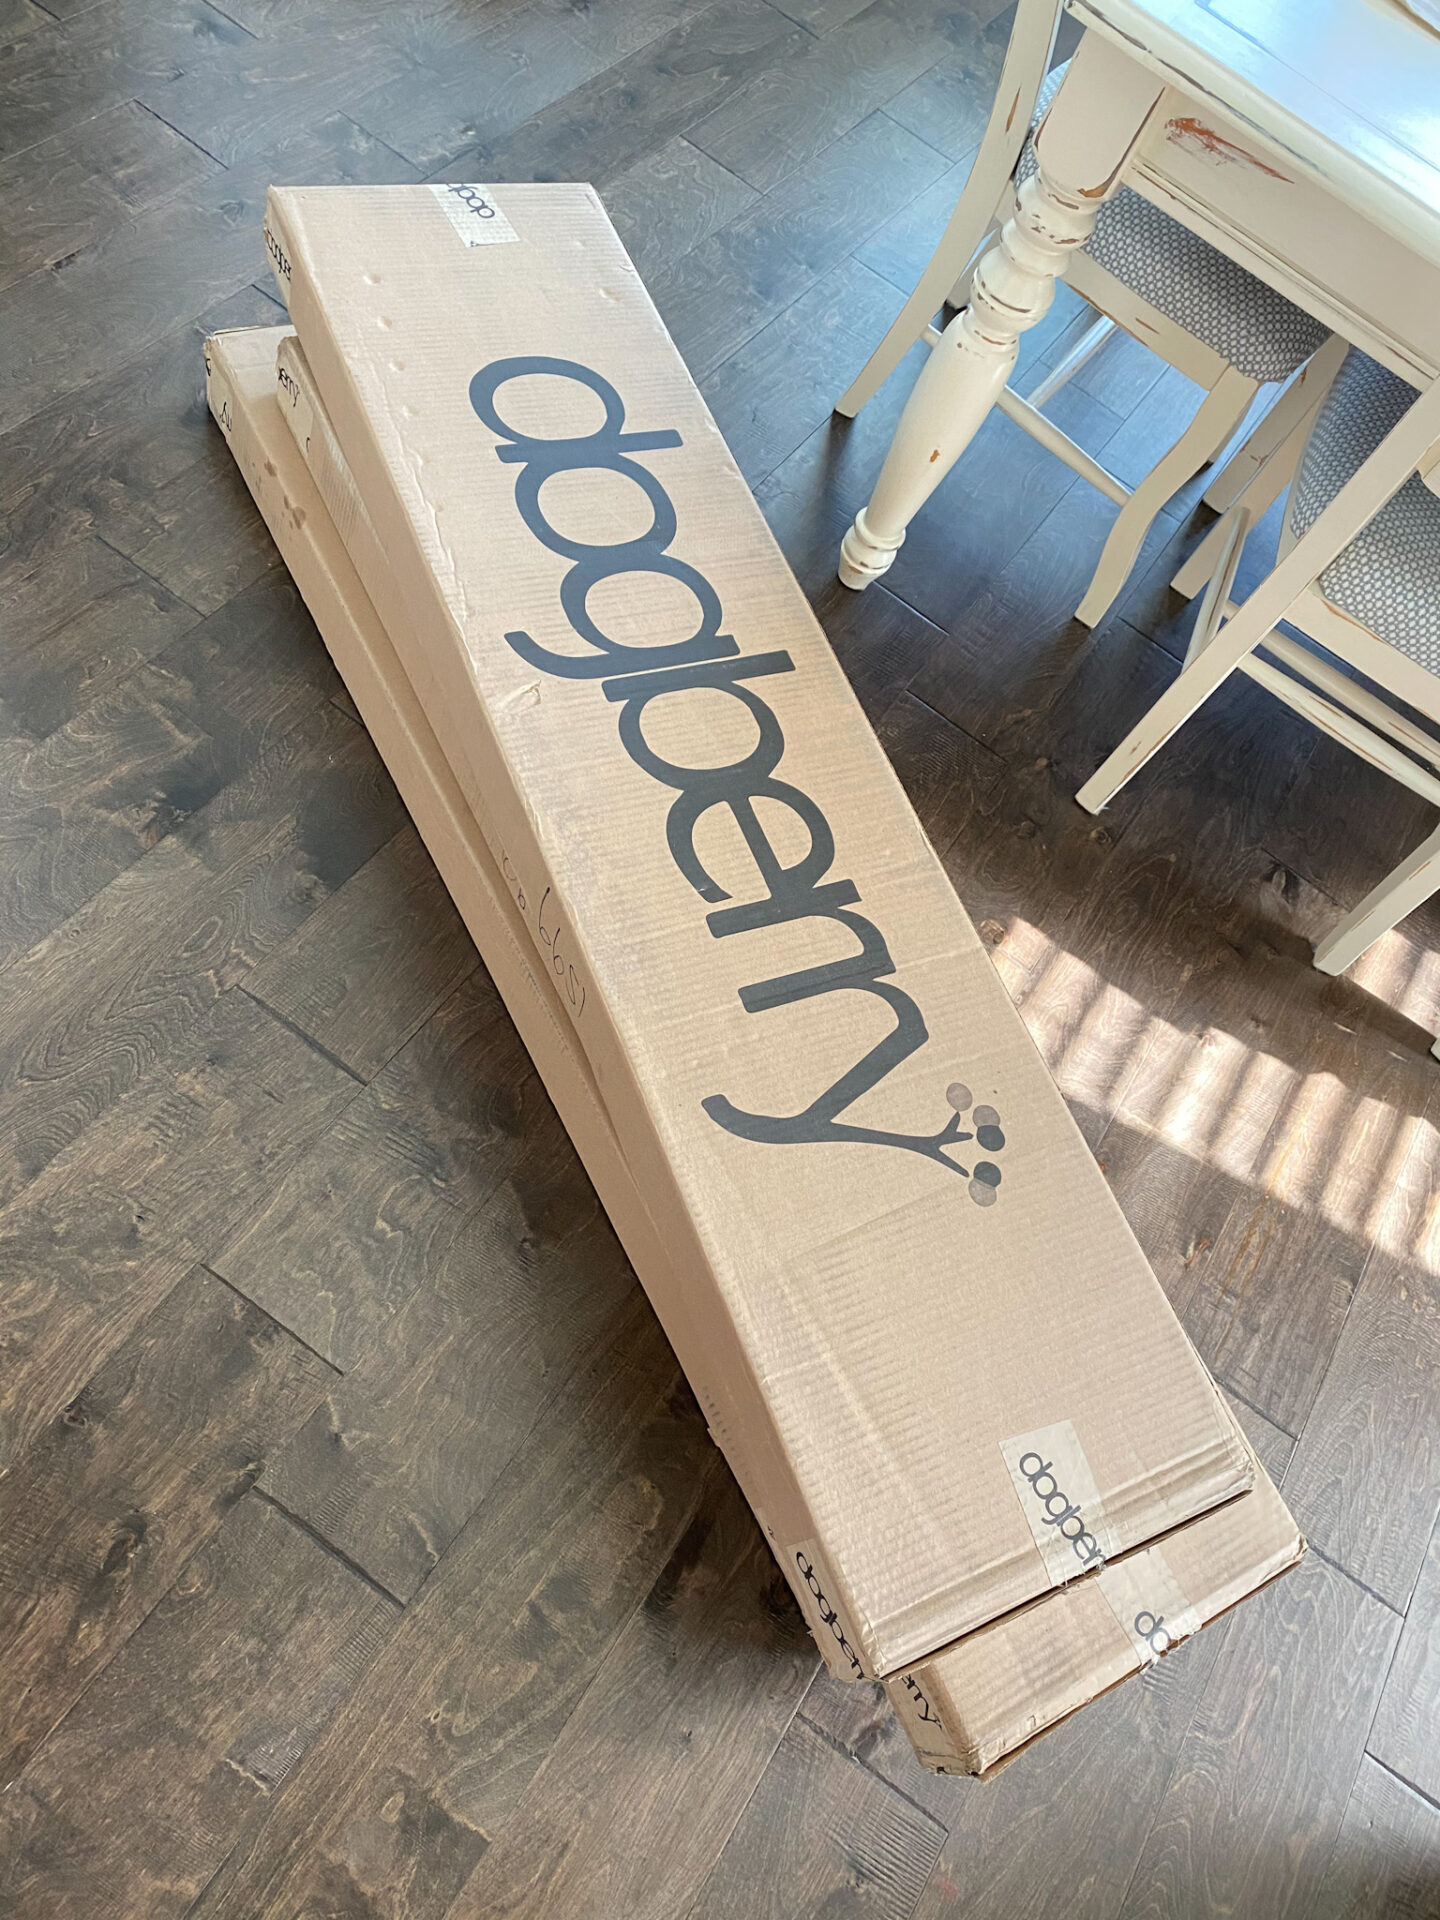
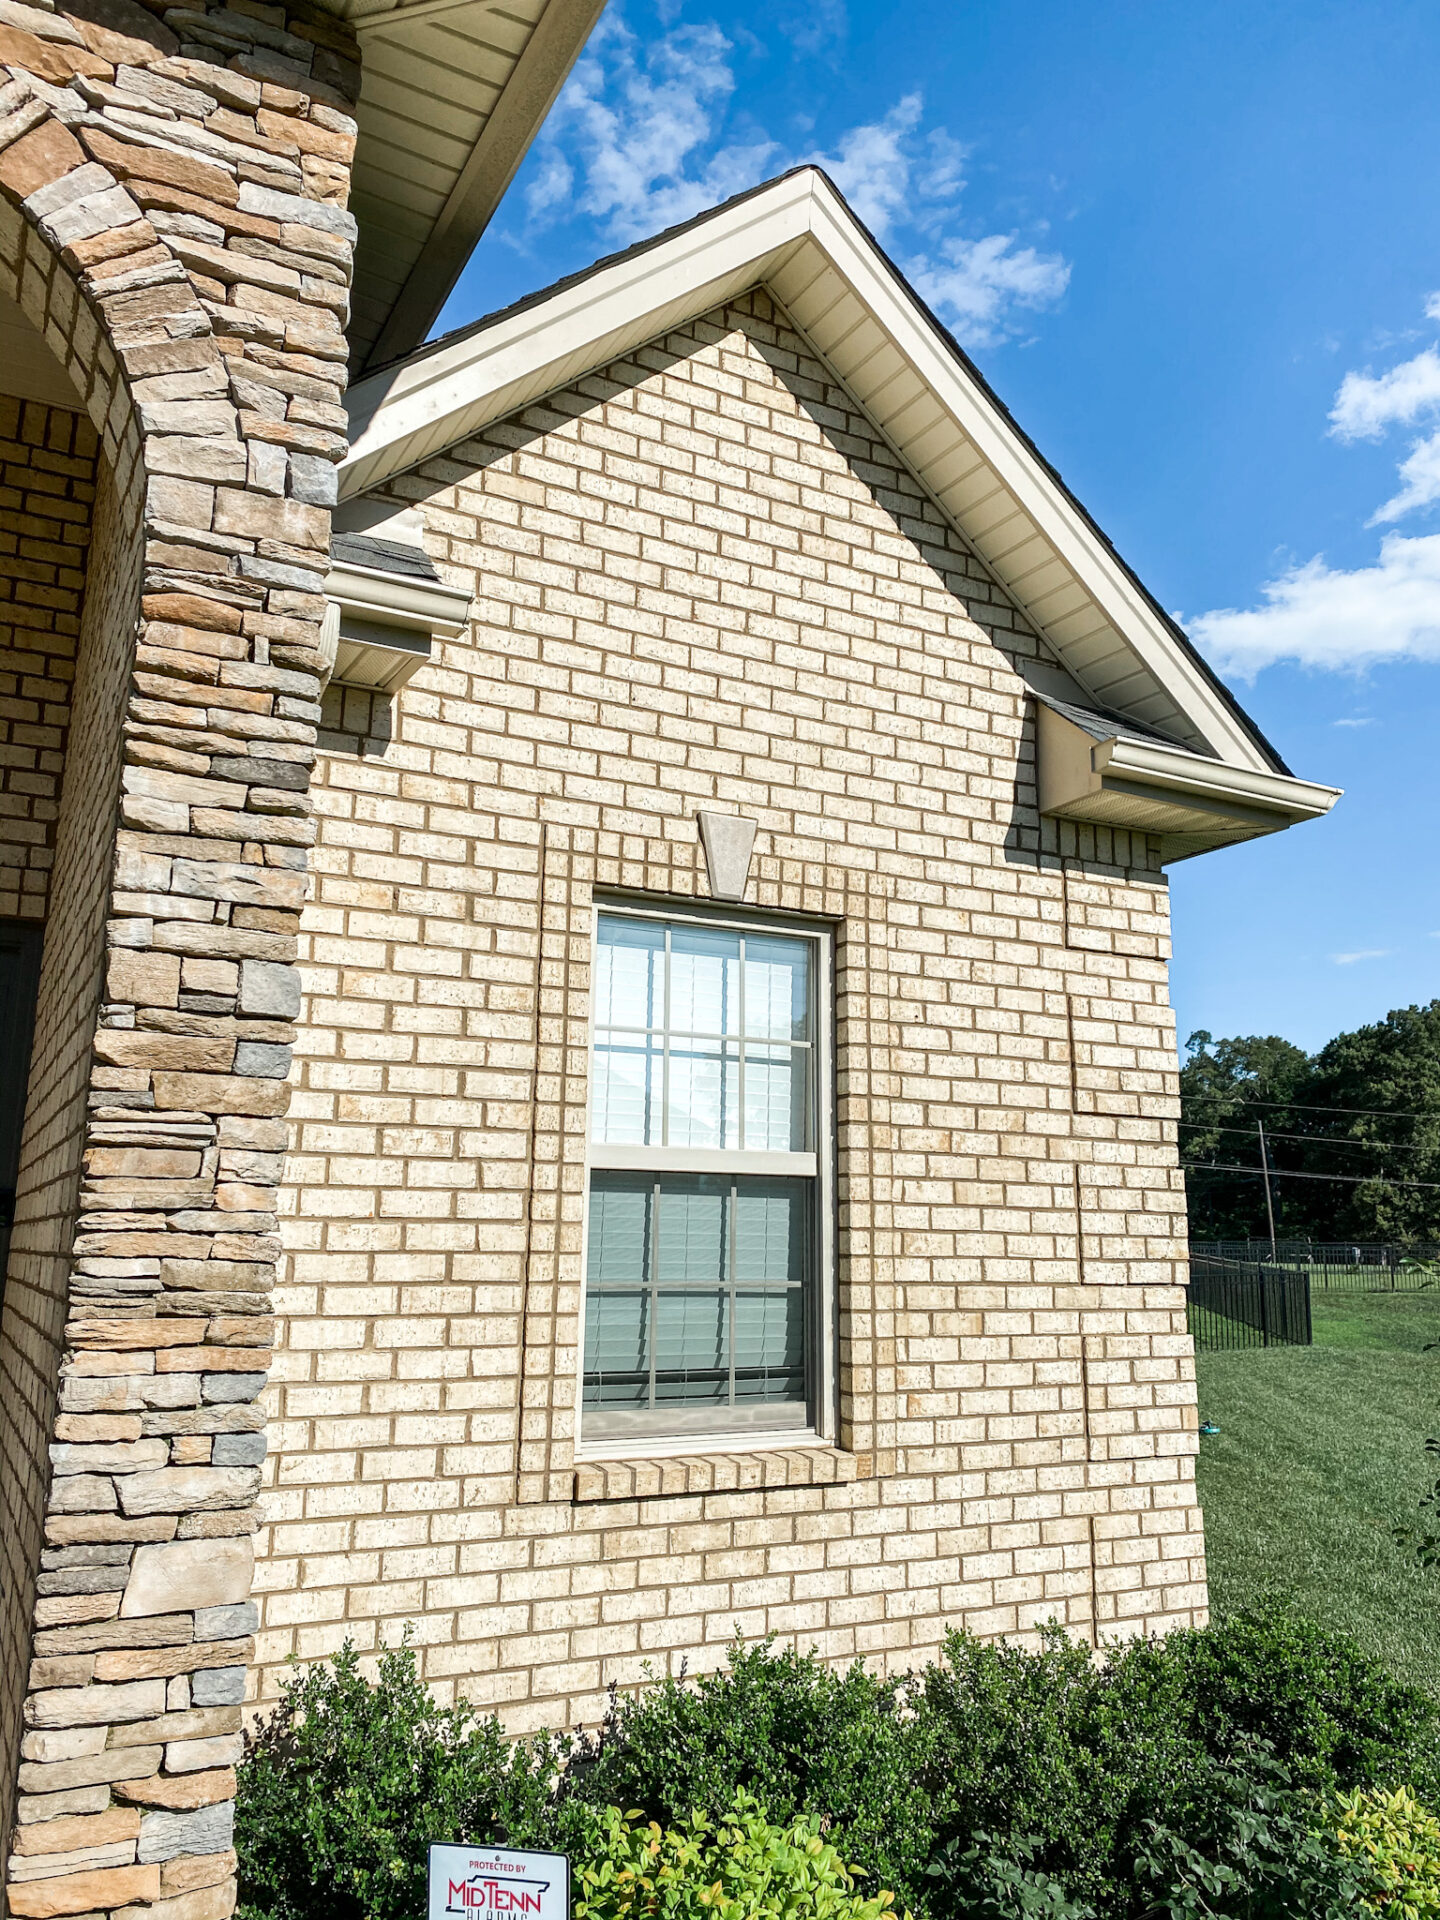
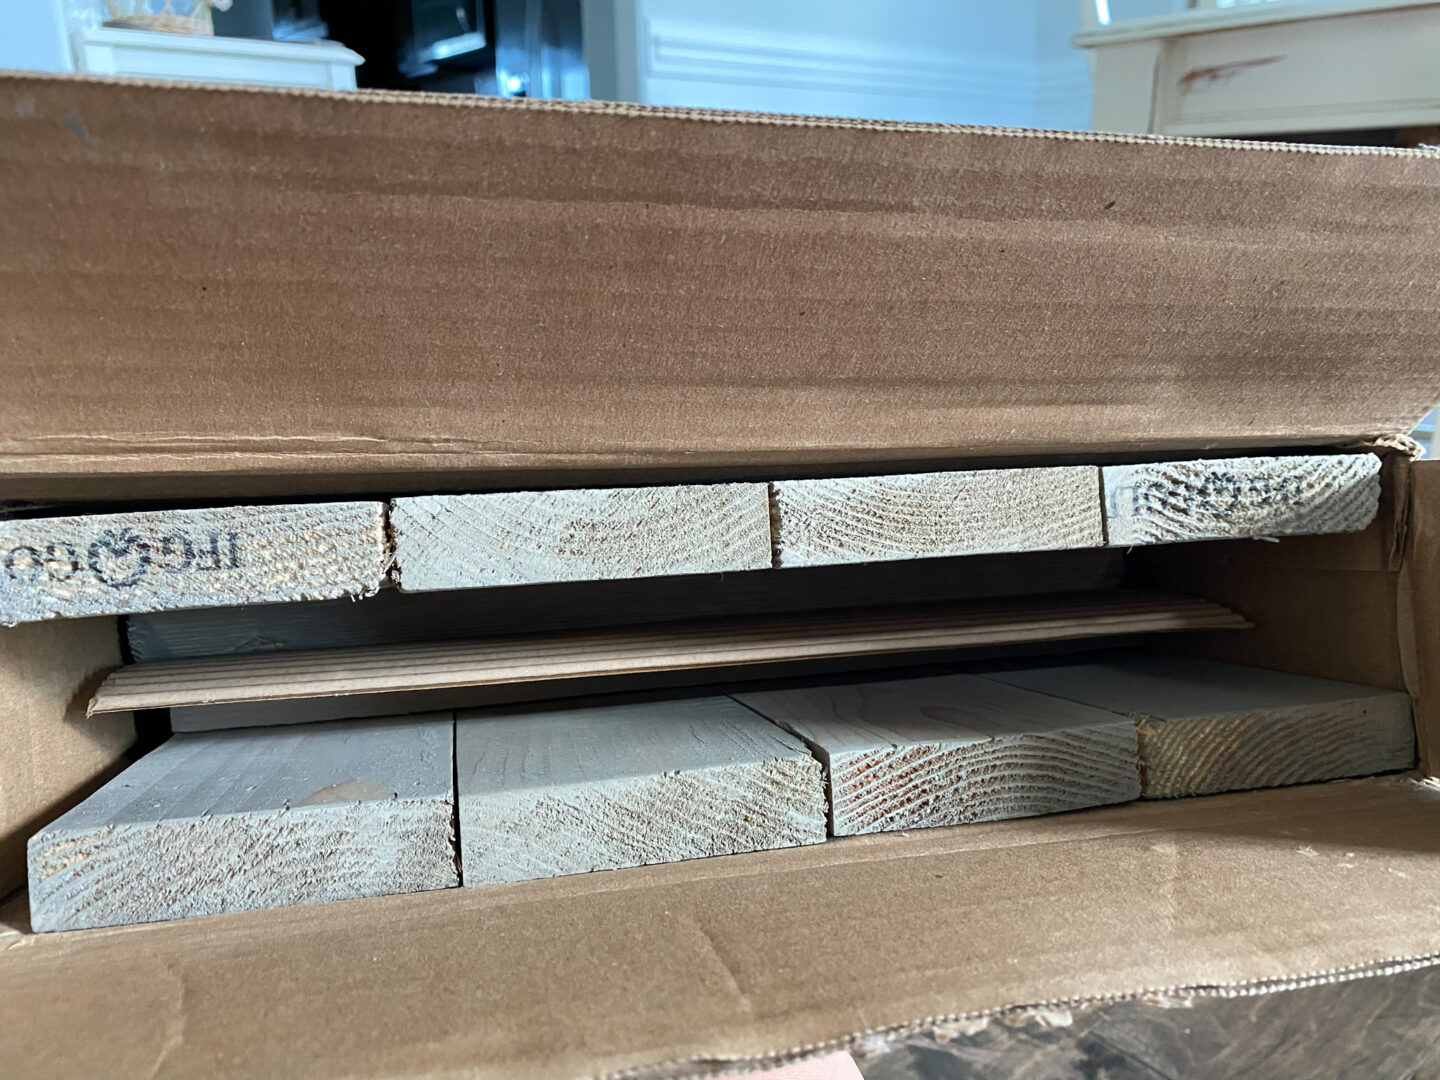
We ordered 3 pairs of farmhouse style shutters for the three windows we wanted to spruce up. There are two windows in our garage and one window in the dining room. There is also a large double window on my son’s room that faces the curb as well, but we didn’t feel that window needed the shutters. The shutters arrived in three heavy boxes from UPS and took about a week to arrive after we ordered them, which wasn’t bad at all!
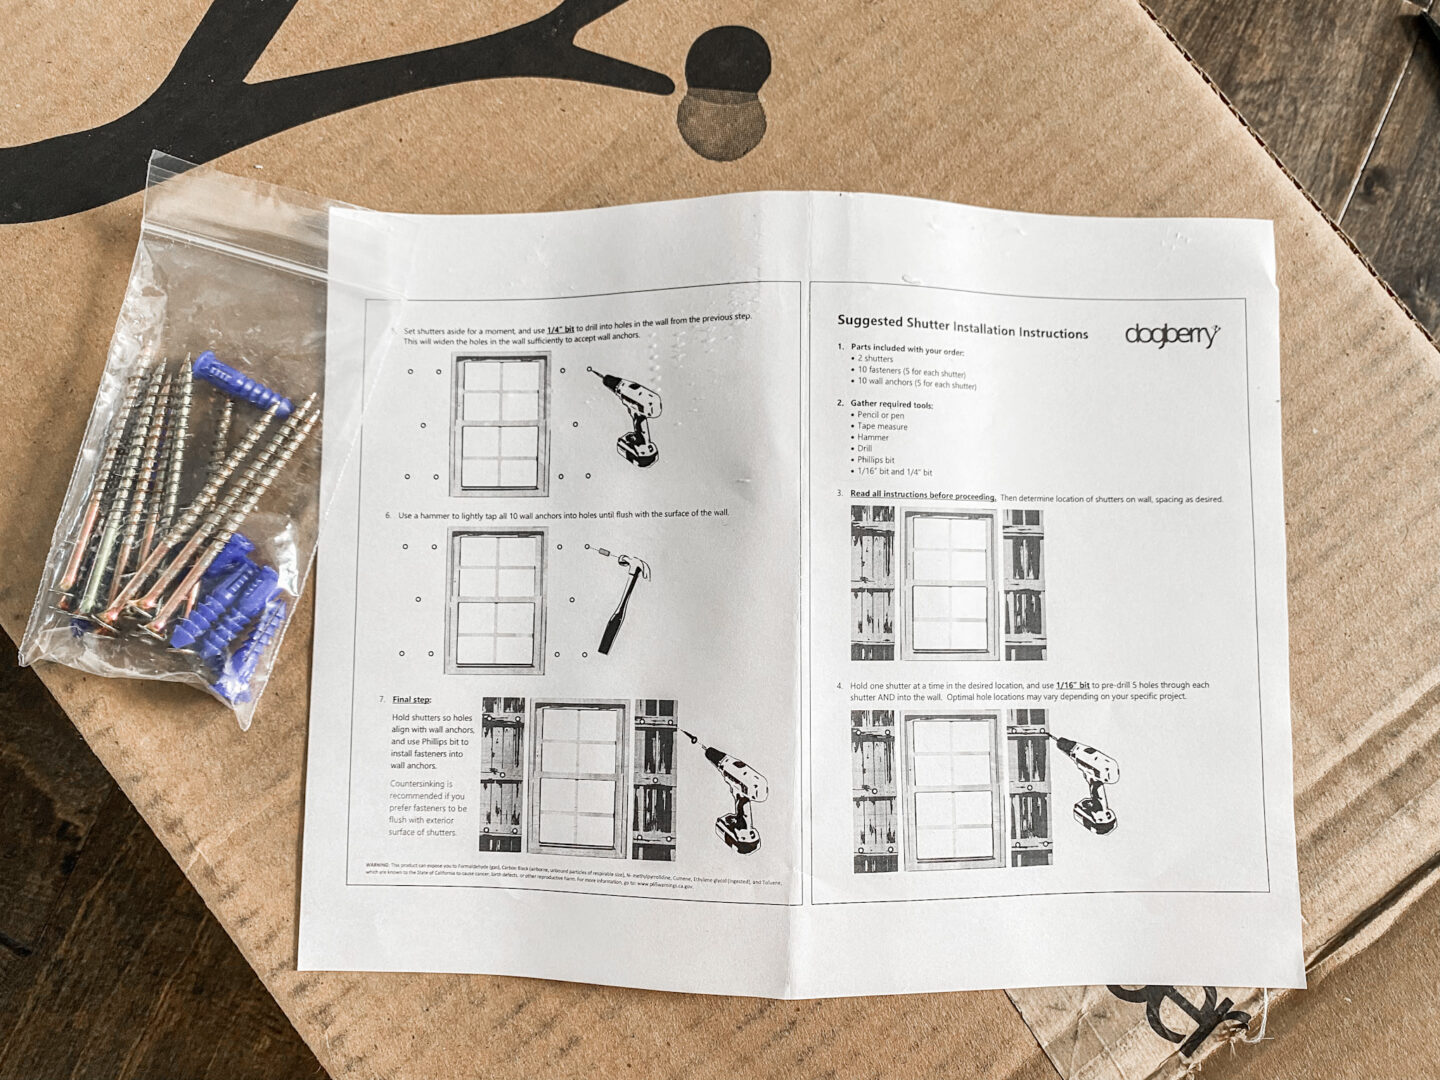
The shutters came with the hardware to hang them and instructions on how to do so. They were also packaged well with a piece of cardboard between them to protect them from rubbing against each other during transit. The only problem we encountered with the hardware, is that the hardware provided would only work with vinyl or wood siding…and as we all know by now…we have BRICK.
Seeing the Shutters in Person
When I opened up the shutters and pulled them out to inspect them, they were exactly what I had expected them to be. The images on the Home Depot website were really accurate, which made me super happy! These are sturdy and beautiful and exactly what I wanted.

What You Will Need For Installing Shutters Onto Brick
- Hammer Drill
- Regular Drill
- Masonry Drill Bits (several because they get dull after a few uses)
- Concrete Anchor Screws
- Pencil
- Black Paint
- Q-tips
- Sample size paint the color of your shutters
- And MOST importantly: an extra set of hands!
The Steps
How To Install Farmhouse Shutters Onto a Brick Home

Step 1: Mark your holes!
You will need your “extra pair of hands” I talked about for this whole project, so you will see a lot of my hubby in this blog post! He was a huge help and I couldn’t have done it without him. Truth be told, I was actually HIS extra pair of hands lol!
Our windows are up quite a bit from ground level, so we also needed a ladder for this project. Placing the shutters against your wall, you will need to mark your holes with a pencil. While marking the holes, your “extra pair of hands” will be holding the shutter up against the wall without moving (if possible!). You will want to make sure you avoid the mortar and drill directly into the brick, so make sure your hole markings will be in the middle of where a brick is. We marked our holes in 4 places: 2 at the top and 2 at the bottom.
Step 2: Drill Your Holes into the Shutters
Take your shutters off of the wall and set them aside. On the marks that you made with your pencil, take your regular drill and drill your holes. You can also take this opportunity to make sinker holes for the screw heads to make them more flush if you’d like.
Step 3: Q-Tip Marks the Spot

Using the end of a Q-tip with most of the cotton pulled off, dip it into a small amount of black acrylic paint. I poured a little bit of my paint into a Dixie cup and that worked great!
Take your shutter and place it back on the wall where you want it mounted later. Take your Q-tip and carefully thread it through your drilled hole and press it firmly against the wall to ensure contact. These marks are super important! If you don’t press firmly enough or thread the Q-tip all the way through you will have to repeat this step.
Once you have marked all 4 of the holes properly, you will be ready to drill into your brick! I know, the thought of drilling into your beautiful brick home is daunting, but I promise it will be worth it and you’ll love the end result.
Step 4: Drilling Into Brick
Using your Hammer Drill, line up with the paint marks you made, make sure you stay firm and straight and go for it! Using a Hammer Drill is probably the best advice I can give to anyone looking to drill into brick. Not only did it save us tons of time, it was kind of fun too! Watch the video above to see how it works.
Step 5: Screw in your Concrete Anchors
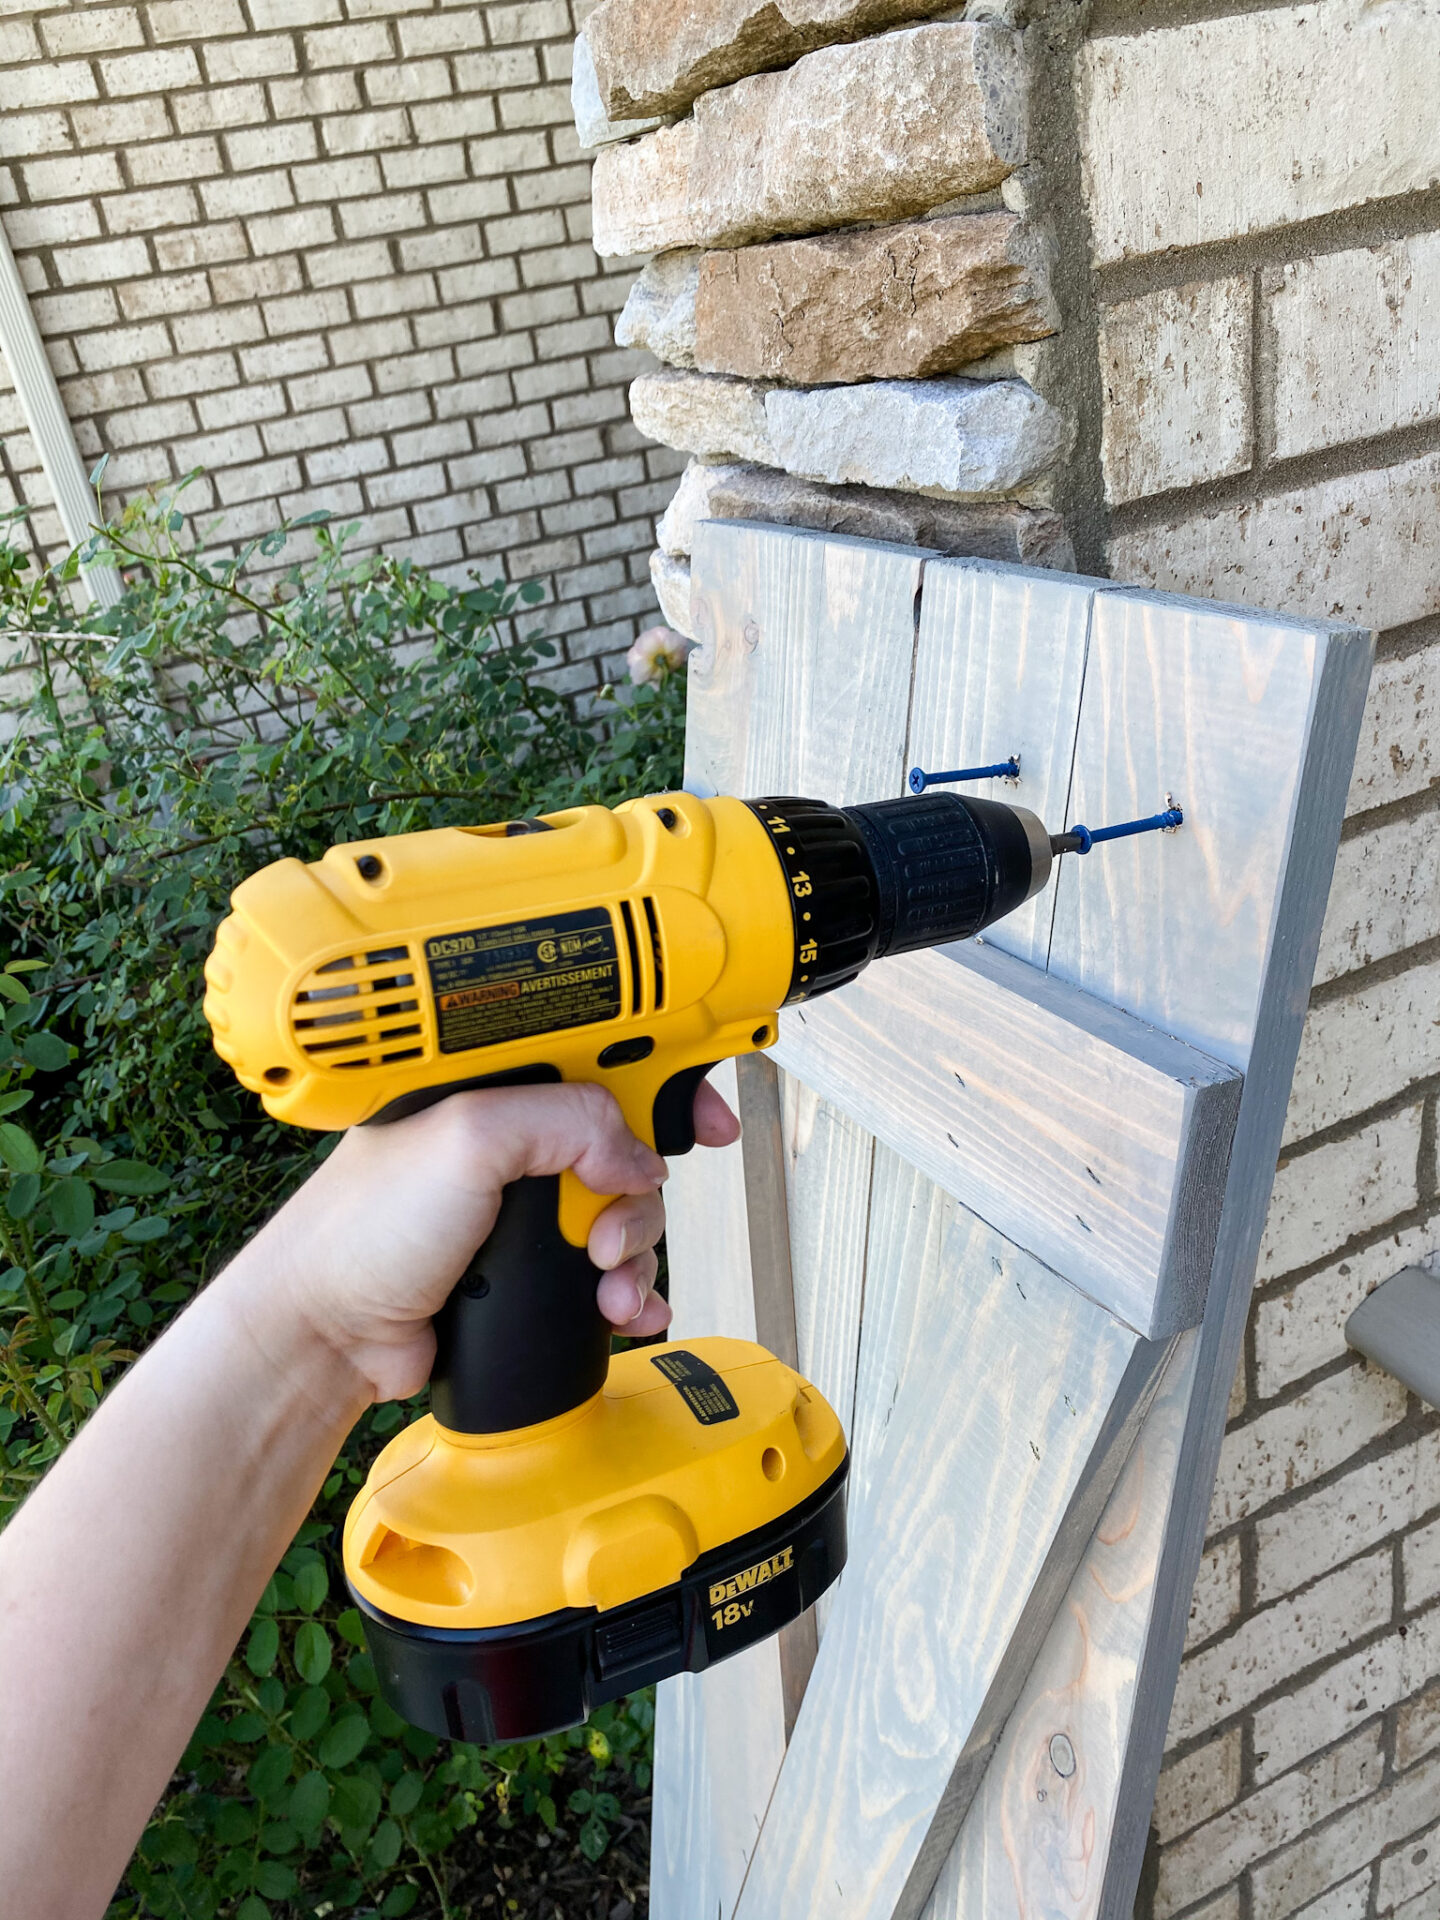
The first thing you’ll notice is that concrete anchors are bright blue! They are strong and sturdy though, so they can definitely support the weight of these shutters. Slightly screw in each screw through the holes you made earlier until the screws come out about half an inch on the back of the shutter. This will make it easier when you go to line up with the holes in the bricks.
Step 6: Attaching the shutters!
This is the most exciting and rewarding step of all: Finally getting the shutters up! Line your screws up with the holes and slowly screw them into the brick wall. Once you’ve done that, you have successfully installed your very first shutter! Watch the video to see how easy it is.
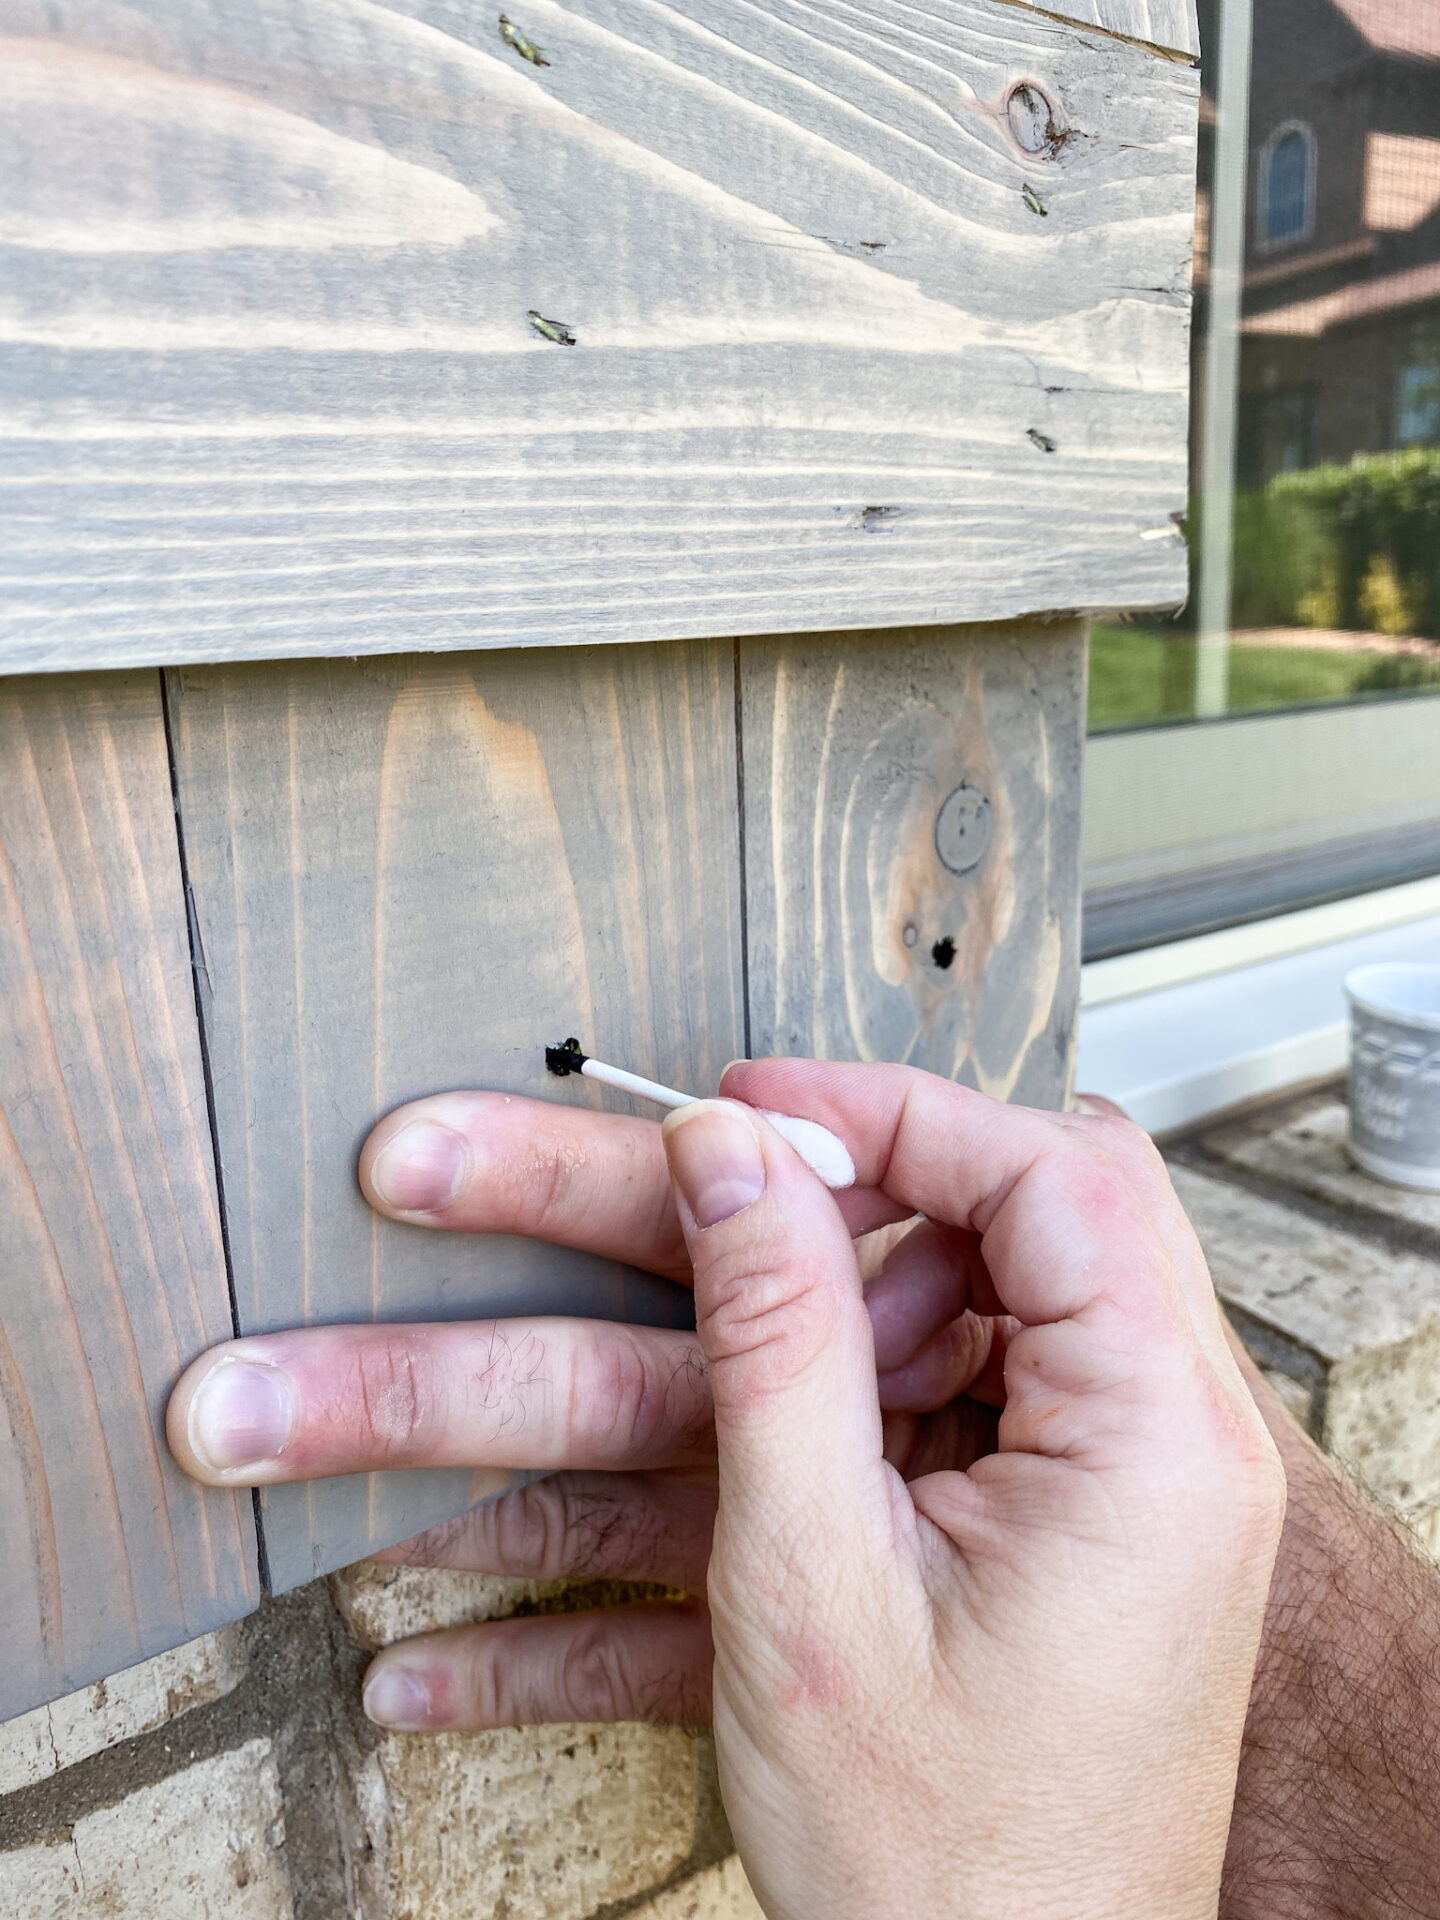
Step 7: The Finishing Touch
You might think that you’re done after attaching your shutters, but if you’re like me and you can’t stand the sight of bright blue screws against your beautiful new shutters this step is for you!

After I saw how beautiful my new shutters looked on our home, I was immediately drawn to the bright blue screws and my OCD was like: MUST COVER THOSE UP. So, my solution to this problem is cheap and easy. Go to Home Depot, grab yourself a wood stain swatch from the paint counter, and go match your shutter stain to a paint color. I think I was at Home Depot for a good 20 minutes narrowing down the right color, but in the end, I found the perfect match!
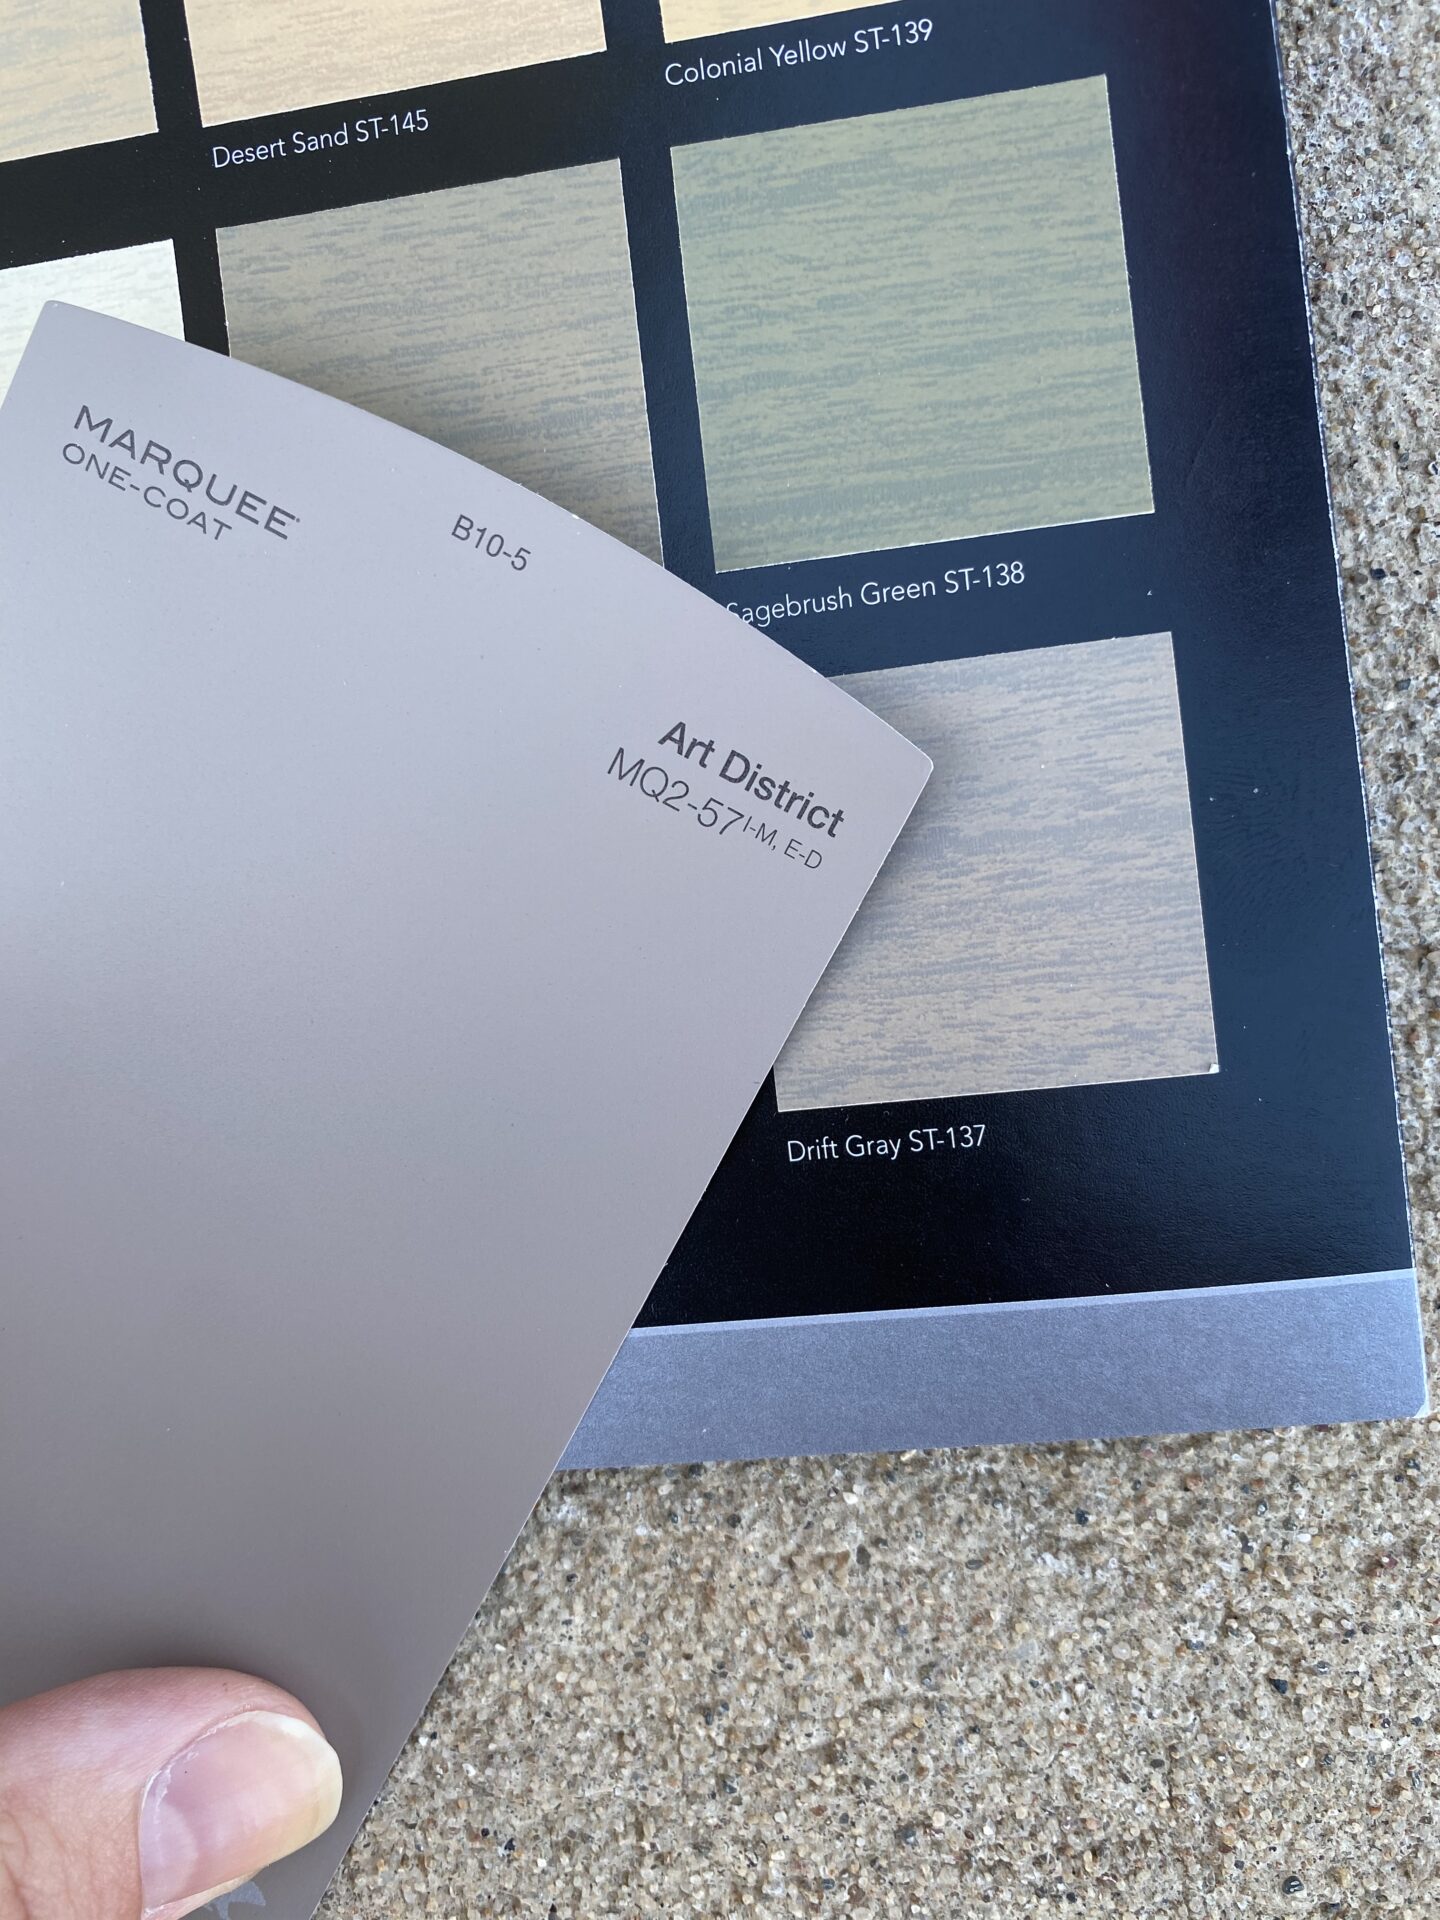
I chose the BEHR color ‘Art District’, which ended up being a nearly perfect match for the stain color ‘Drift Gray’. Once I found the right color, I purchased a paint sample in a satin finish.

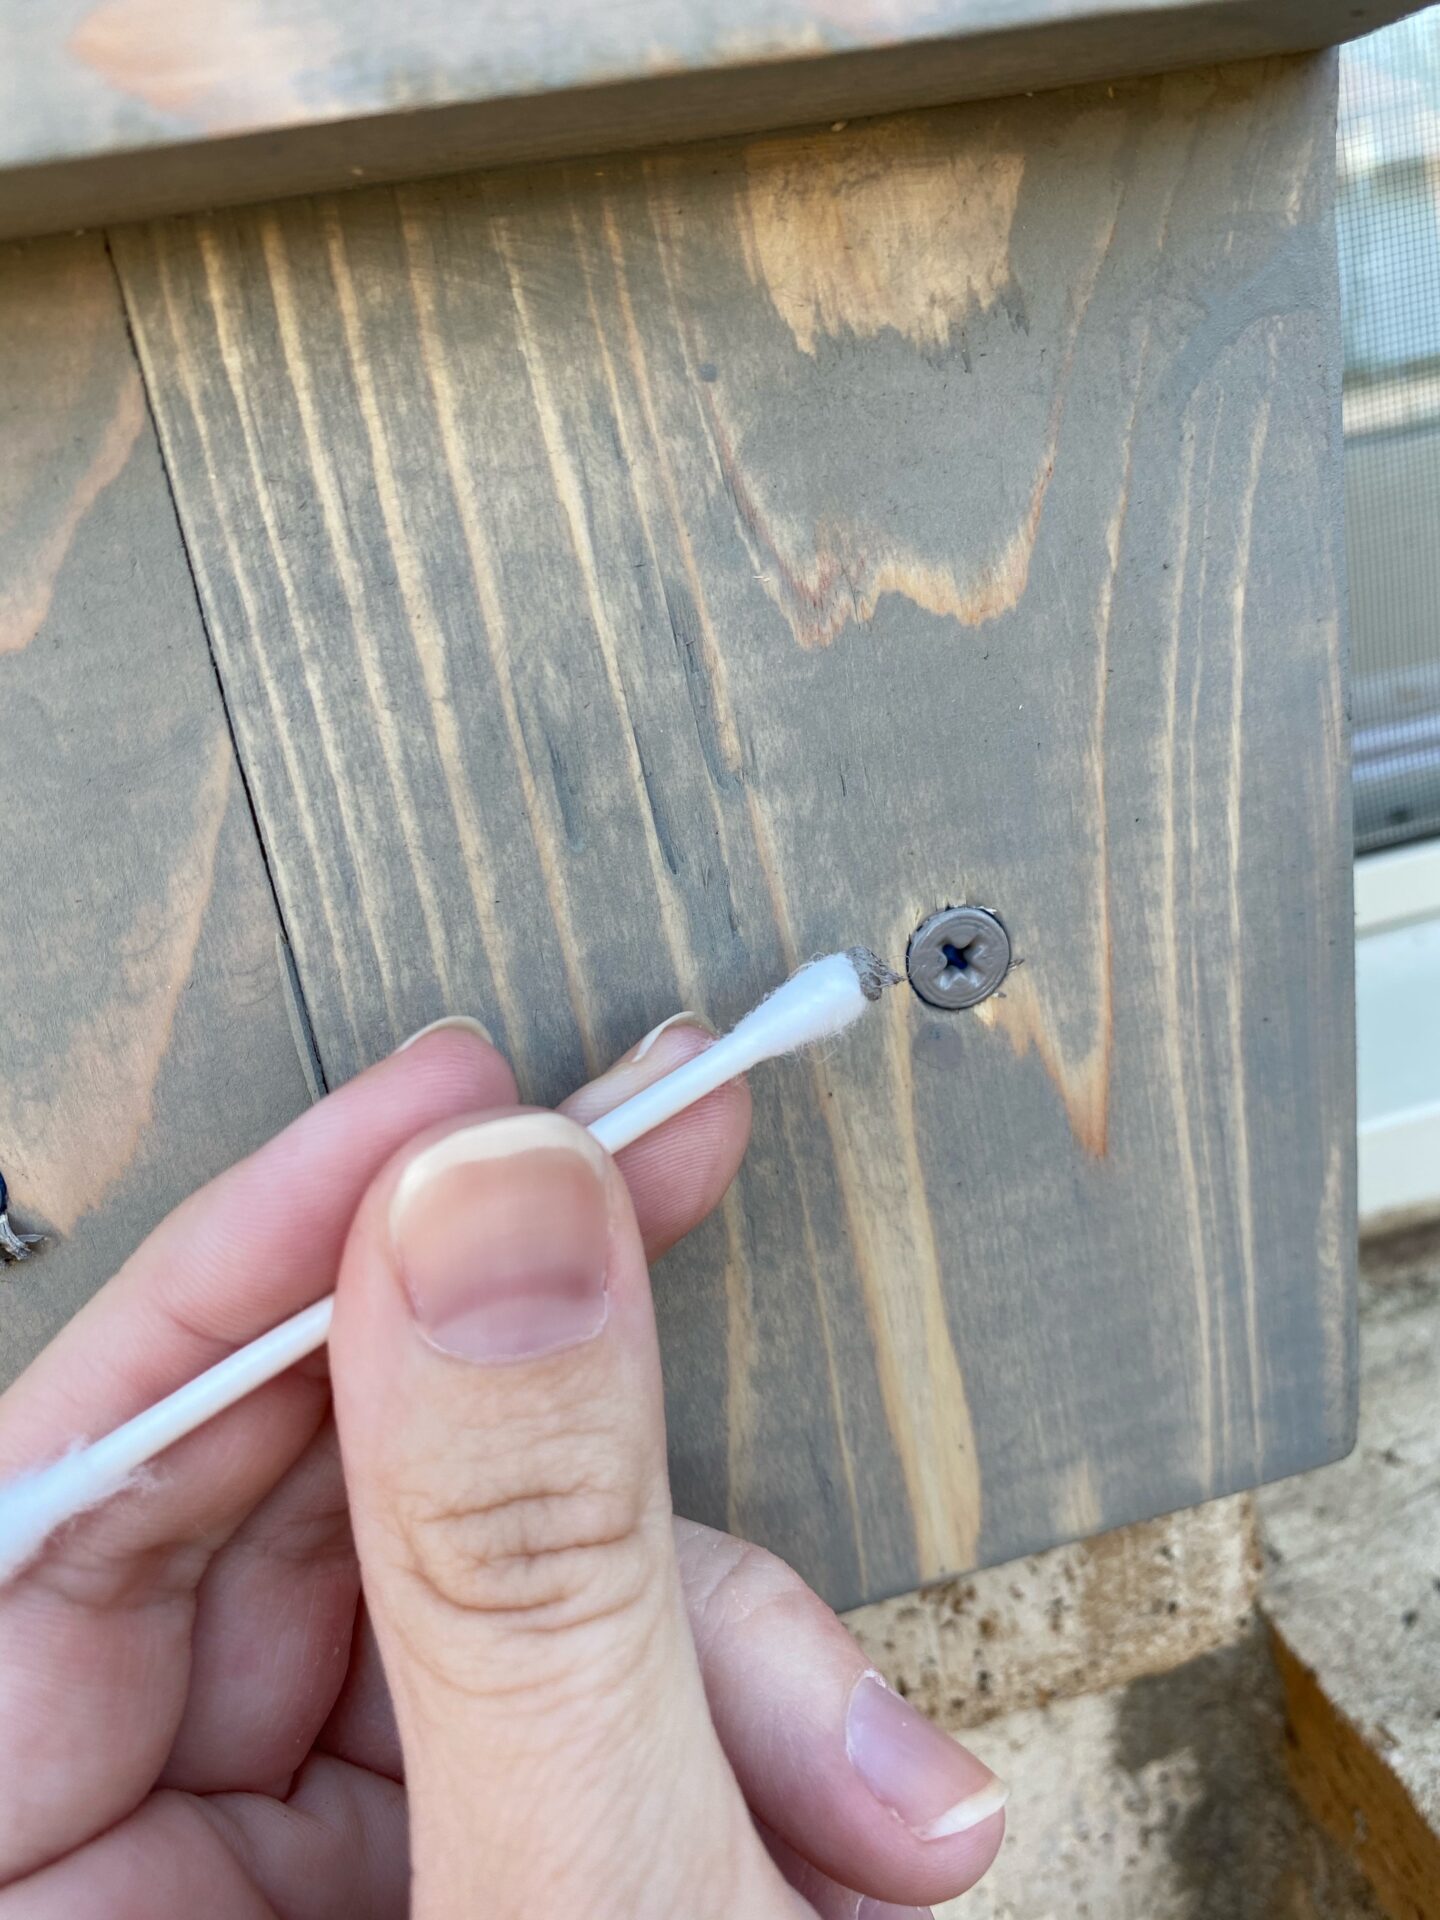
Applying the color to the screw heads is as easy as grabbing another Q-tip!
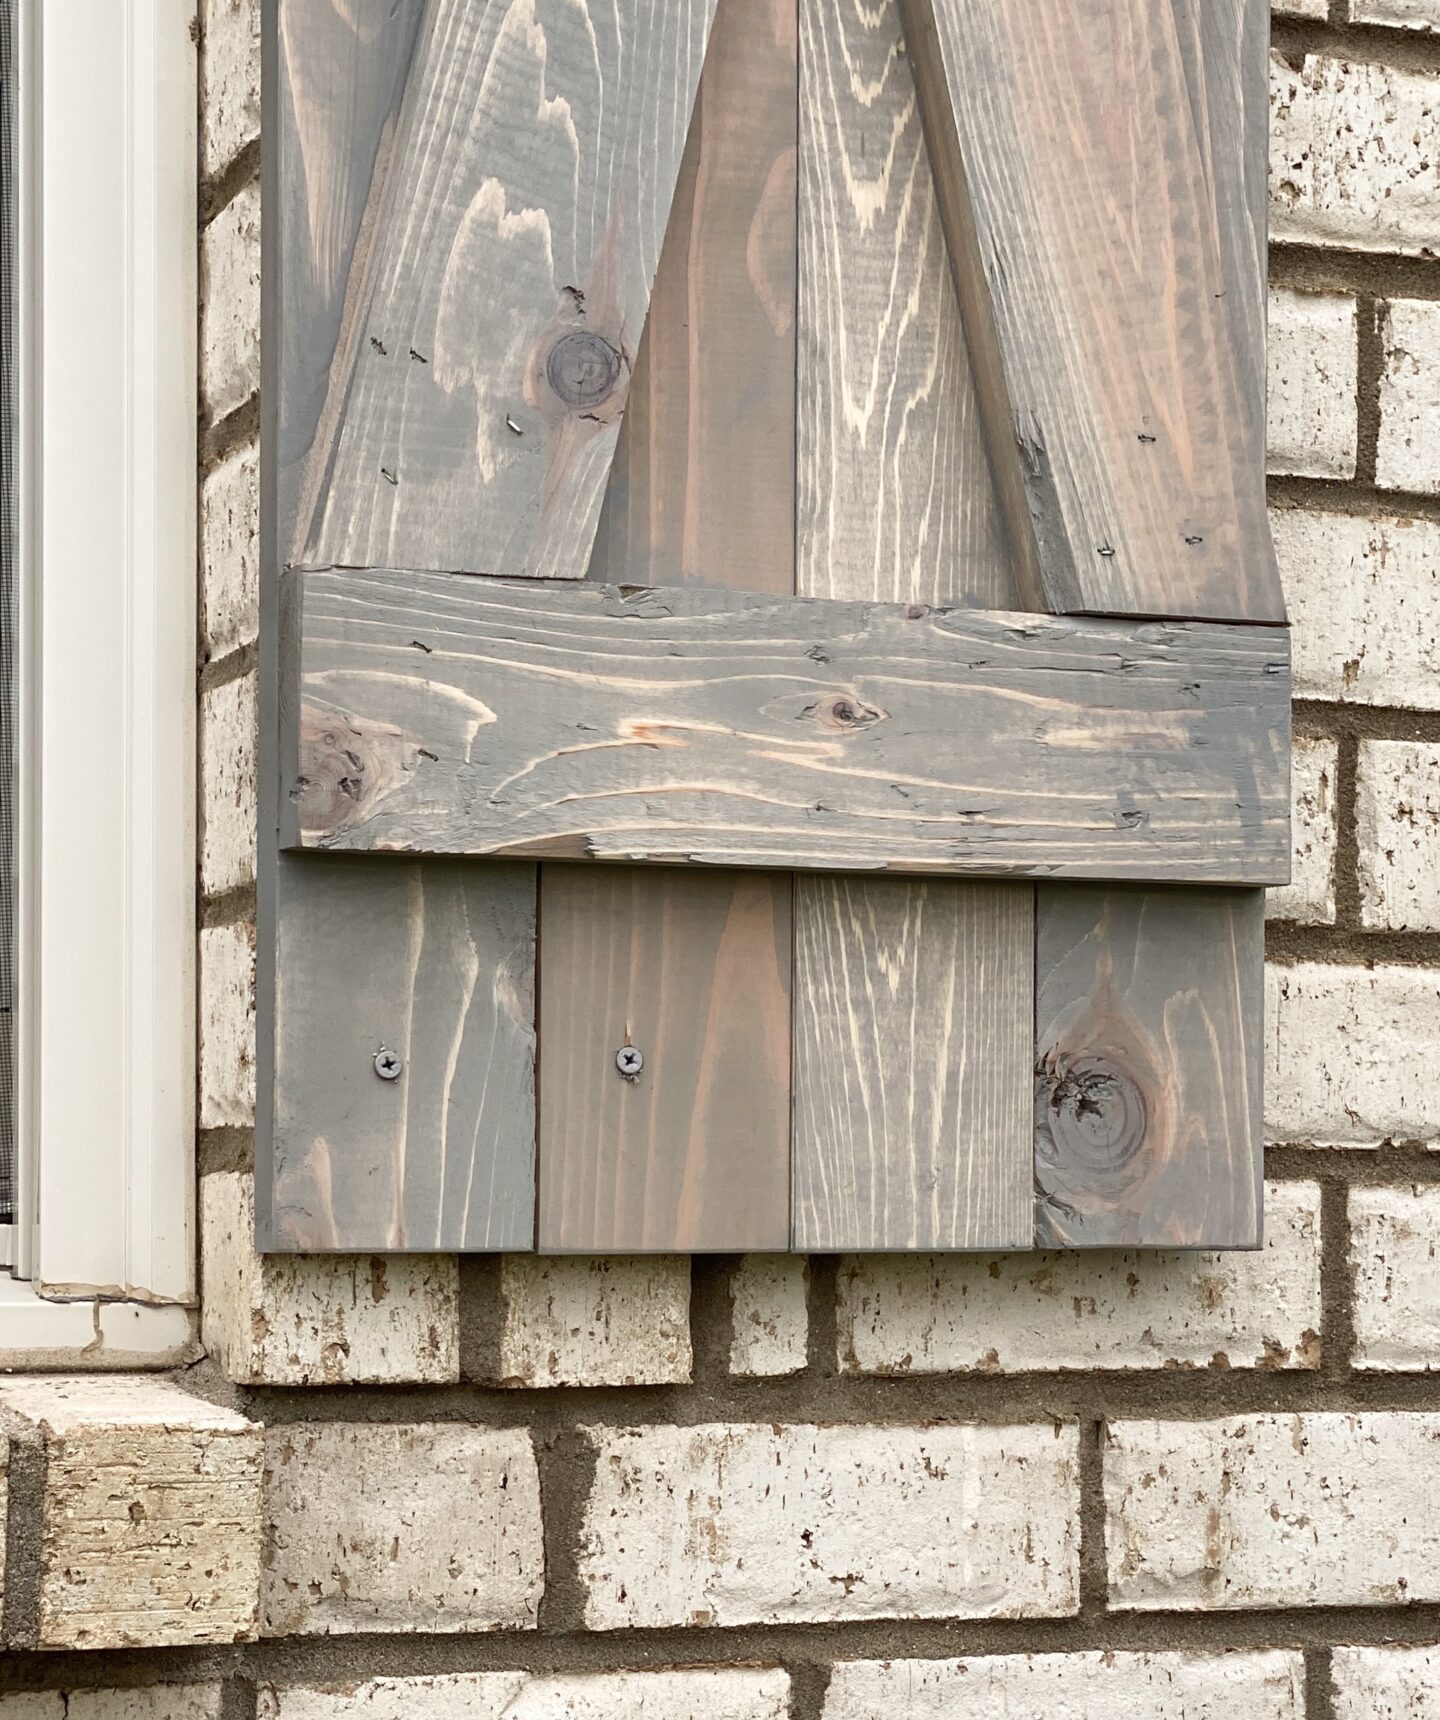
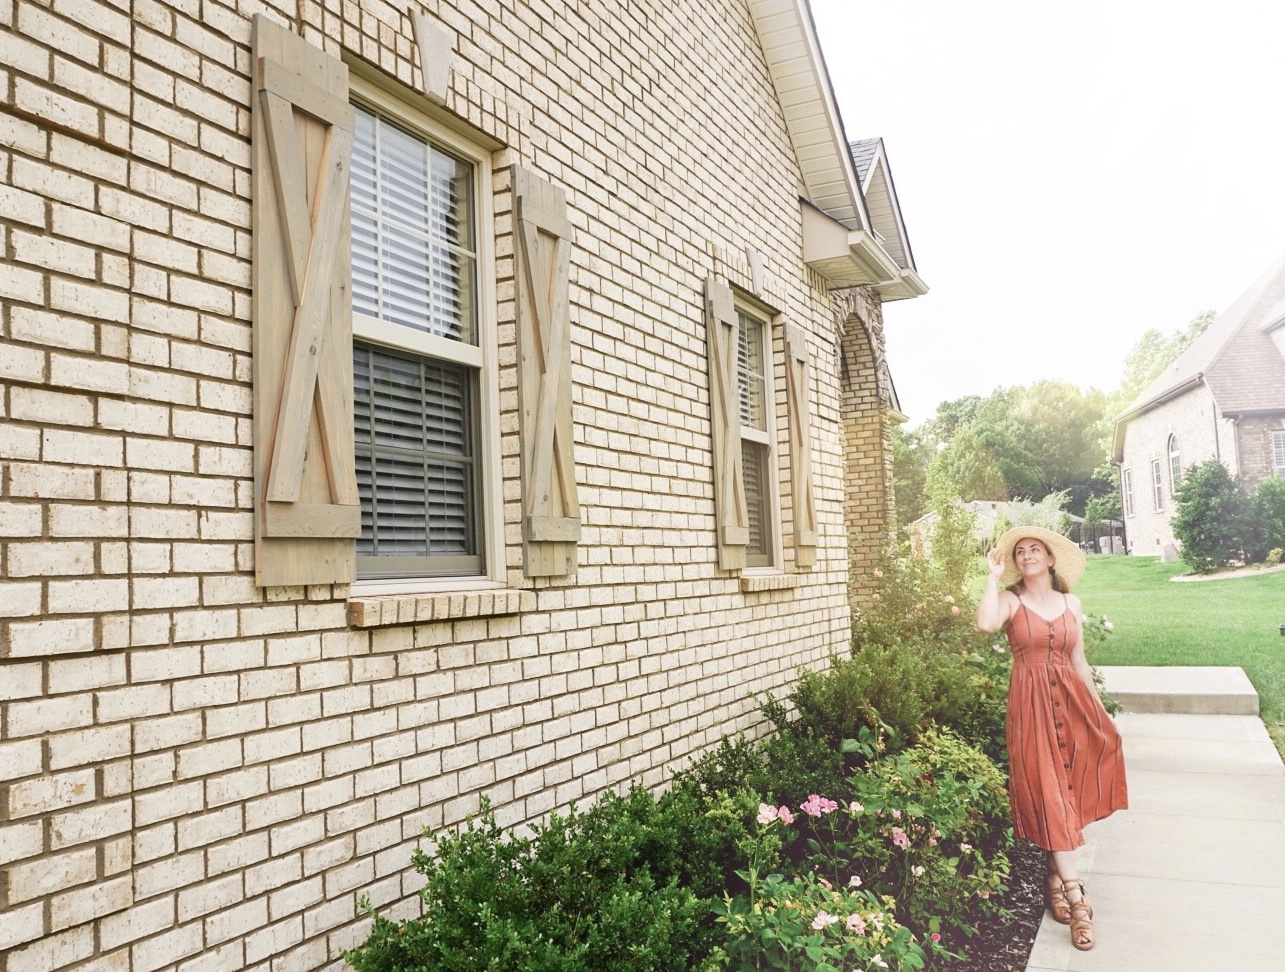
The finished result!
I bet by now you are wishing you could see how it all turned out! Well here it is, the finished look! We are absolutely in love with these shutters on our home. I feel like we live in a little Country Cottage now!


Now you know How To Install Farmhouse Shutters Onto a Brick Home! I hope you enjoyed this DIY and found it helpful! Let me know in the comments what you thought of this project; I’d love to hear your thoughts! If you love DIY projects as much as I do, check out my other DIY Blog Posts here. Thanks for stopping by and come back soon!