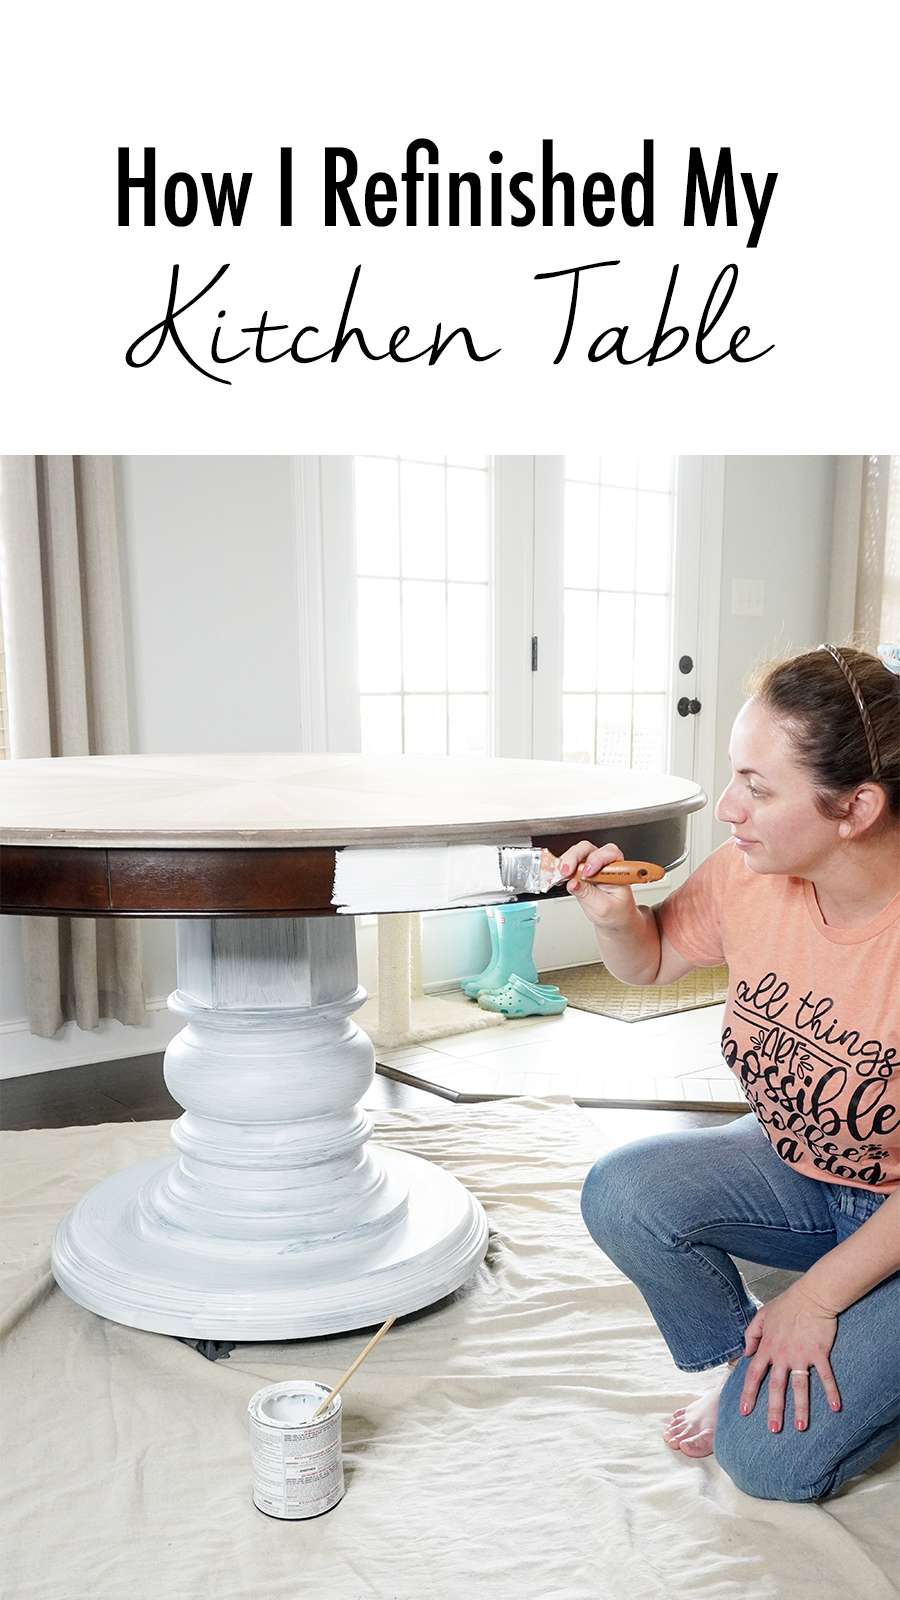
Hi everyone and welcome back to my blog for another fun DIY How To! Today’s post is How I Refinished My Kitchen Table! Now, a while back I had a much smaller round table in my Eat-In Kitchen. As our family has grown and we’ve added more chairs around the table, we found we needed a larger table with a round base. Now let me tell you, finding a 54″ round table with a round base that is below $1,500 is tough! I searched Facebook Marketplace for about a year before I finally found one, and at a killer deal: $250. I can’t wait to show you How I Refinished my Kitchen Table and got the look I was after at a fraction of the cost. The before and afters are amazing!
The Table Before
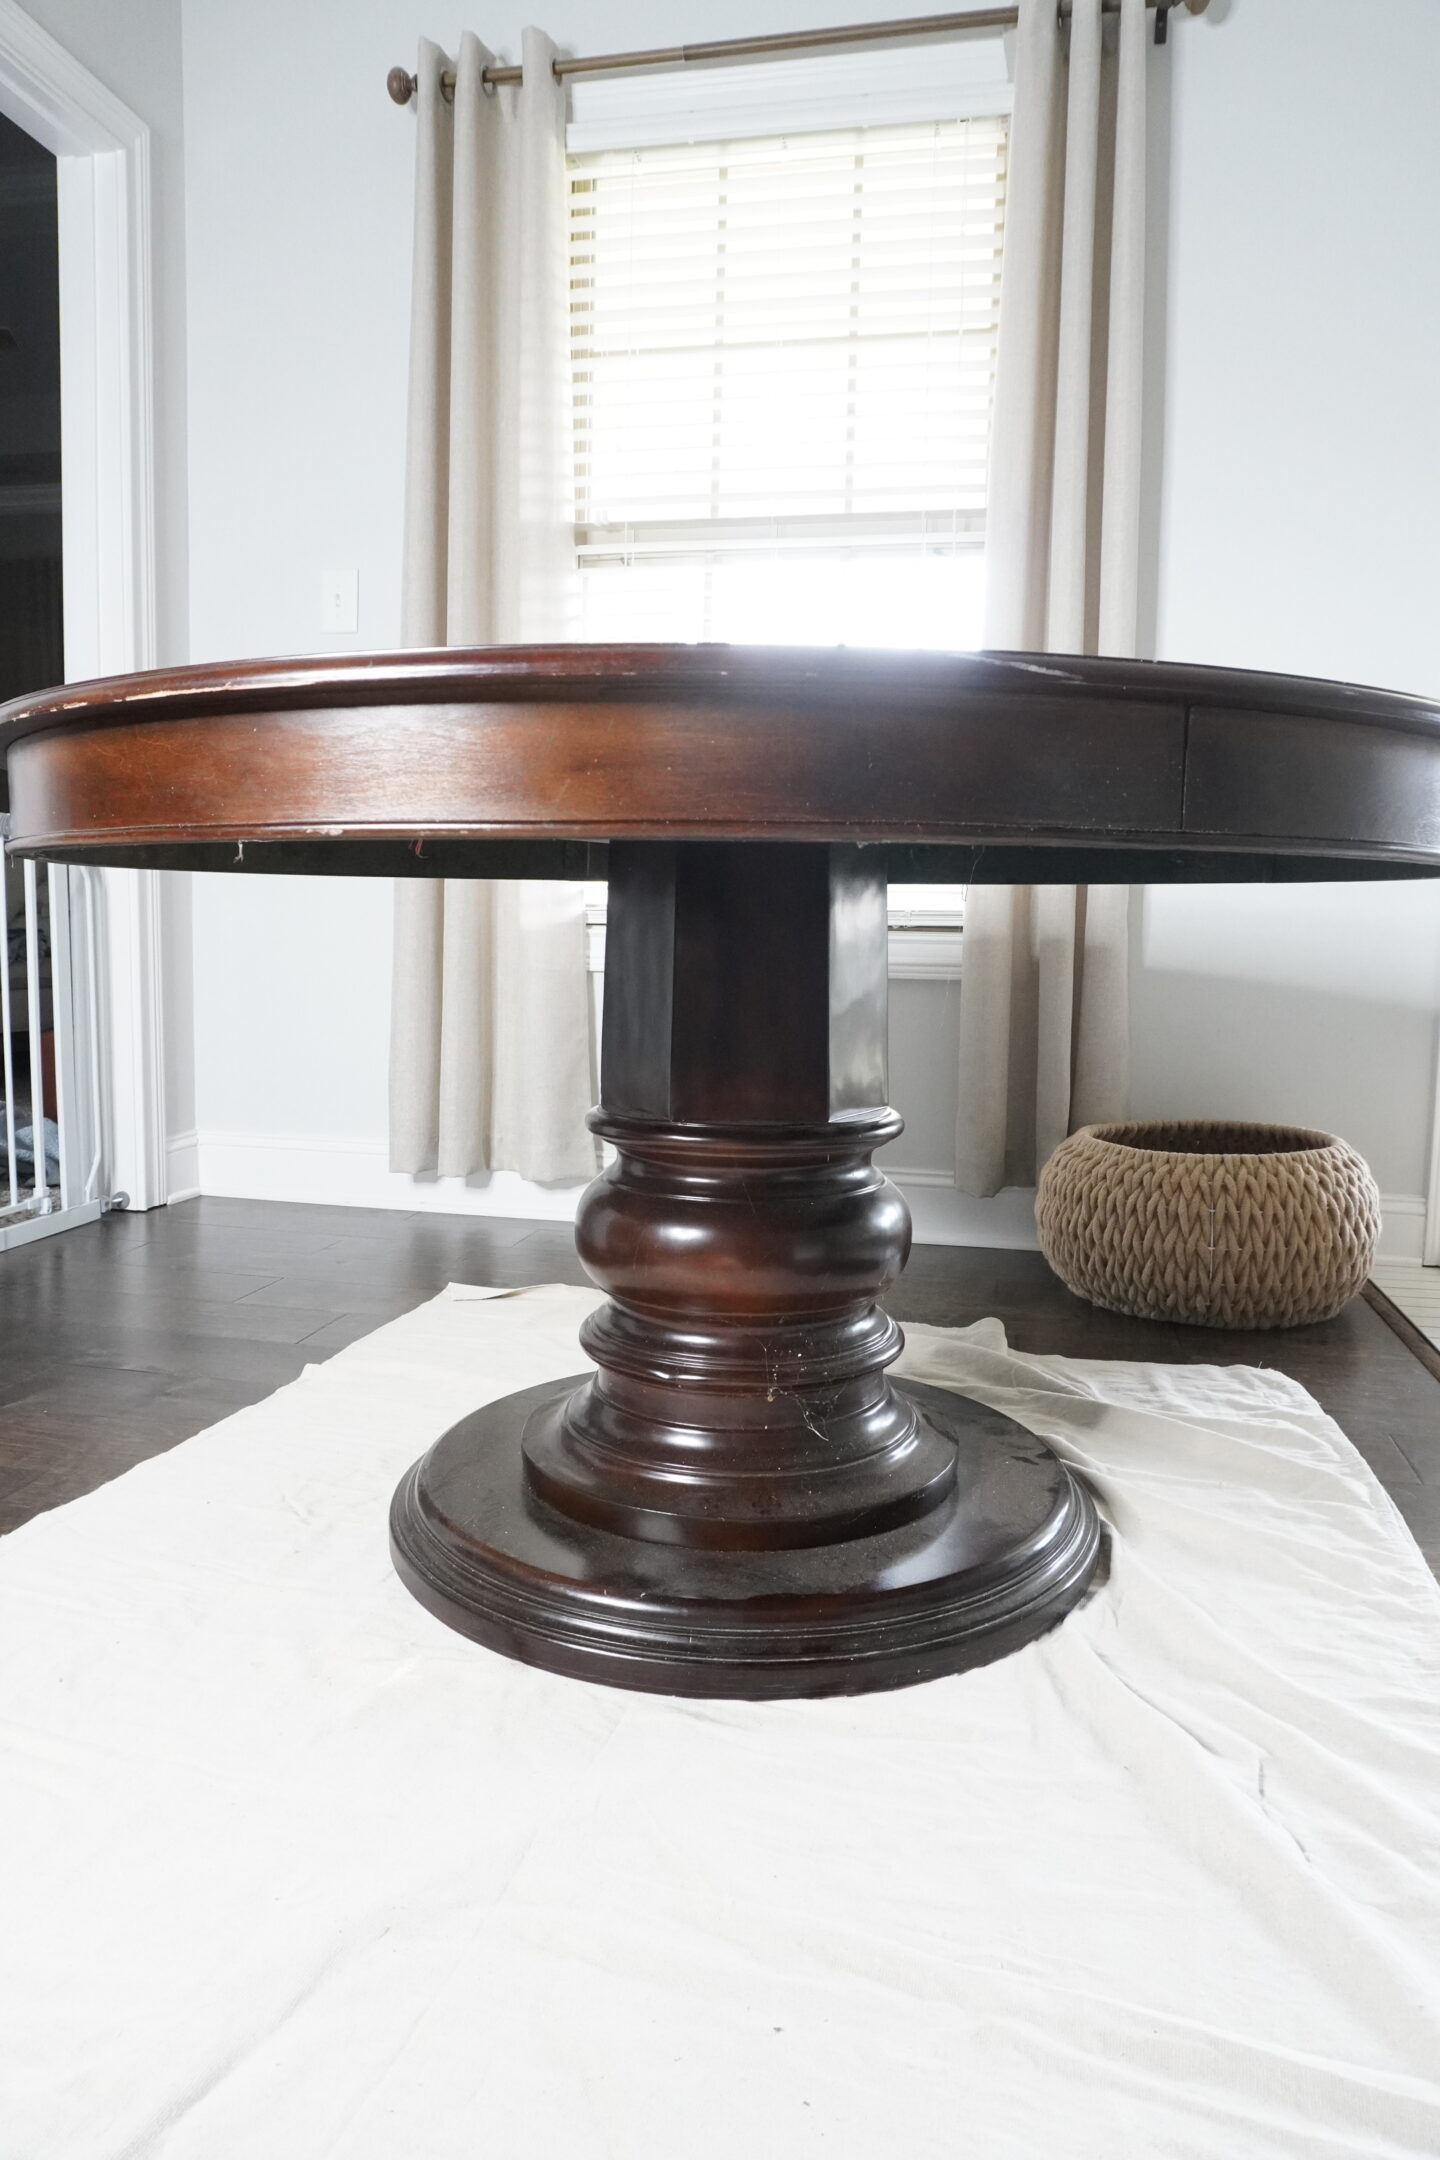
Let’s ignore the fact that this table has been in storage and is covered in cobwebs, shall we? LOL! It’s gorgeous right? Unfortunately, this super dark (almost black) stain that is on this table doesn’t go with my French Farmhouse Style home.
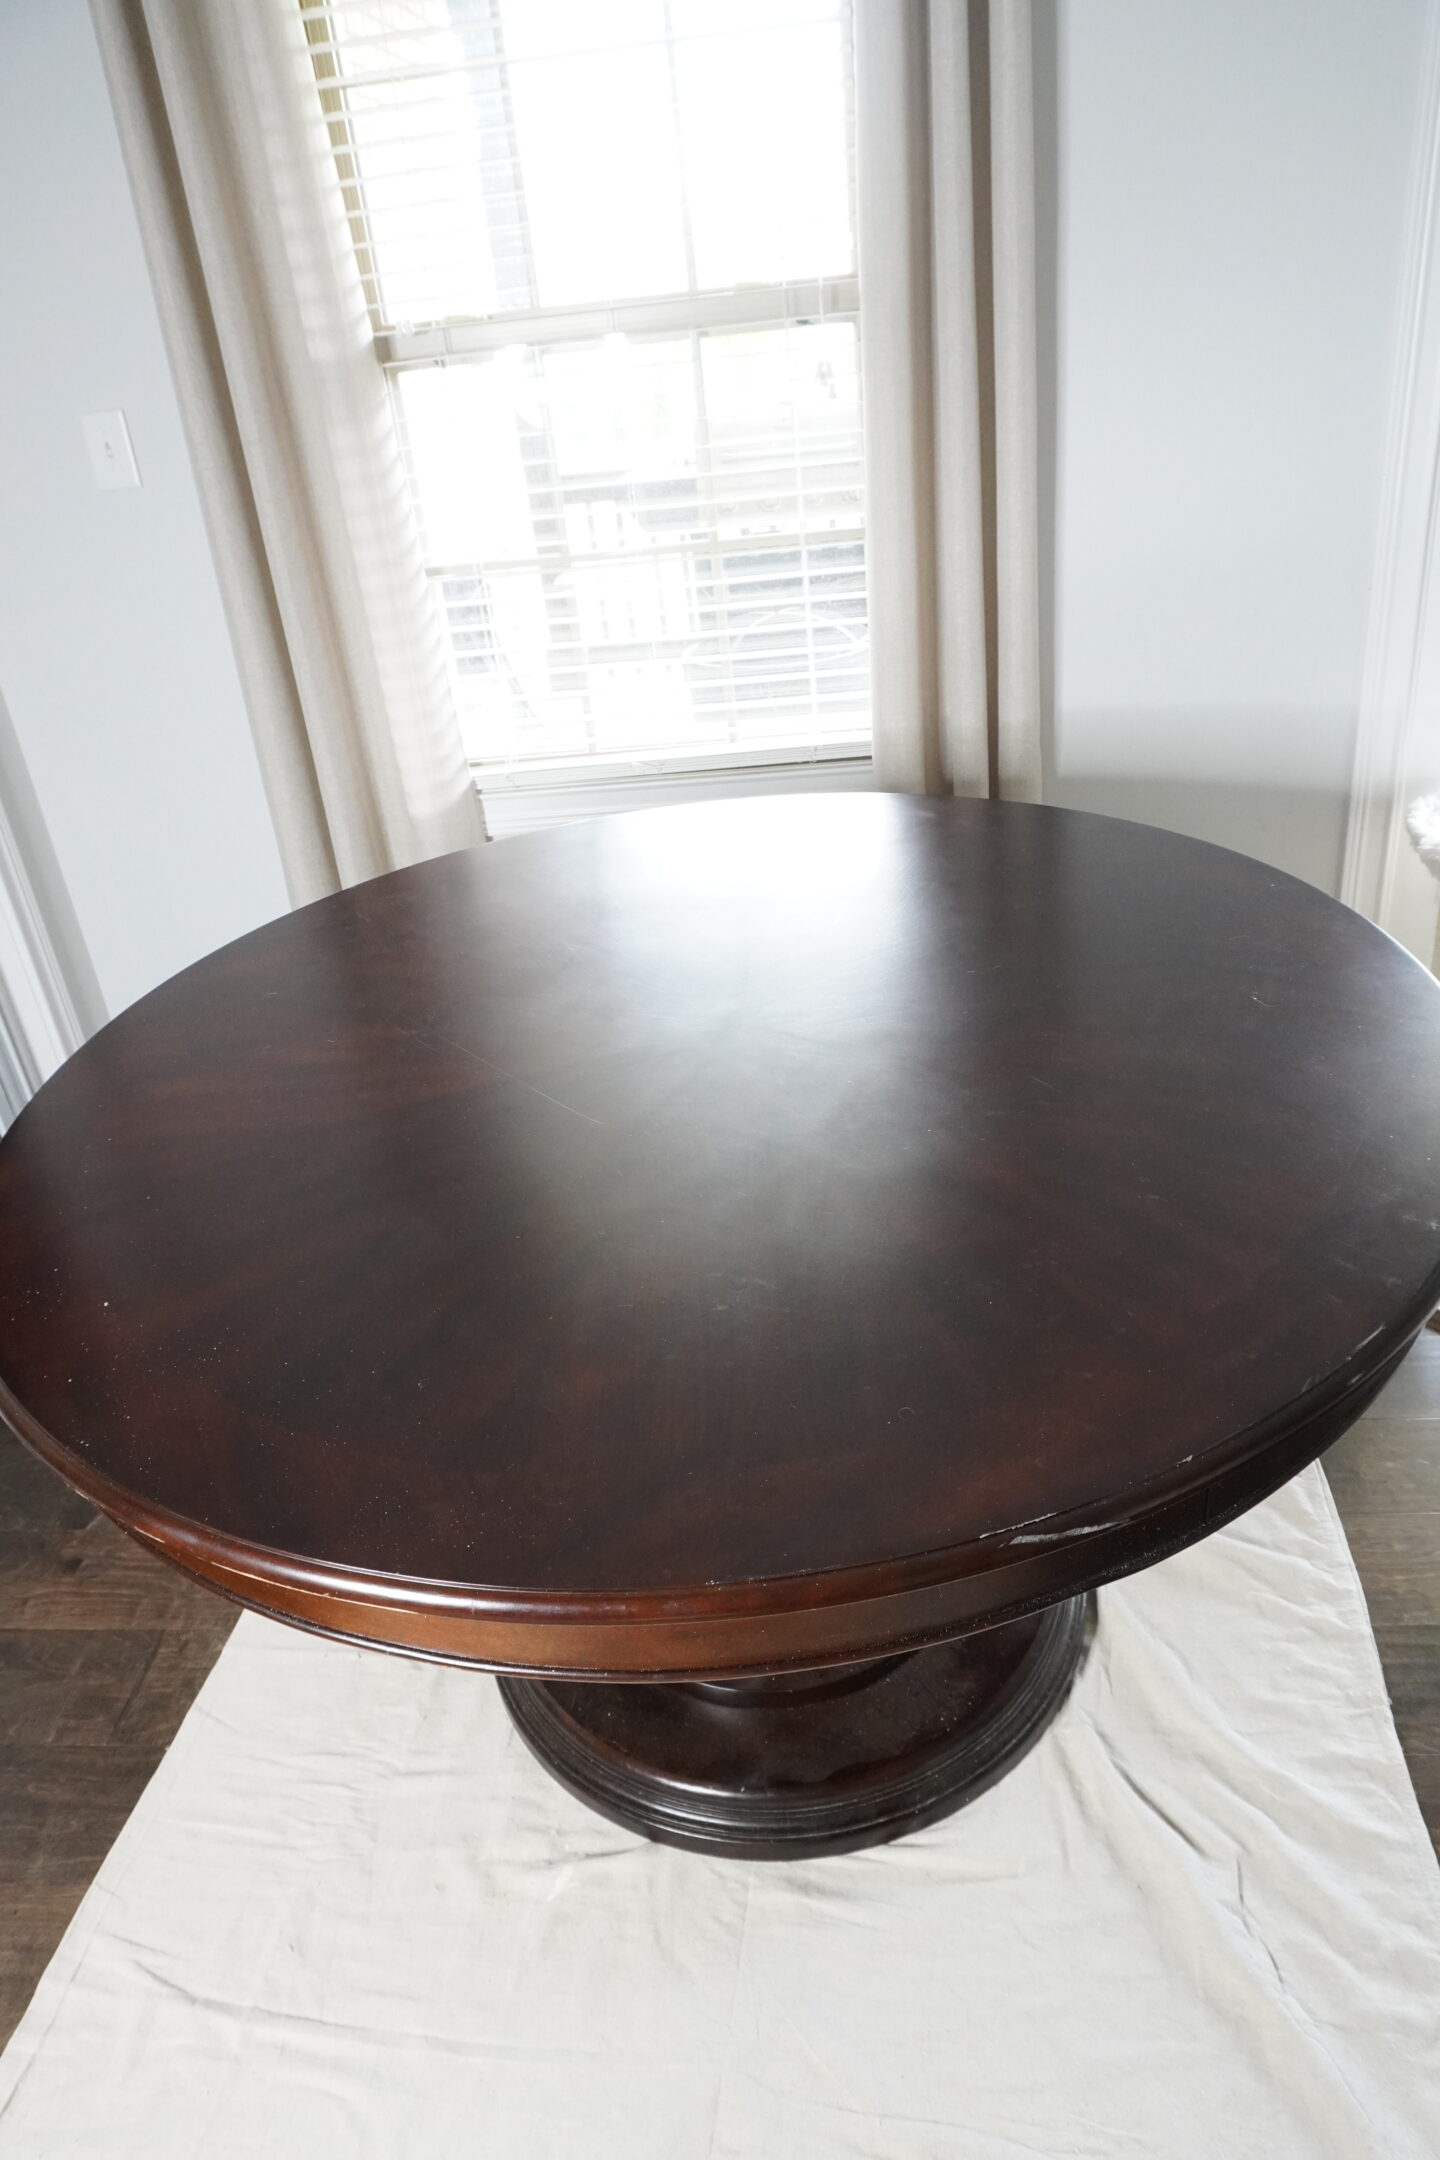
When I got this table home I was so happy to see that the wood grain on the top was so pretty! Originally I was just going to paint the entire thing and make it easy on myself, but once I saw that wood grain I knew I wanted a natural wood top for this table.
What I Used for this Project
Before I got started on this project, the first thing I did was wipe the table down. Usually, I will use a heavy-duty cleaner, but because this piece was already in awesome shape and pretty clean (minus those cobwebs) I just used some Lysol wipes and let it dry for about 30 minutes.
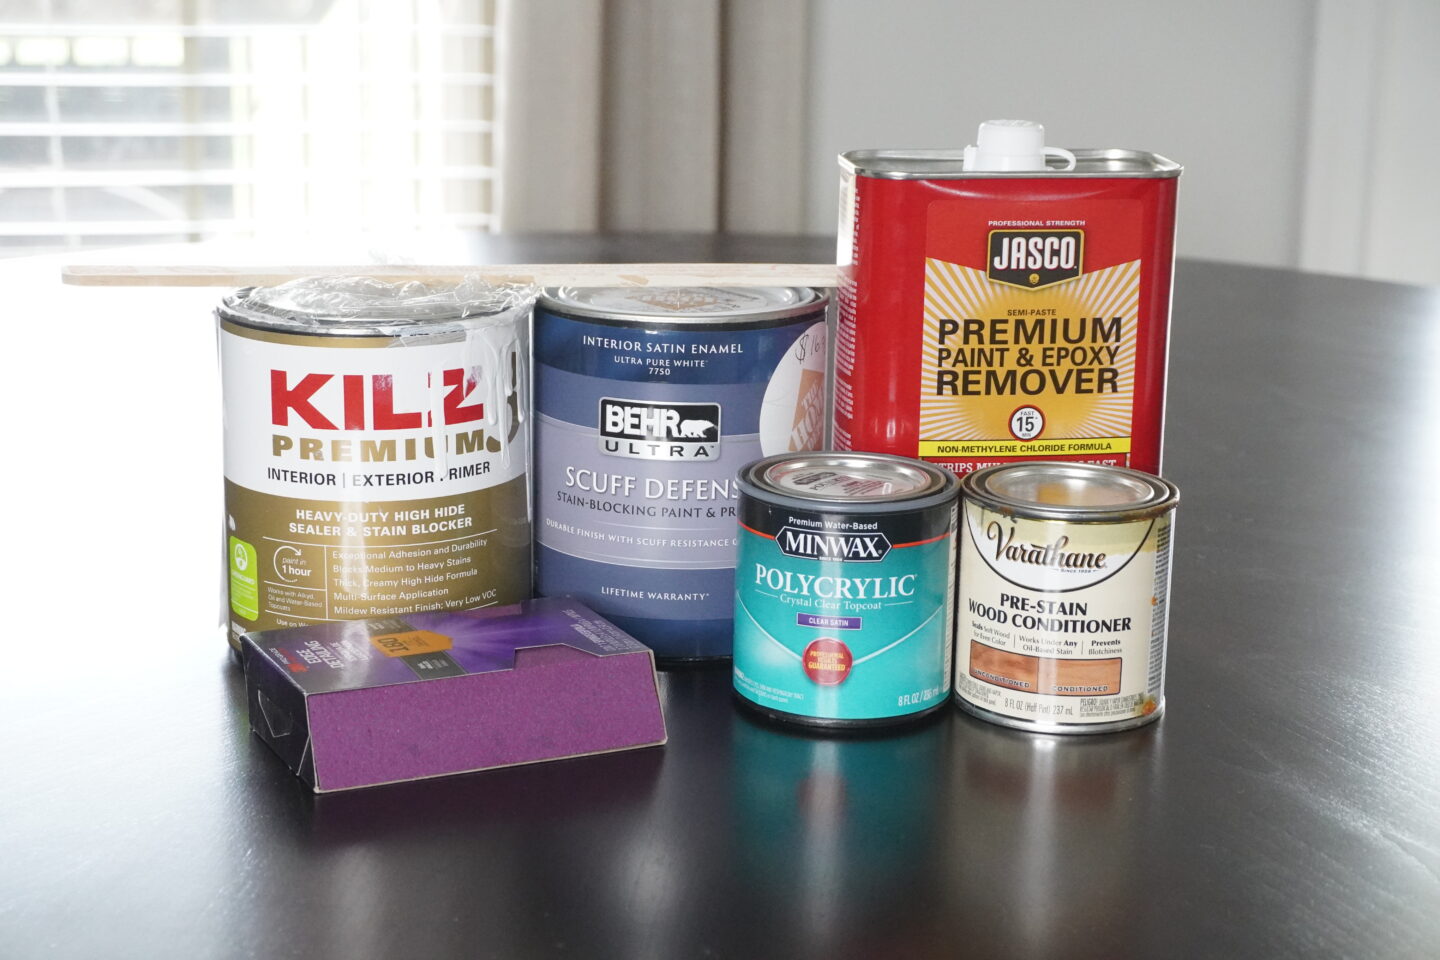
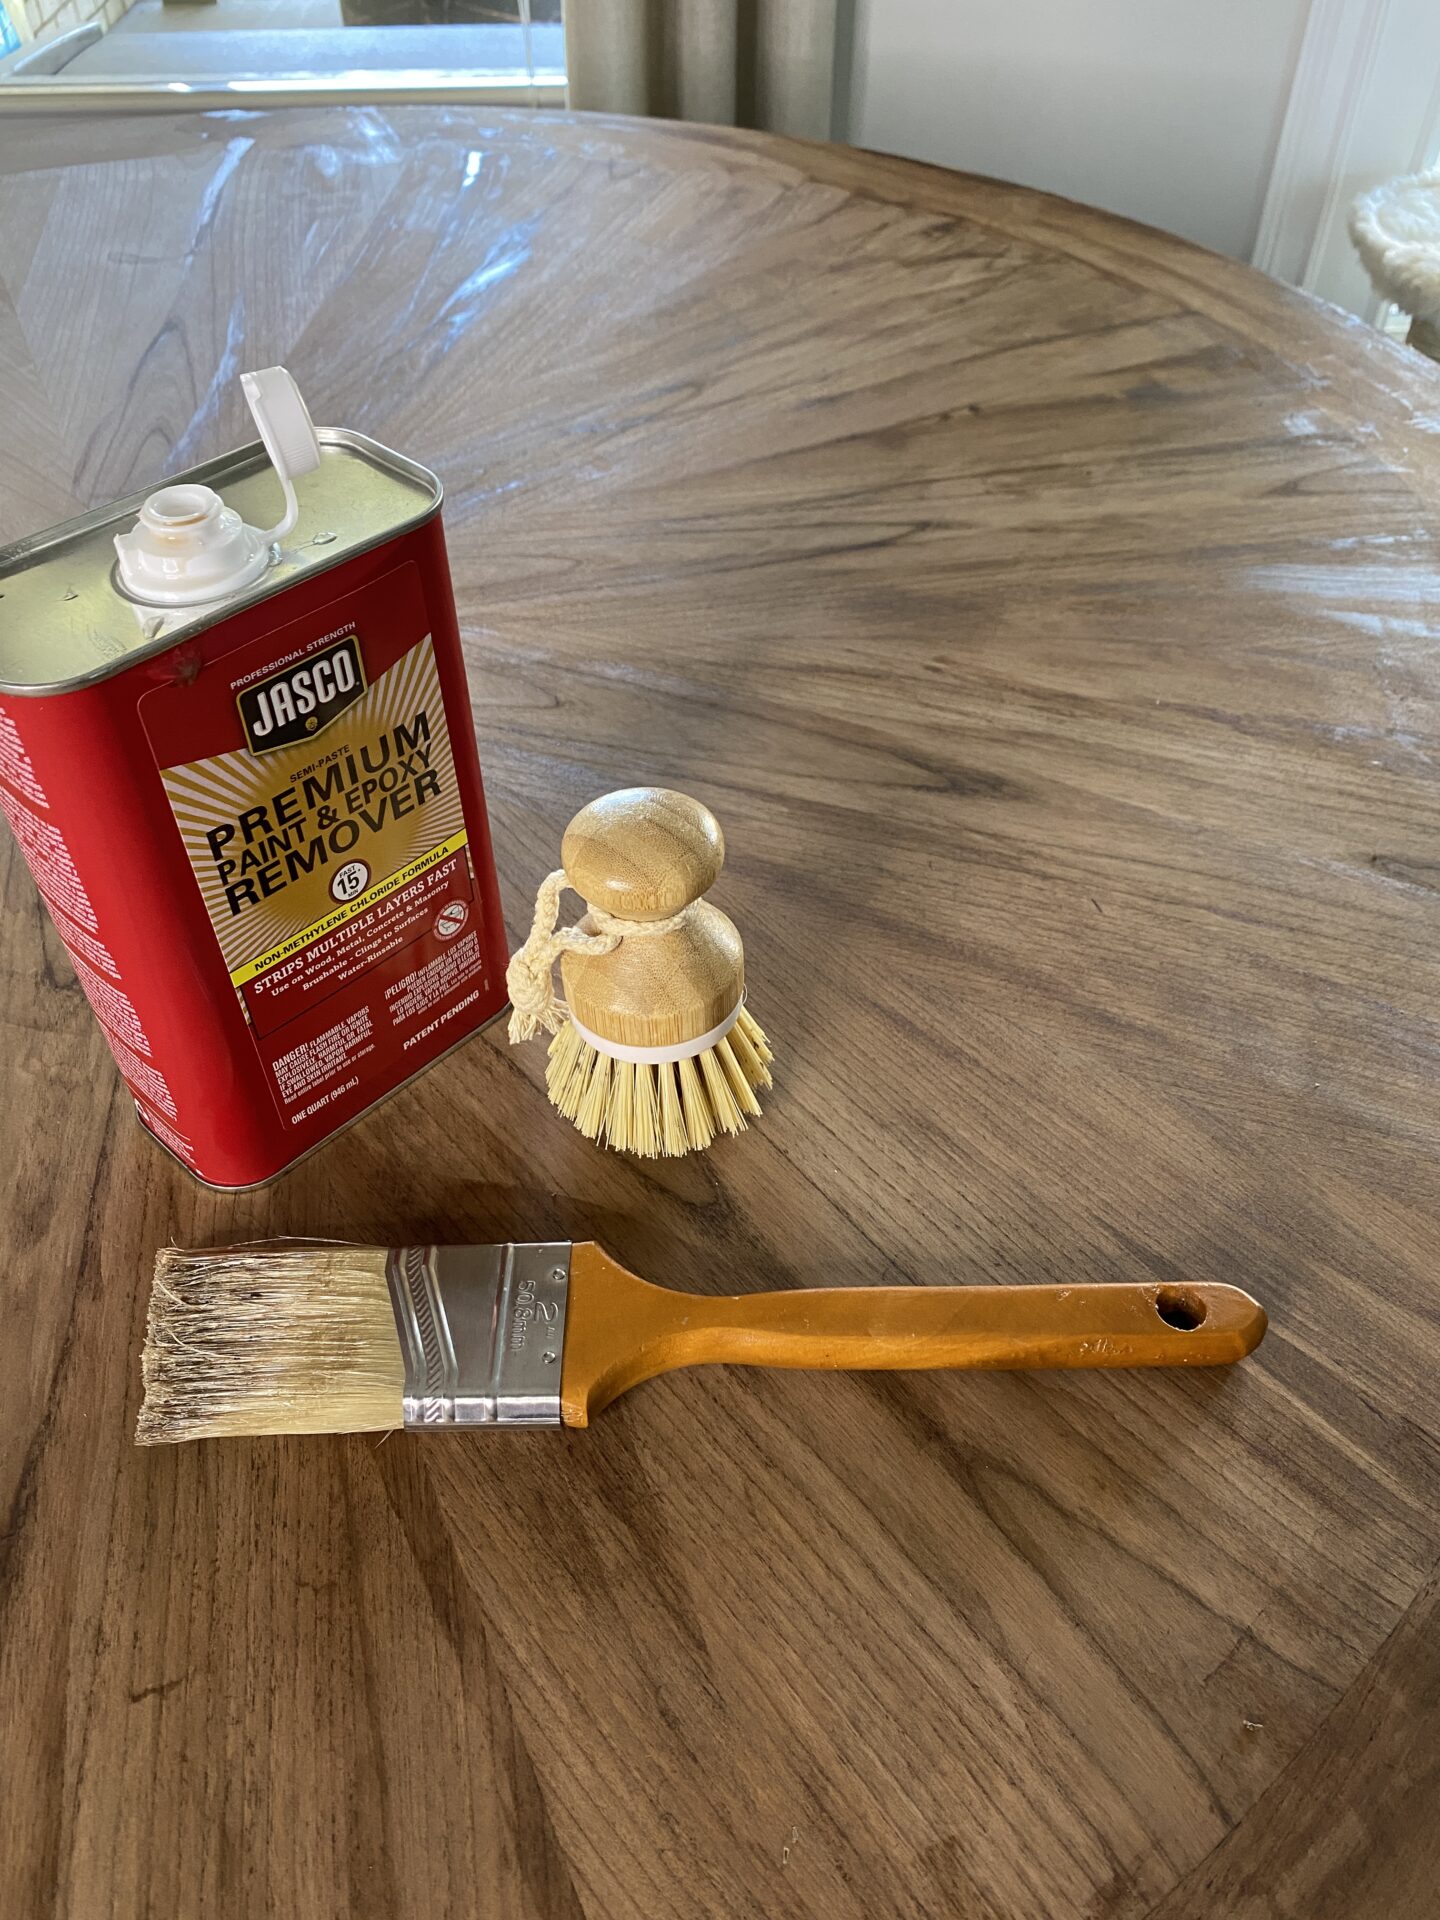
Products used for this project
- Jasco Premium Paint & Epoxy Remover
- Kilz Premium 3 Primer
- Behr Scuff Defense Paint & Primer in the color Cottage White
- Minwax Polycrylic in a Satin Finish
- Brushes
- Rubber Gloves
- Chemical Resistant Gloves
- Fine Sanding Wedge
How To Strip Stain
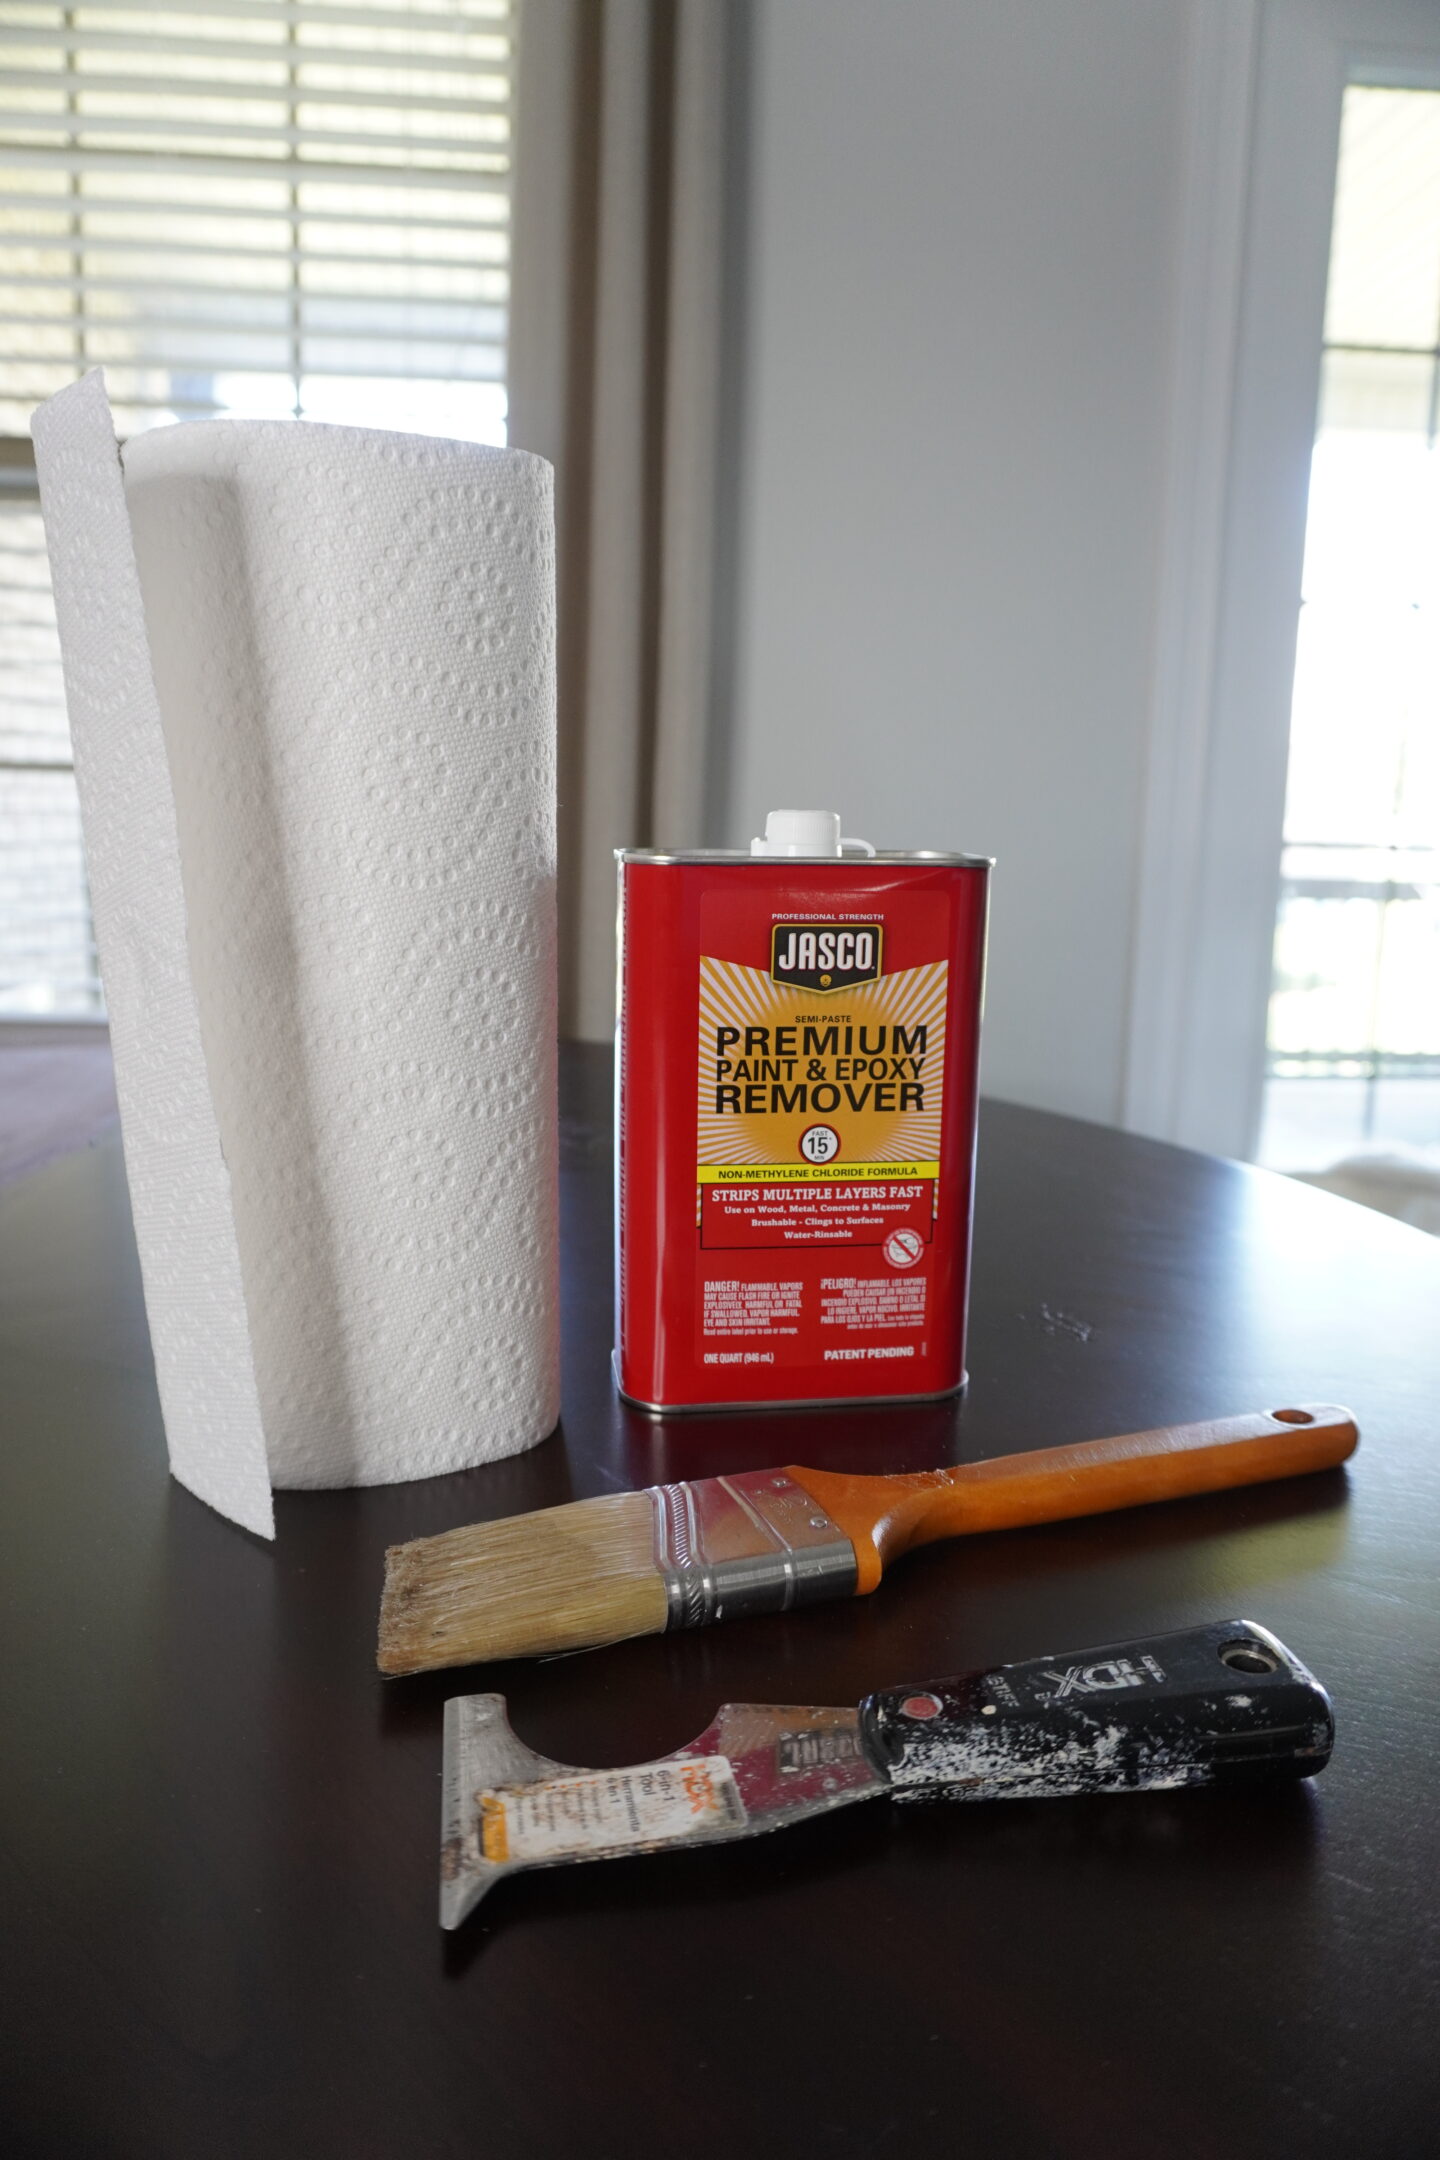
I know. Stripping stain sounds hard, it sounds messy, it sounds scary! But trust me, it’s not too bad. It’s definitely much easier than you think, but also probably messier than you think too LOL! My favorite Stripper for both paint and stain is hands down the Jasco Paint & Epoxy Remover. This comes in both a spray and a gel, and I have used both with great success, but today we are using the Gel.
The first thing I did was test the Jasco Paint & Epoxy Remover Gel on a small spot to see just how much work I would have to put into removing the stain. Thankfully, it came off super easy and I was really excited to get started on refinishing my kitchen table!
The test patch
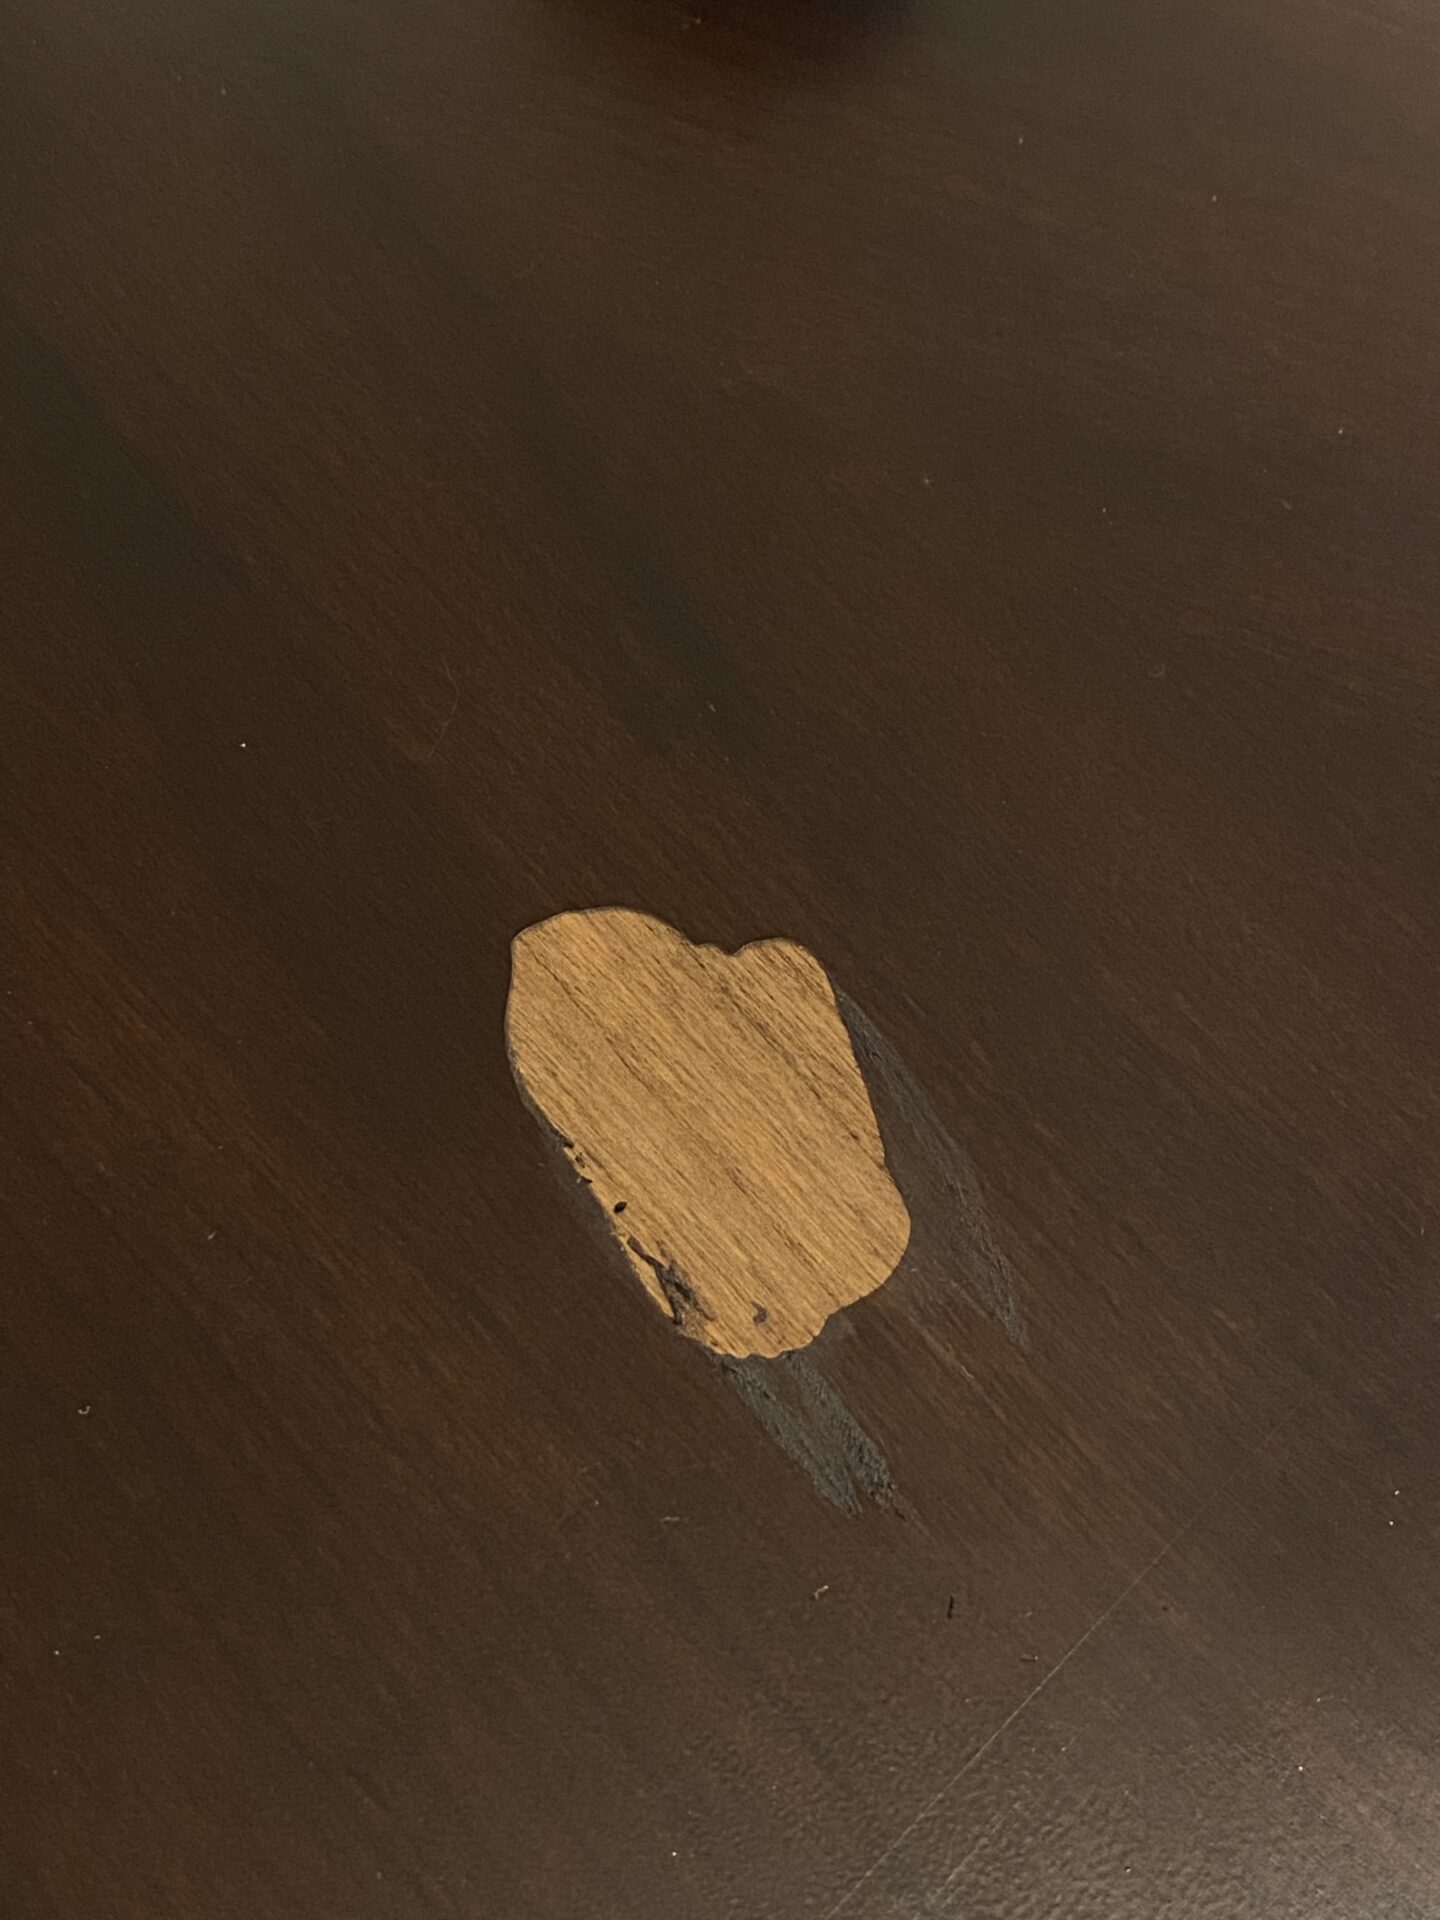
Just look at that natural wood color peeking through! So pretty. This got me really excited to tackle the rest of the top! When I apply the Jasco Paint & Epoxy Remover I like to use a brush that I don’t care about and intend to throw away. Don’t use your nice brushes for this step!
*Tip: To make your brush last for the whole stripping process, you can put it into a gallon-sized Ziplock bag in between uses.
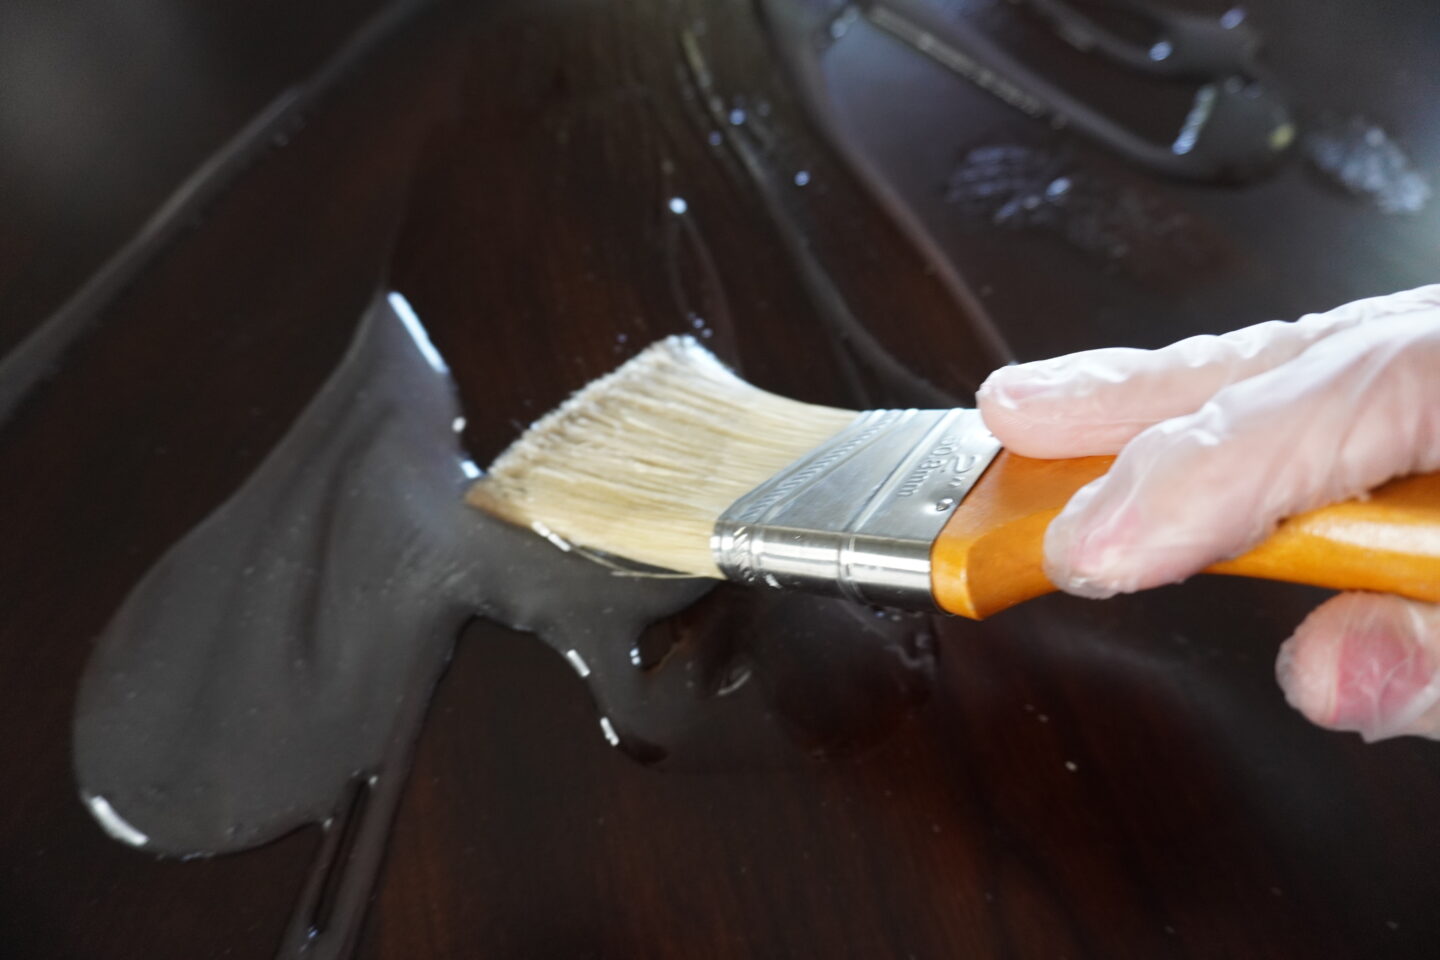
When working with Jasco Paint & Epoxy Remover, you will want to work in small areas. You don’t want to cover your entire piece with it right away because you will want the gel to still be wet when you remove it. It’s important to remember to use your Chemical Resistant Rubber Gloves when using this product and also work in a well-ventilated area. It’s strong stuff!
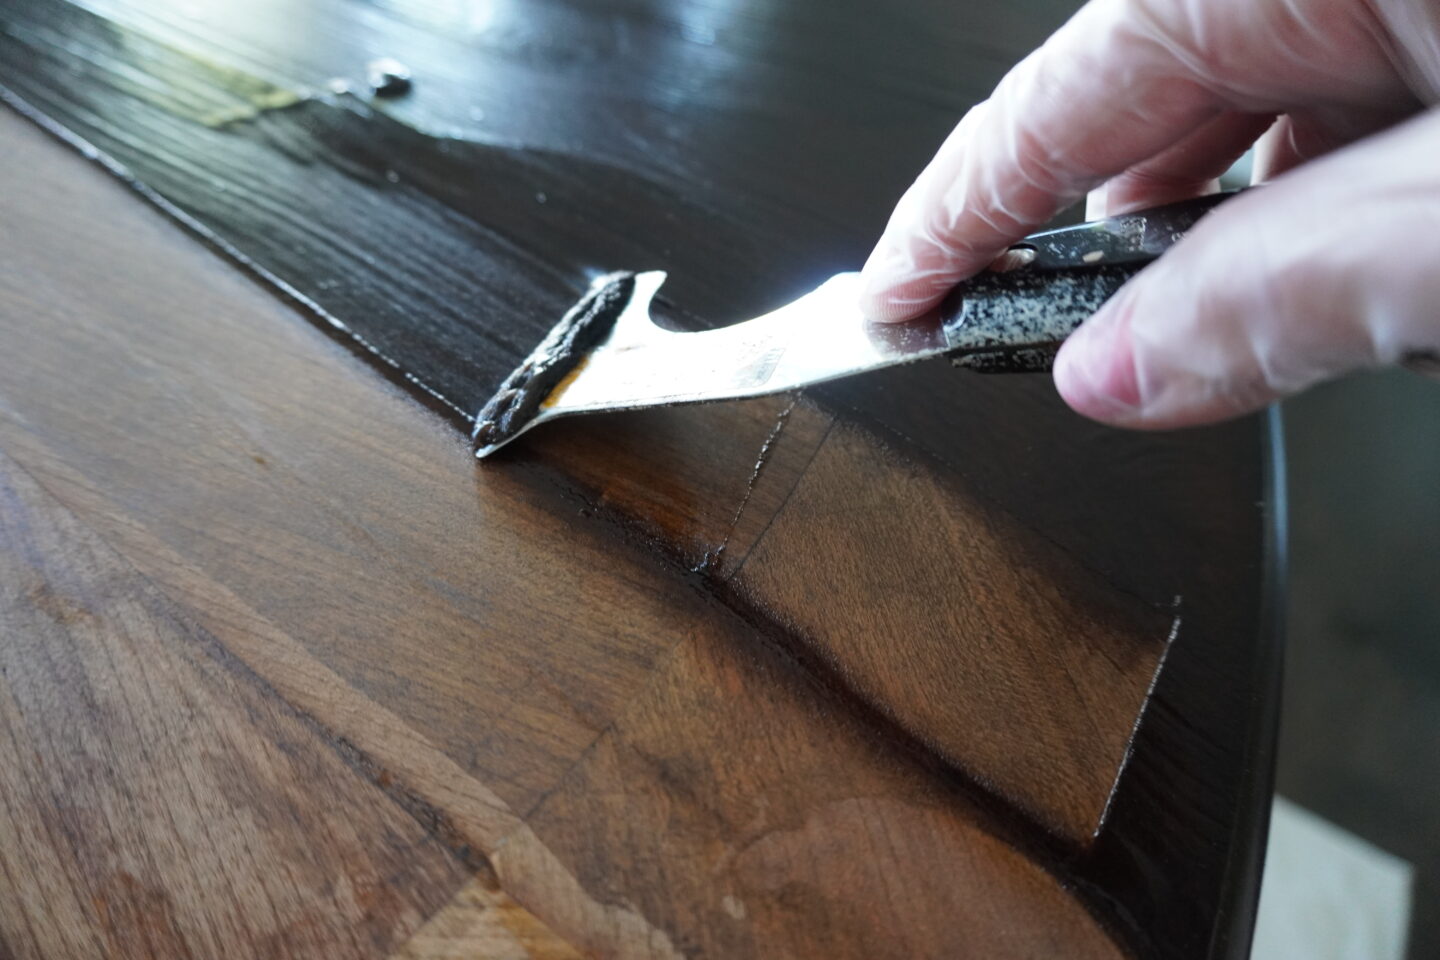
Stripping Stain
After about 10 minutes, my first layer of gel was ready to be removed. I like to use this scraper tool to take off old paint and stains, it just makes for quick and clean work!
I started with half of the table first, but I wanted to quickly show you the before and after of how the wood looks! Right after stripping is on the left, and after it’s dried is on the right. This is nowhere near finished, but it is looking SO good, don’t you think?


Cleaning it up
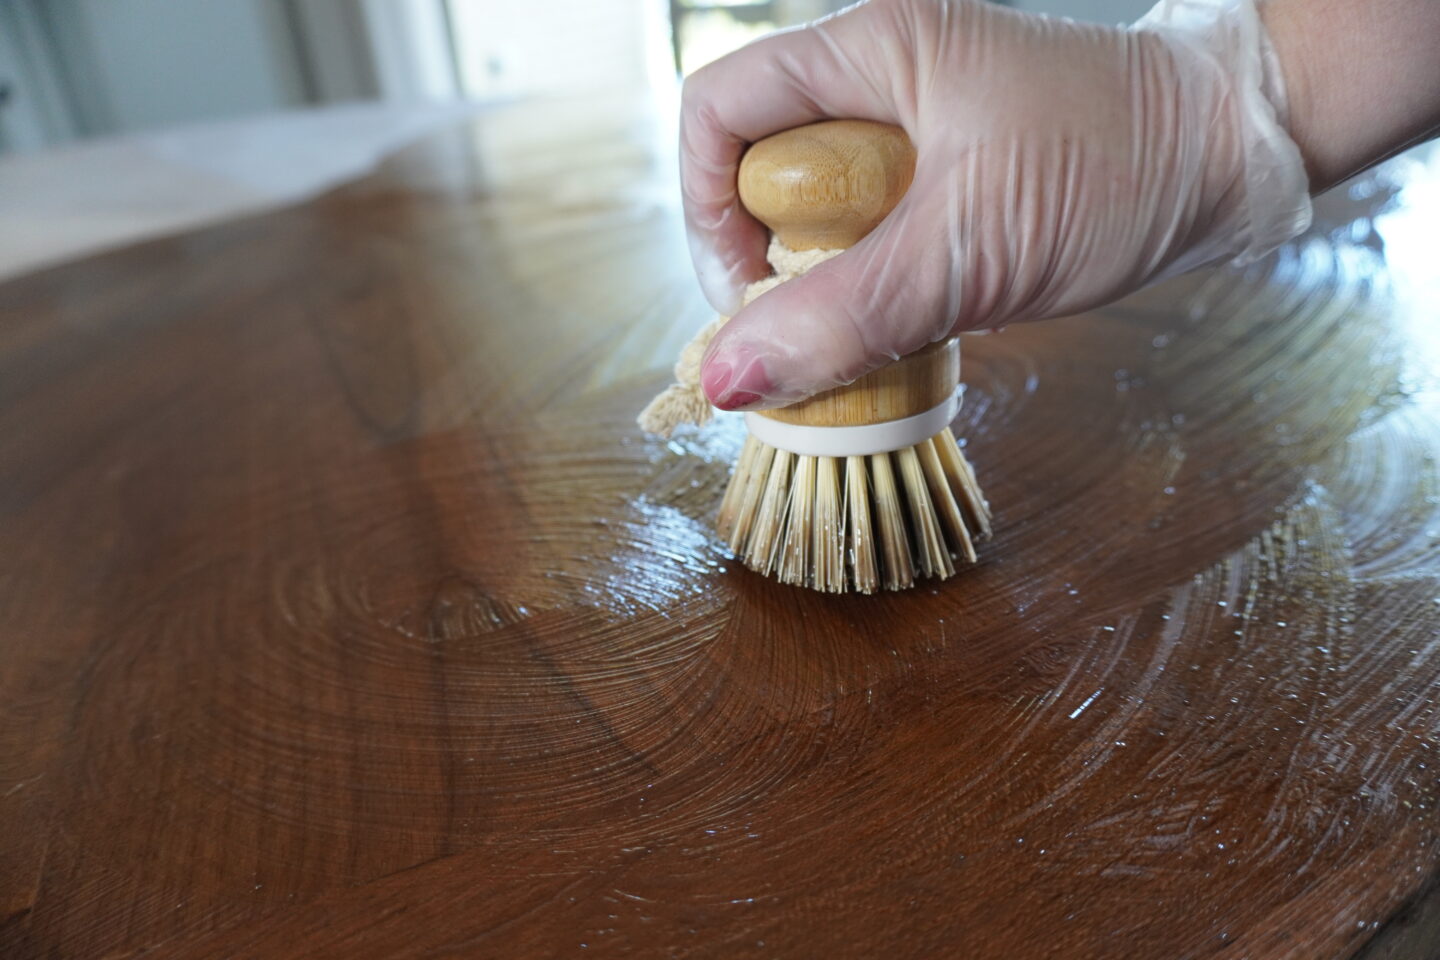
Let’s strip the rest of the top down! This part can be a little tricky because if you are working indoors, like me, it can get a bit messy. I may have scraped off a majority of the stain, but right now it’s streaky and there is residual stain here and there. To get off the remaining stain, you will need a scrub brush and more Jasco Paint & Epoxy Remover.
Apply the Jasco Paint & Epoxy Remover all over the top of the table by using the brush we intend to toss afterward. There is no waiting time for this layer of Jasco! Immediately get to work on scrubbing in gentle, circular motions with your round brush to loosen the remaining stain.
Washing it down
Washing down a project indoors can be a challenge, but it’s definitely doable! Grab a plastic bucket and fill it with warm soapy water (I like to use Blue Dawn), and a Sponge Daddy sponge. Soak your sponge in the soapy solution and gently wipe the tabletop, making sure to clean the entire surface. Clean your sponge in between wipes and change your water out frequently.

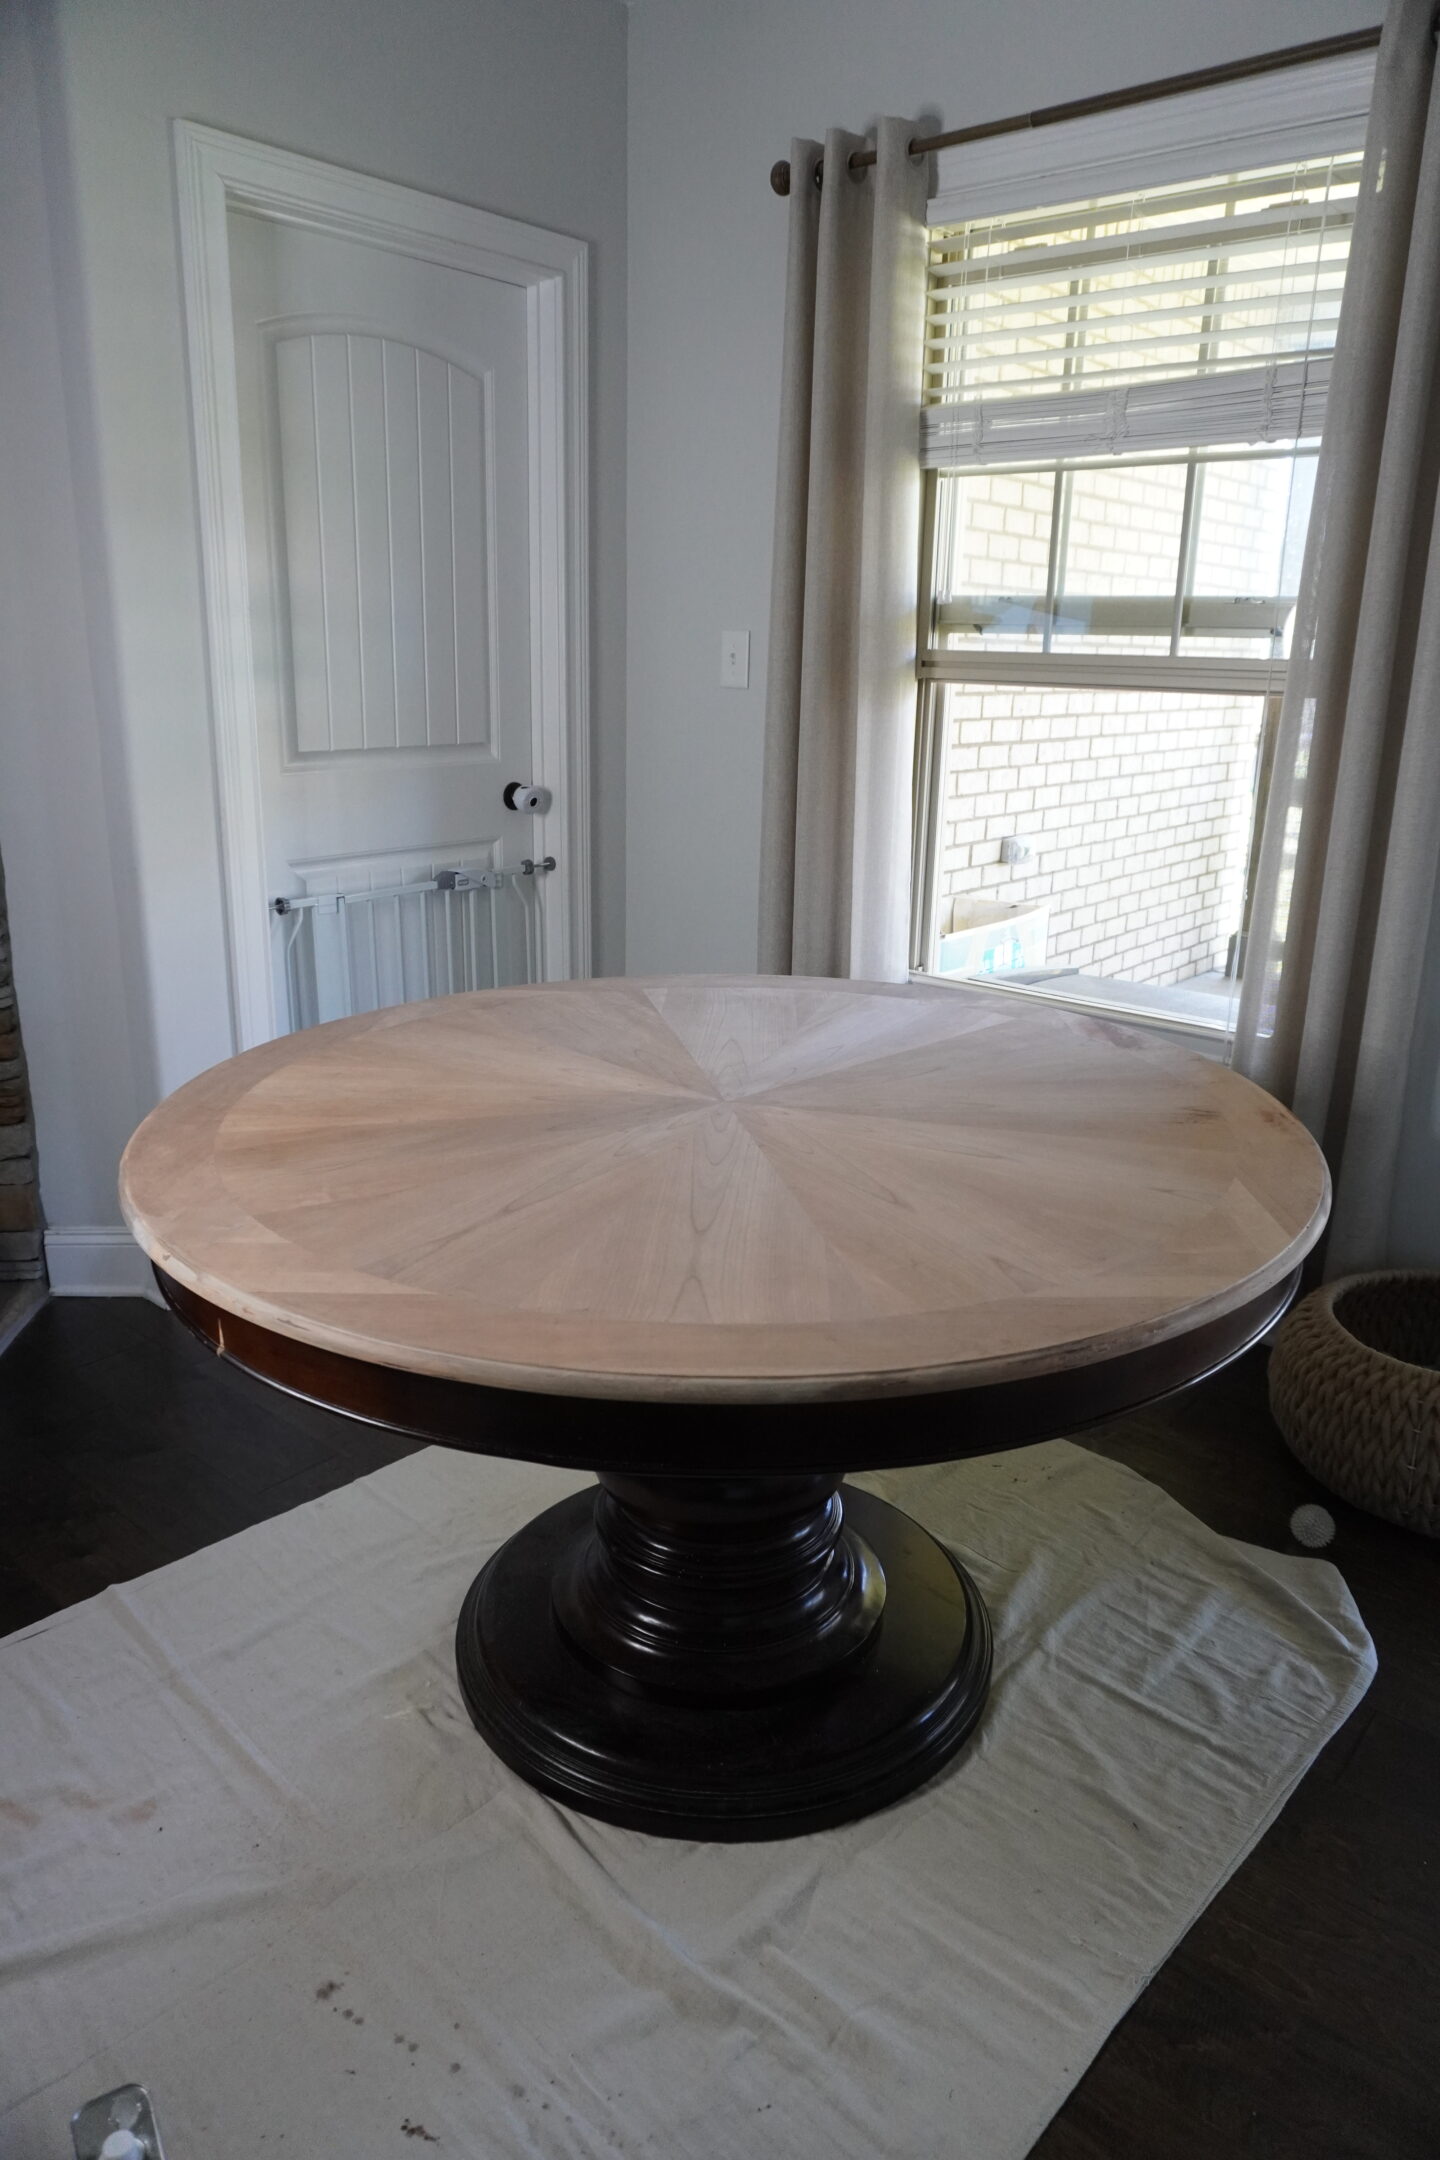
Once you have finished with the soapy water, get a new sponge out and some non-soapy, fresh water in a bucket and repeat the process to rinse. Let your project dry!
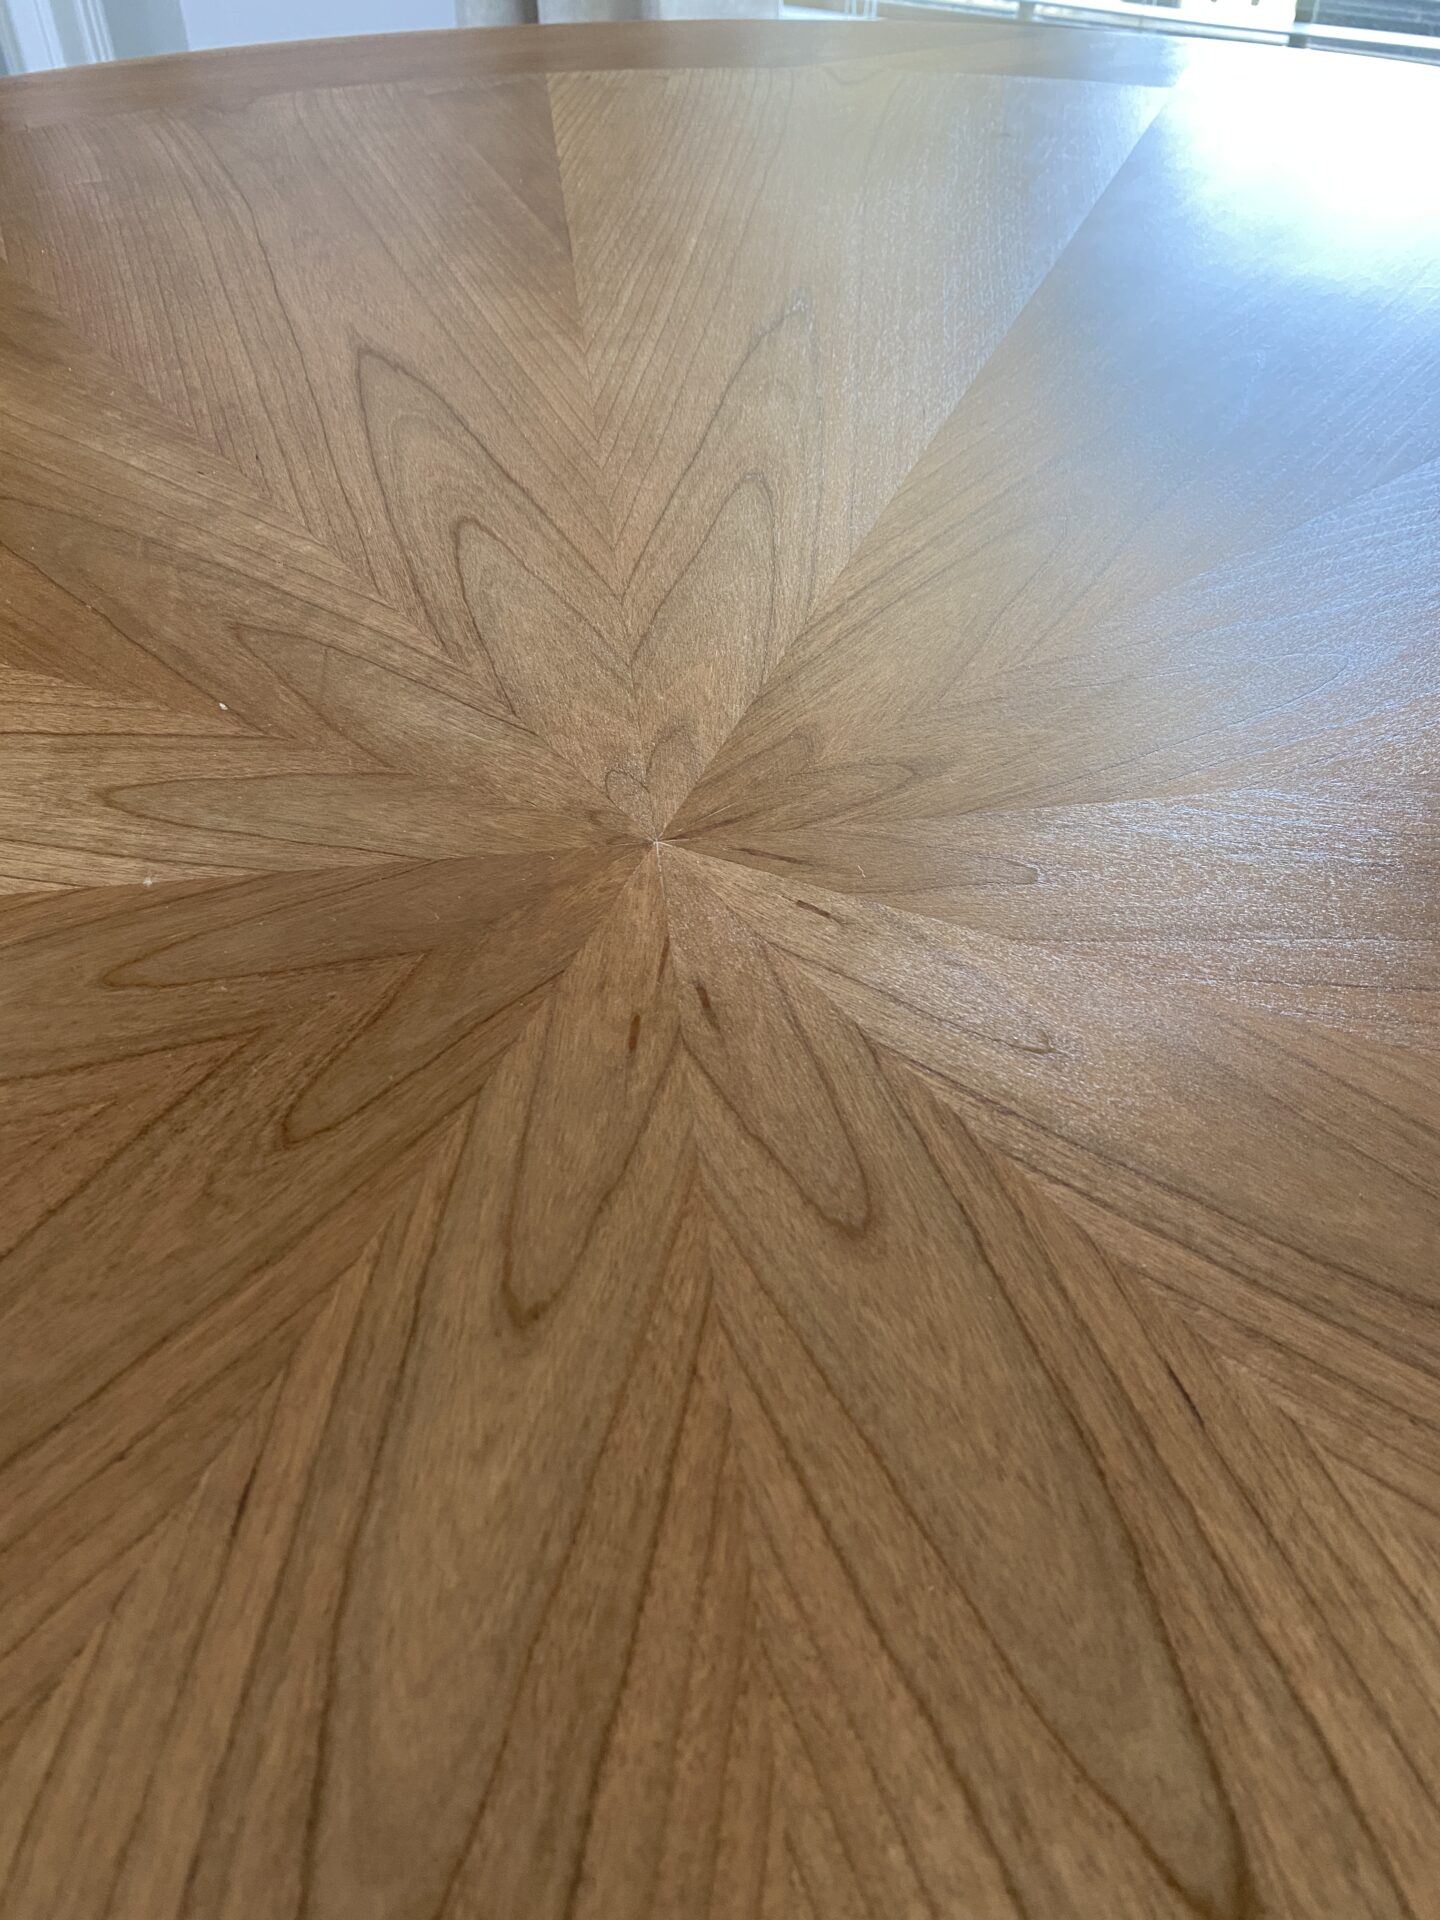
Look at that gorgeous natural wood top! I am loving how this is turning out.
Time to Prime
At this point, as much as I wanted to go ahead and finish the top, I really needed to start on the base first. For this part of the project, you will need another brush you intend to dispose of after use, some rubber gloves, and your Kilz Primer.
If this weren’t a red-based stain on this table, I would have gone the chalk paint and polycrylic route, however when you have a red-based stain, it is always best to use a Primer and then a stain-blocking paint over that.
*Important: using polycyclic over a red-based stain will turn your project orange! Just don’t do it.
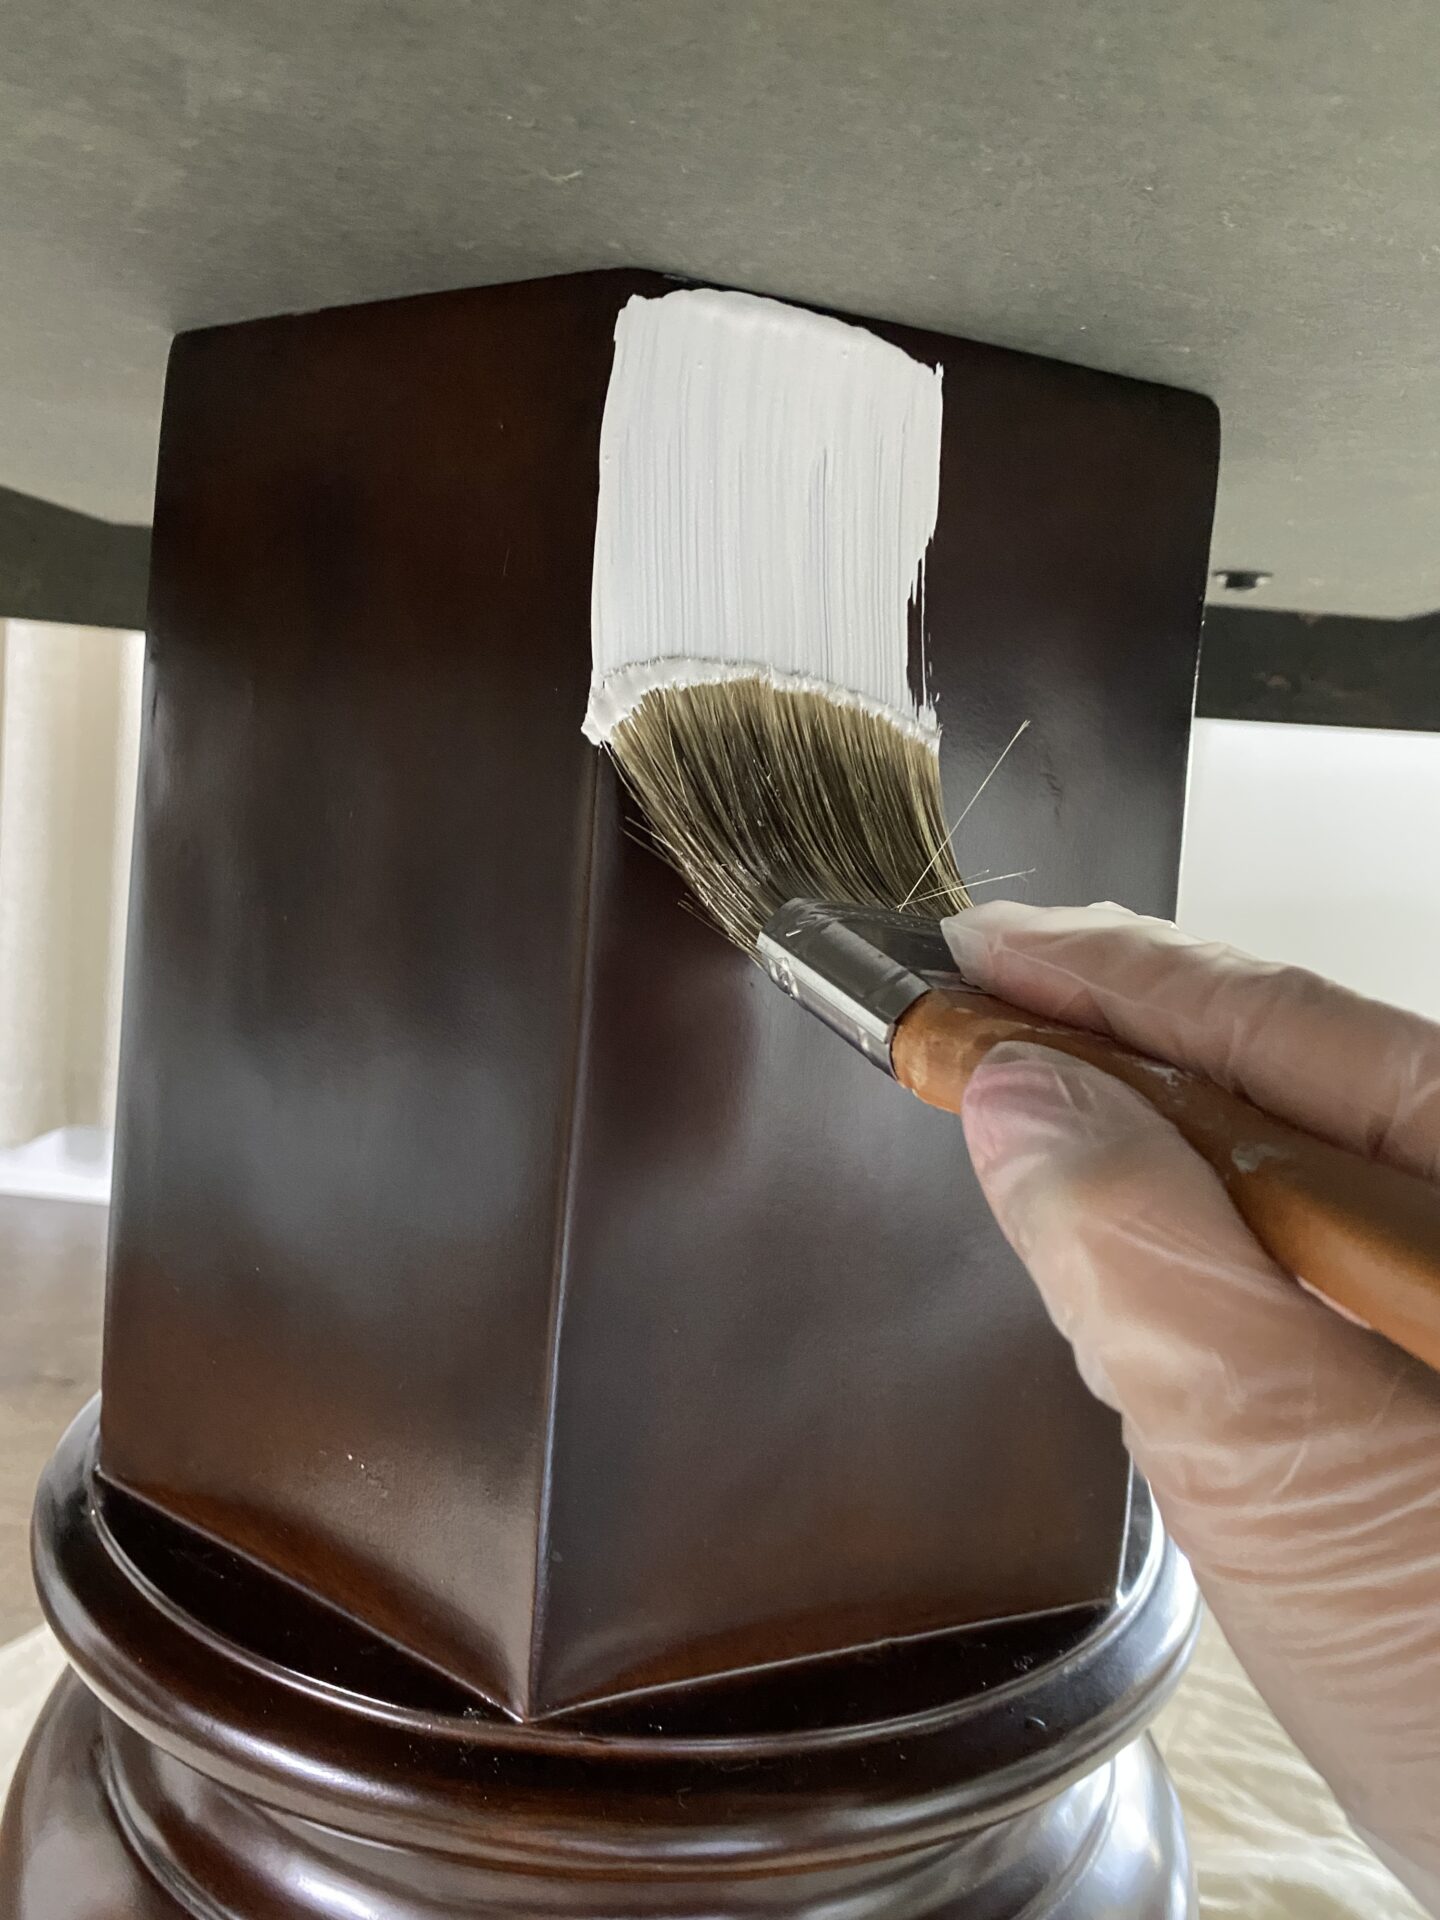
I am starting with the base of the table first, and directly painting over the stain with my Kilz Primer. No sanding is required, just a clean surface.
You may notice I saved the apron for last, and that is because I didn’t want to get Kilz all in my hair while I painted the base LOL!
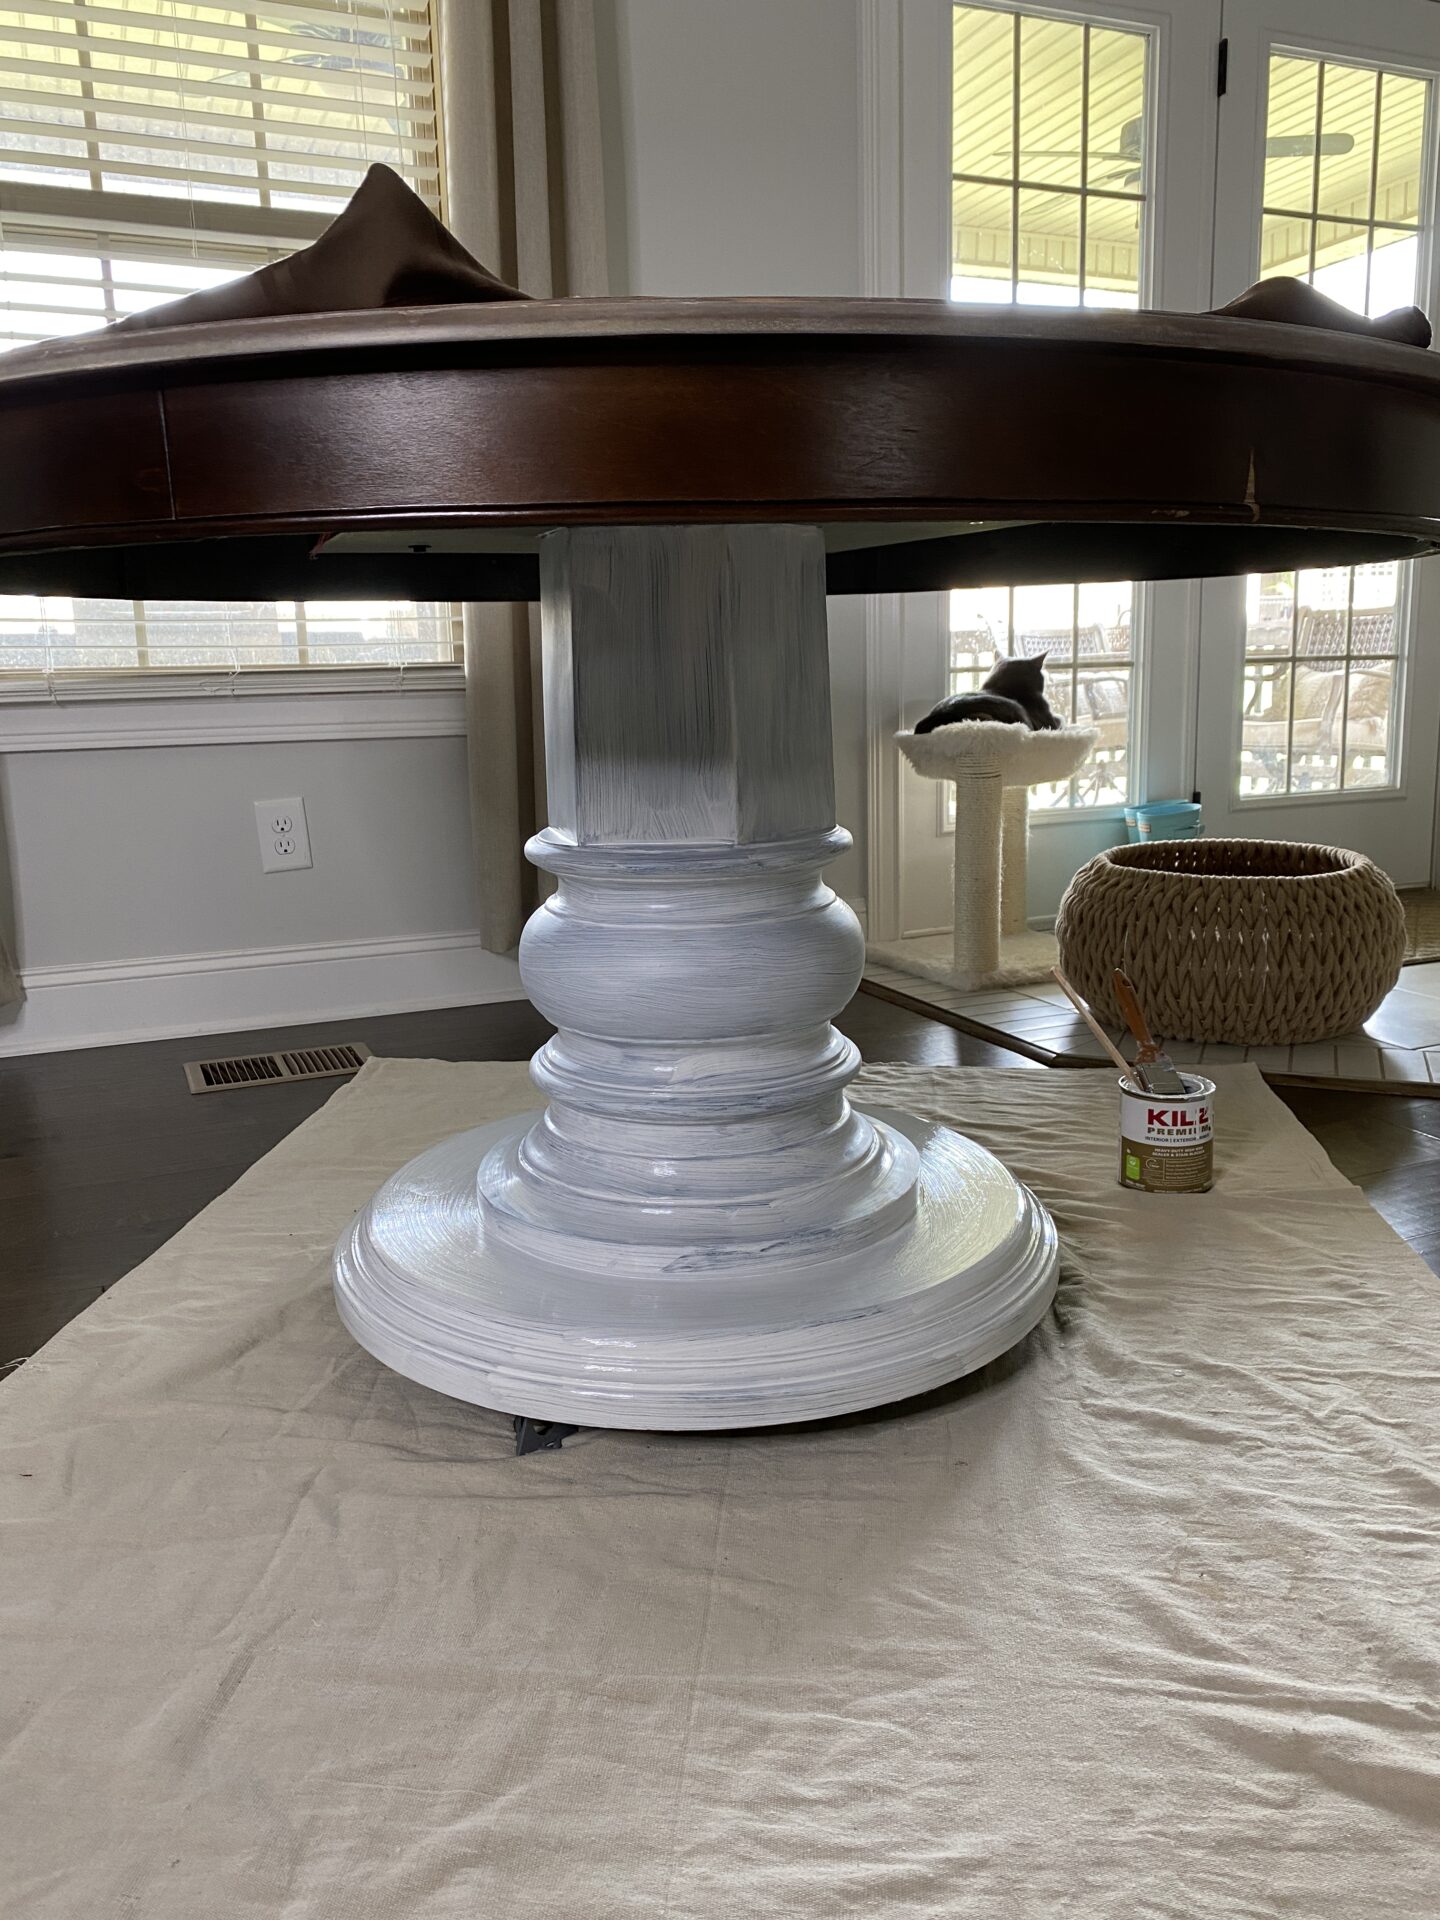
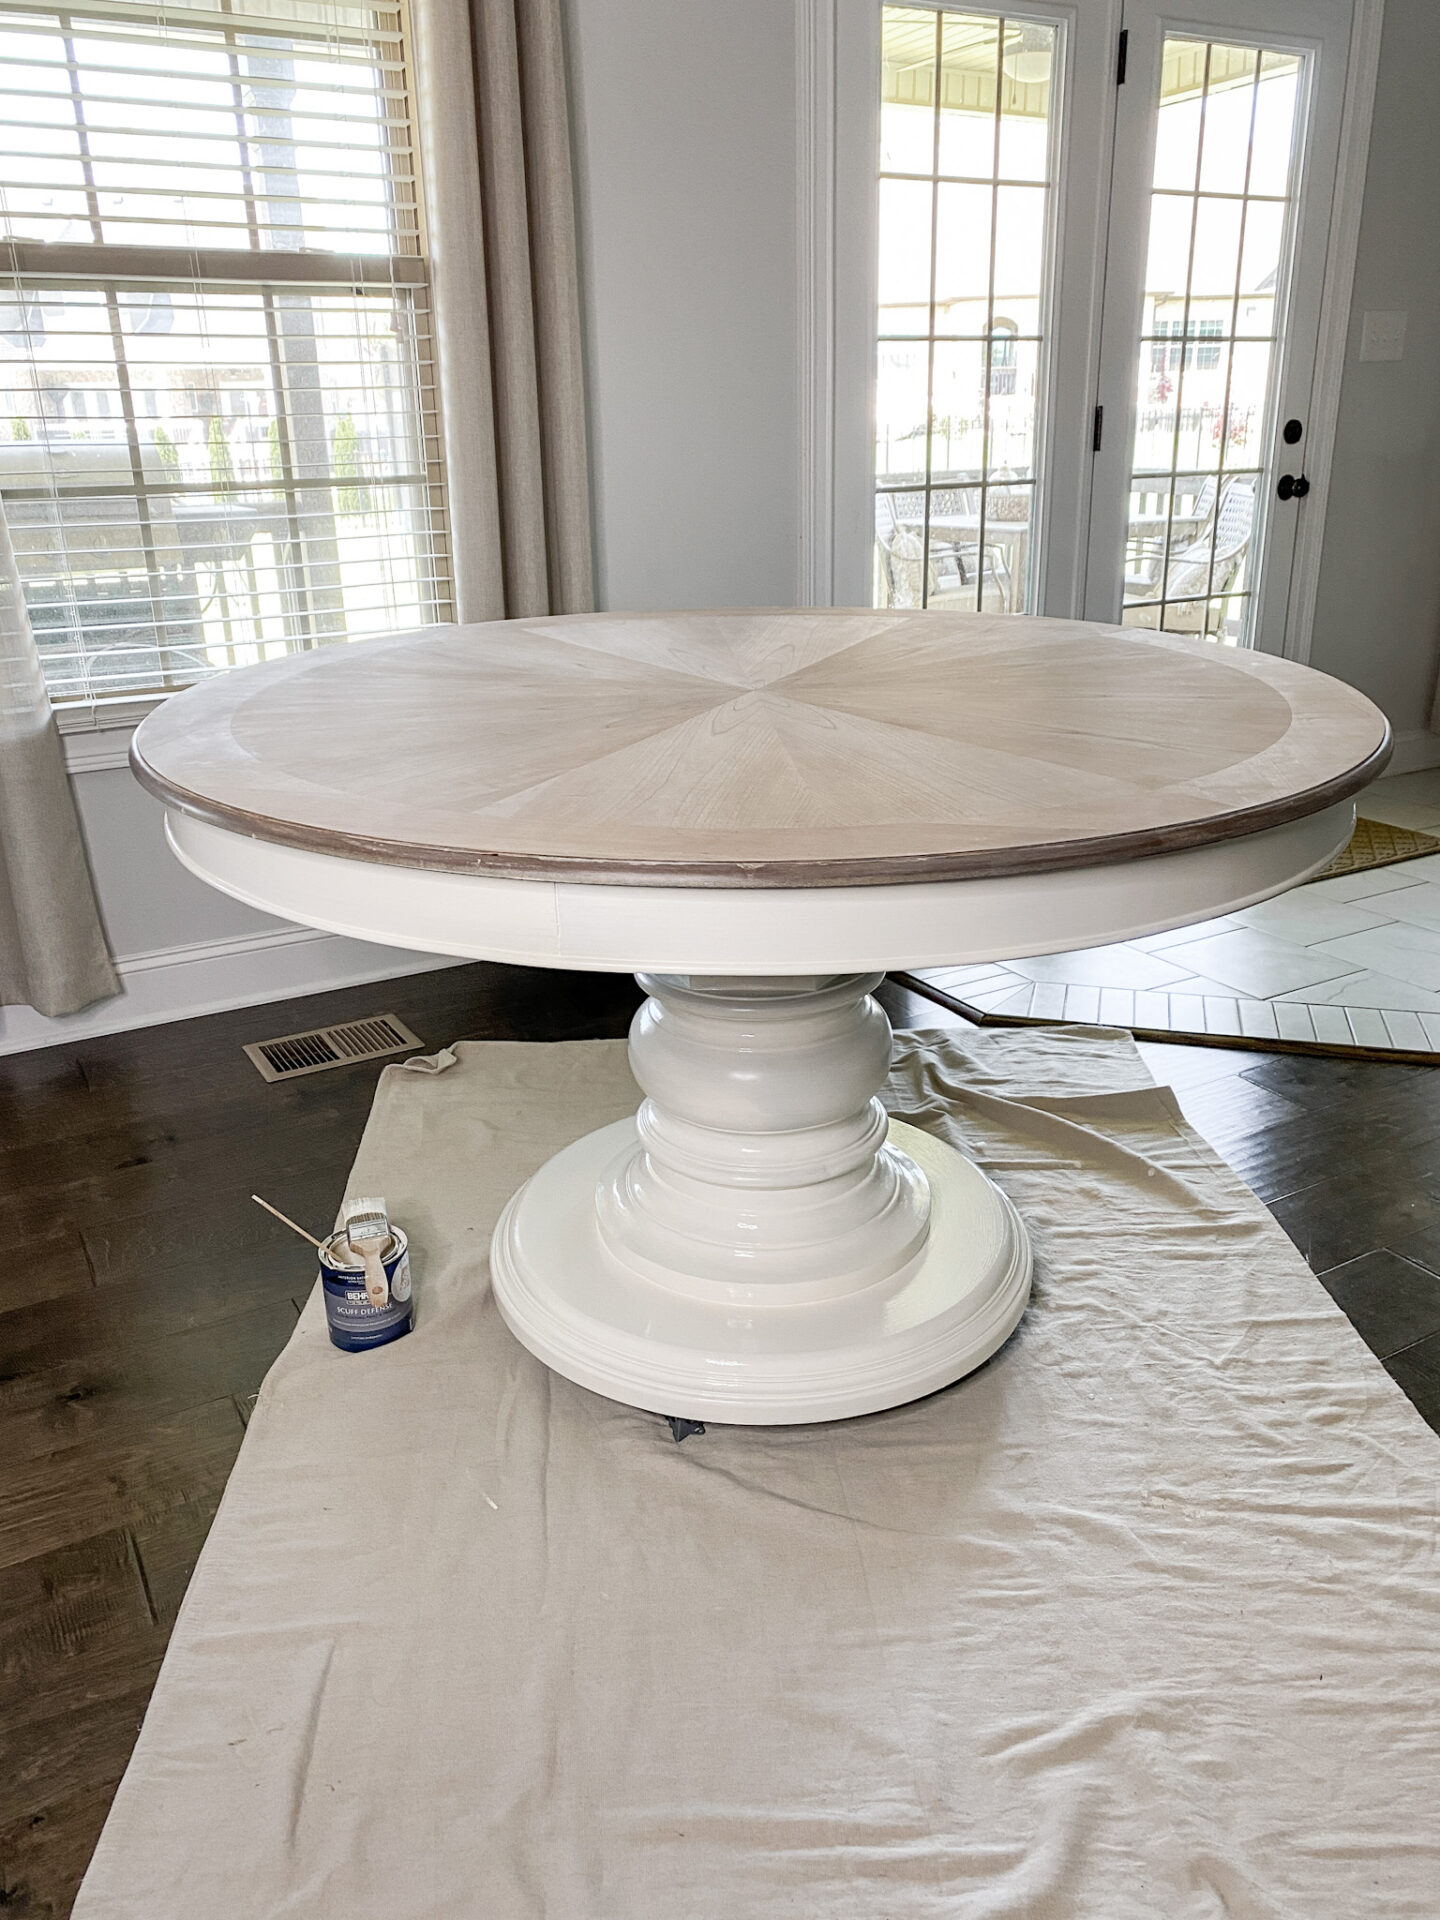
Look guys! We can finally see how it might end up looking like. I feel like there is a light at the end of the tunnel now. Now that the Primer is on, we just have to let it dry for about 2 hours before we can paint.
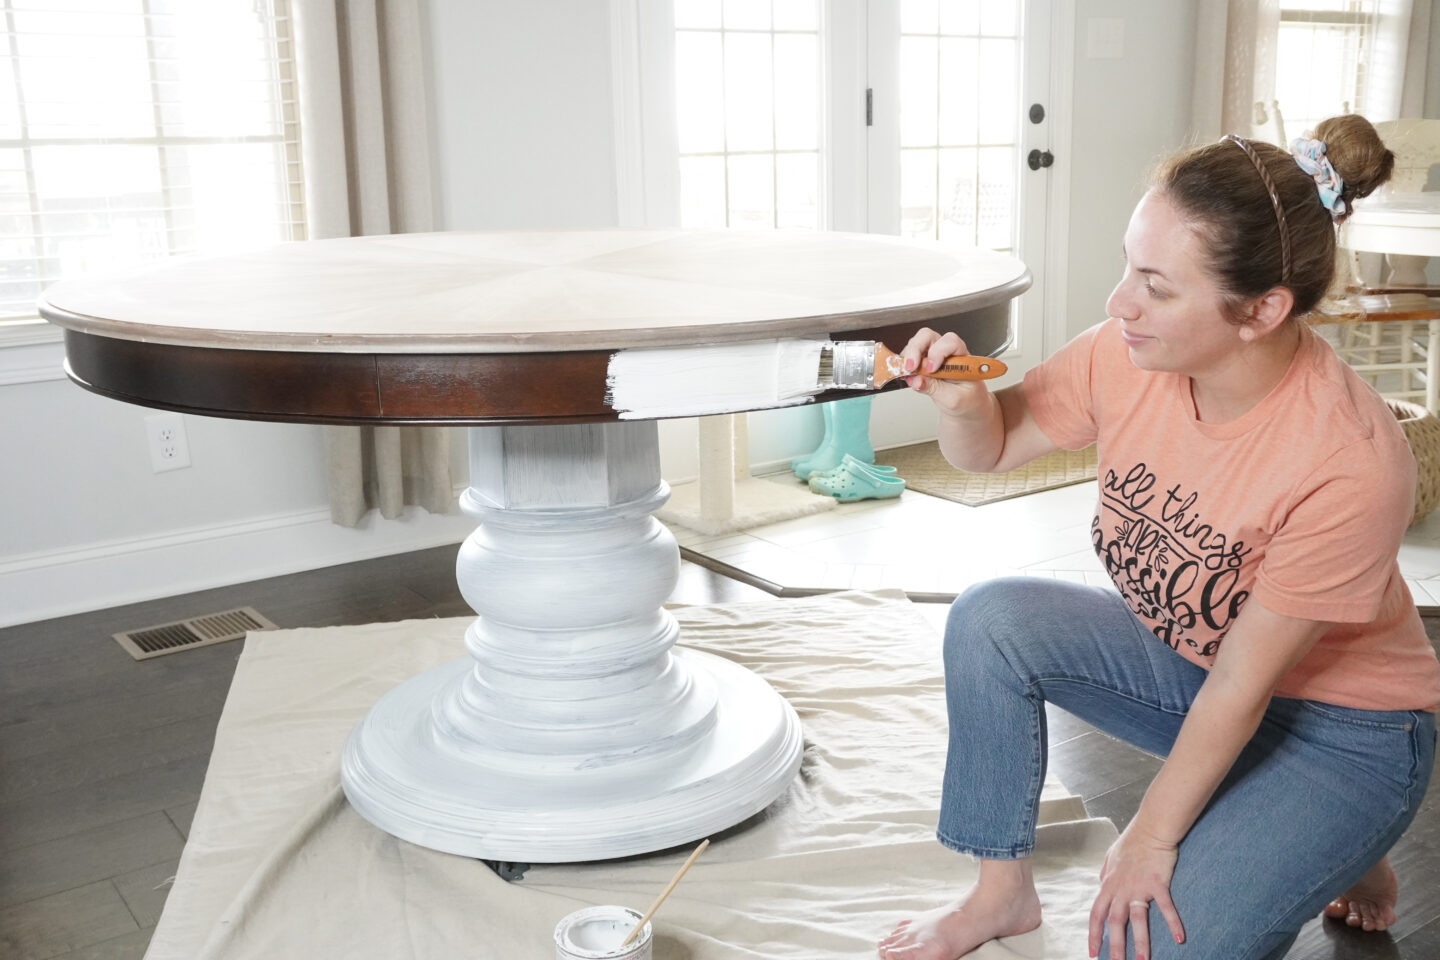
Time To Paint
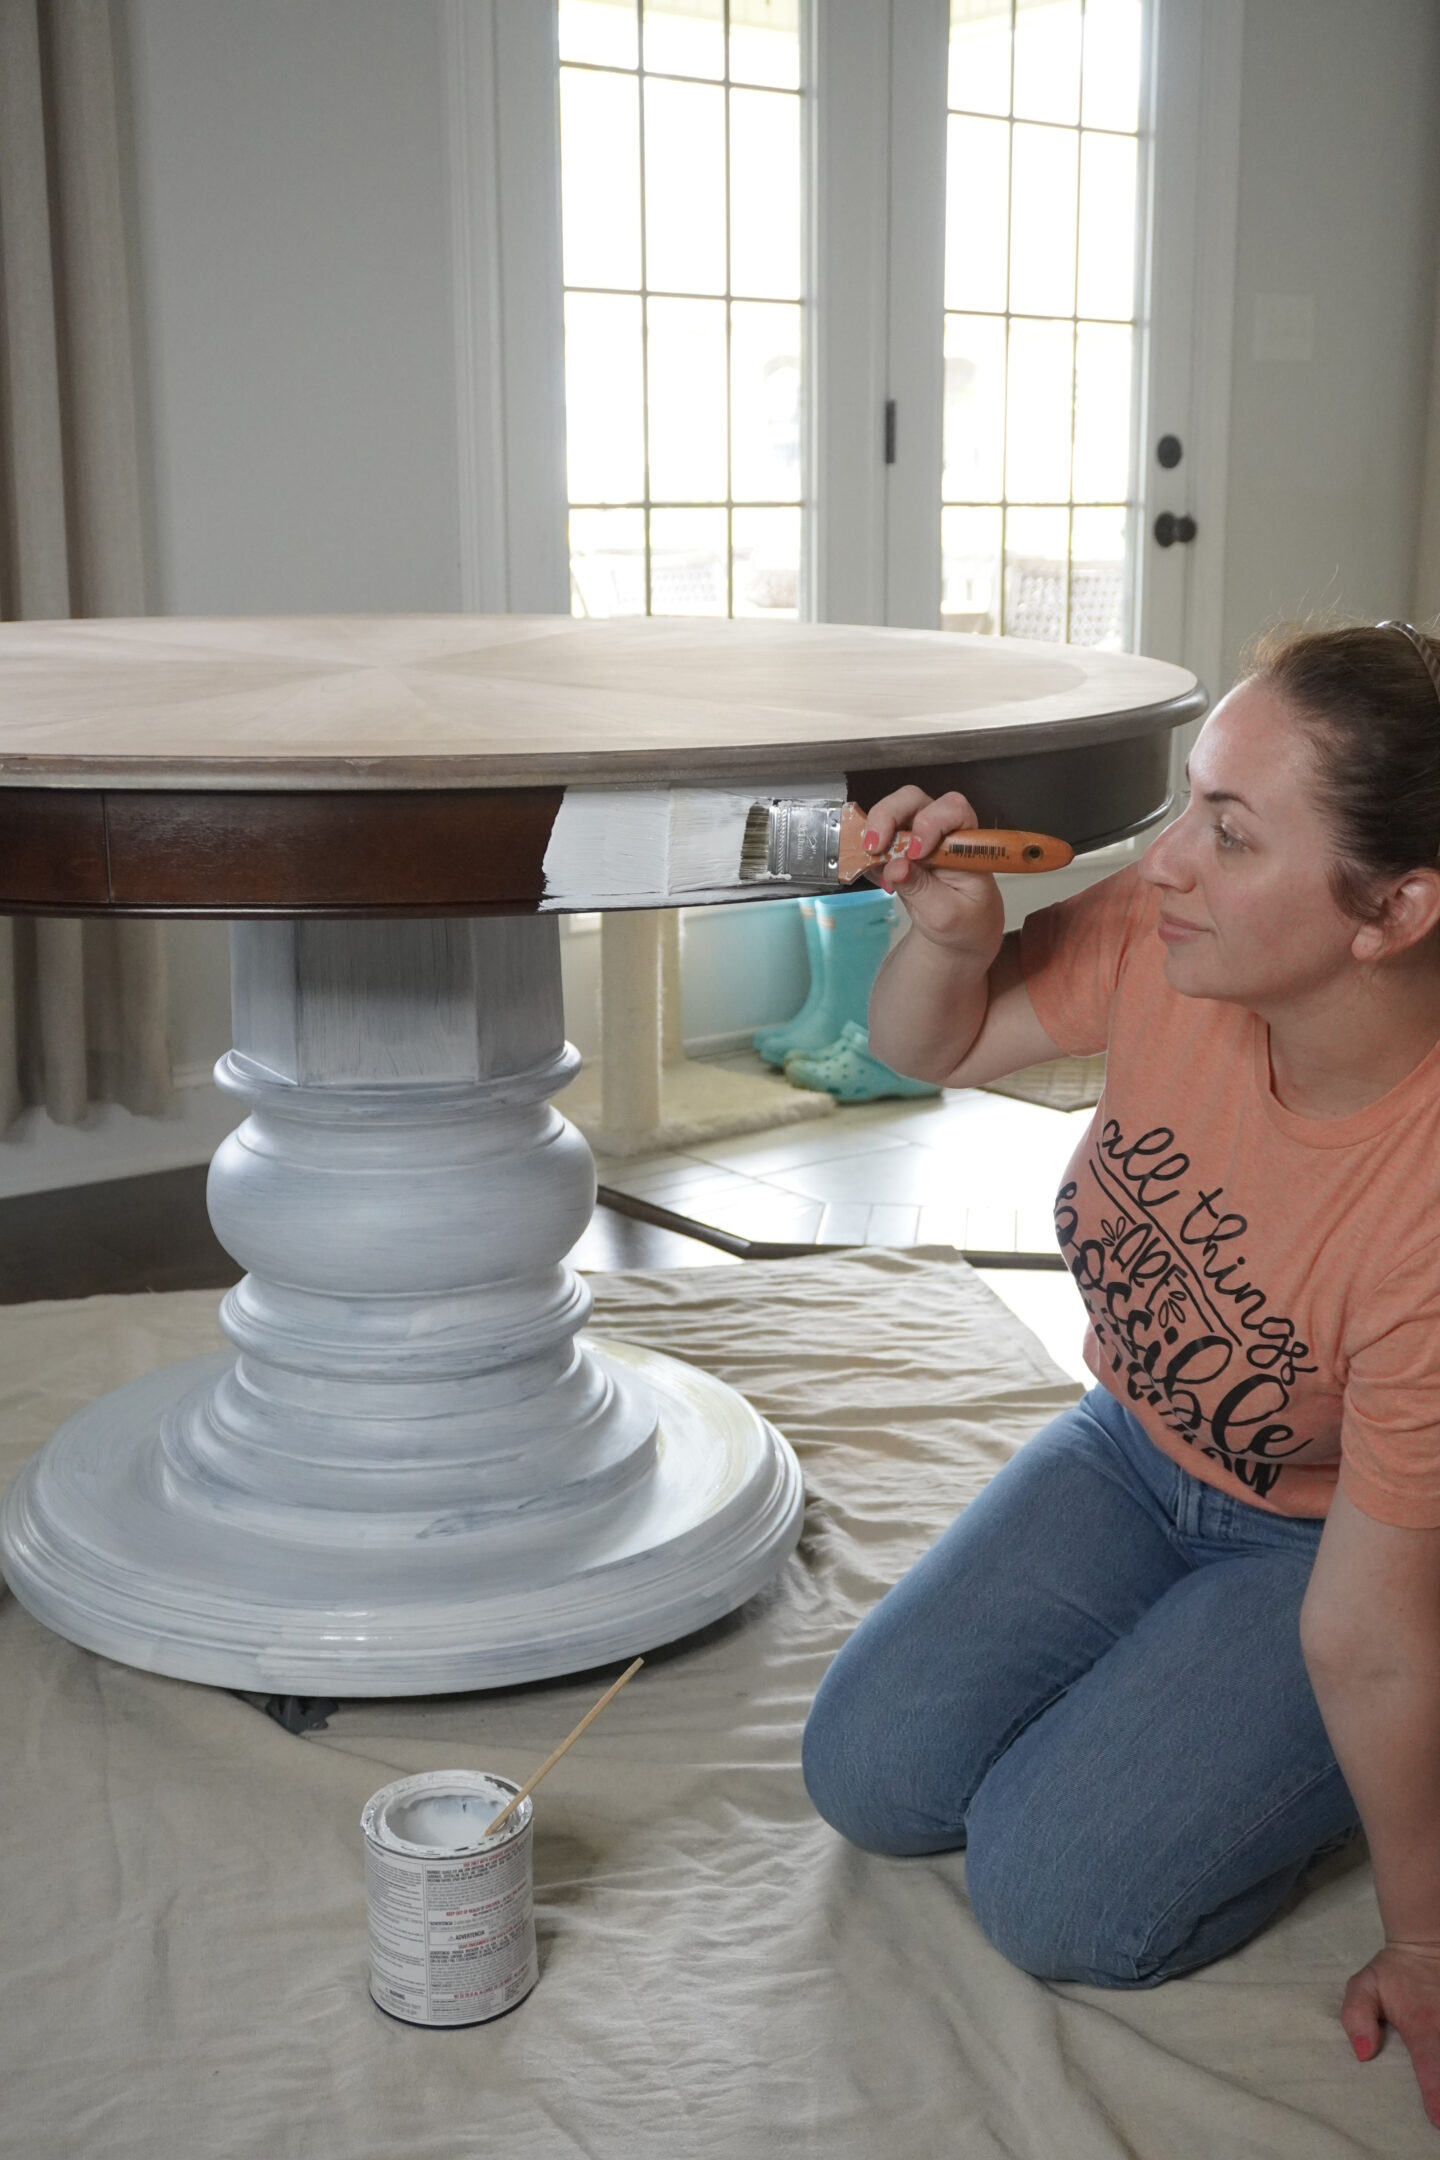
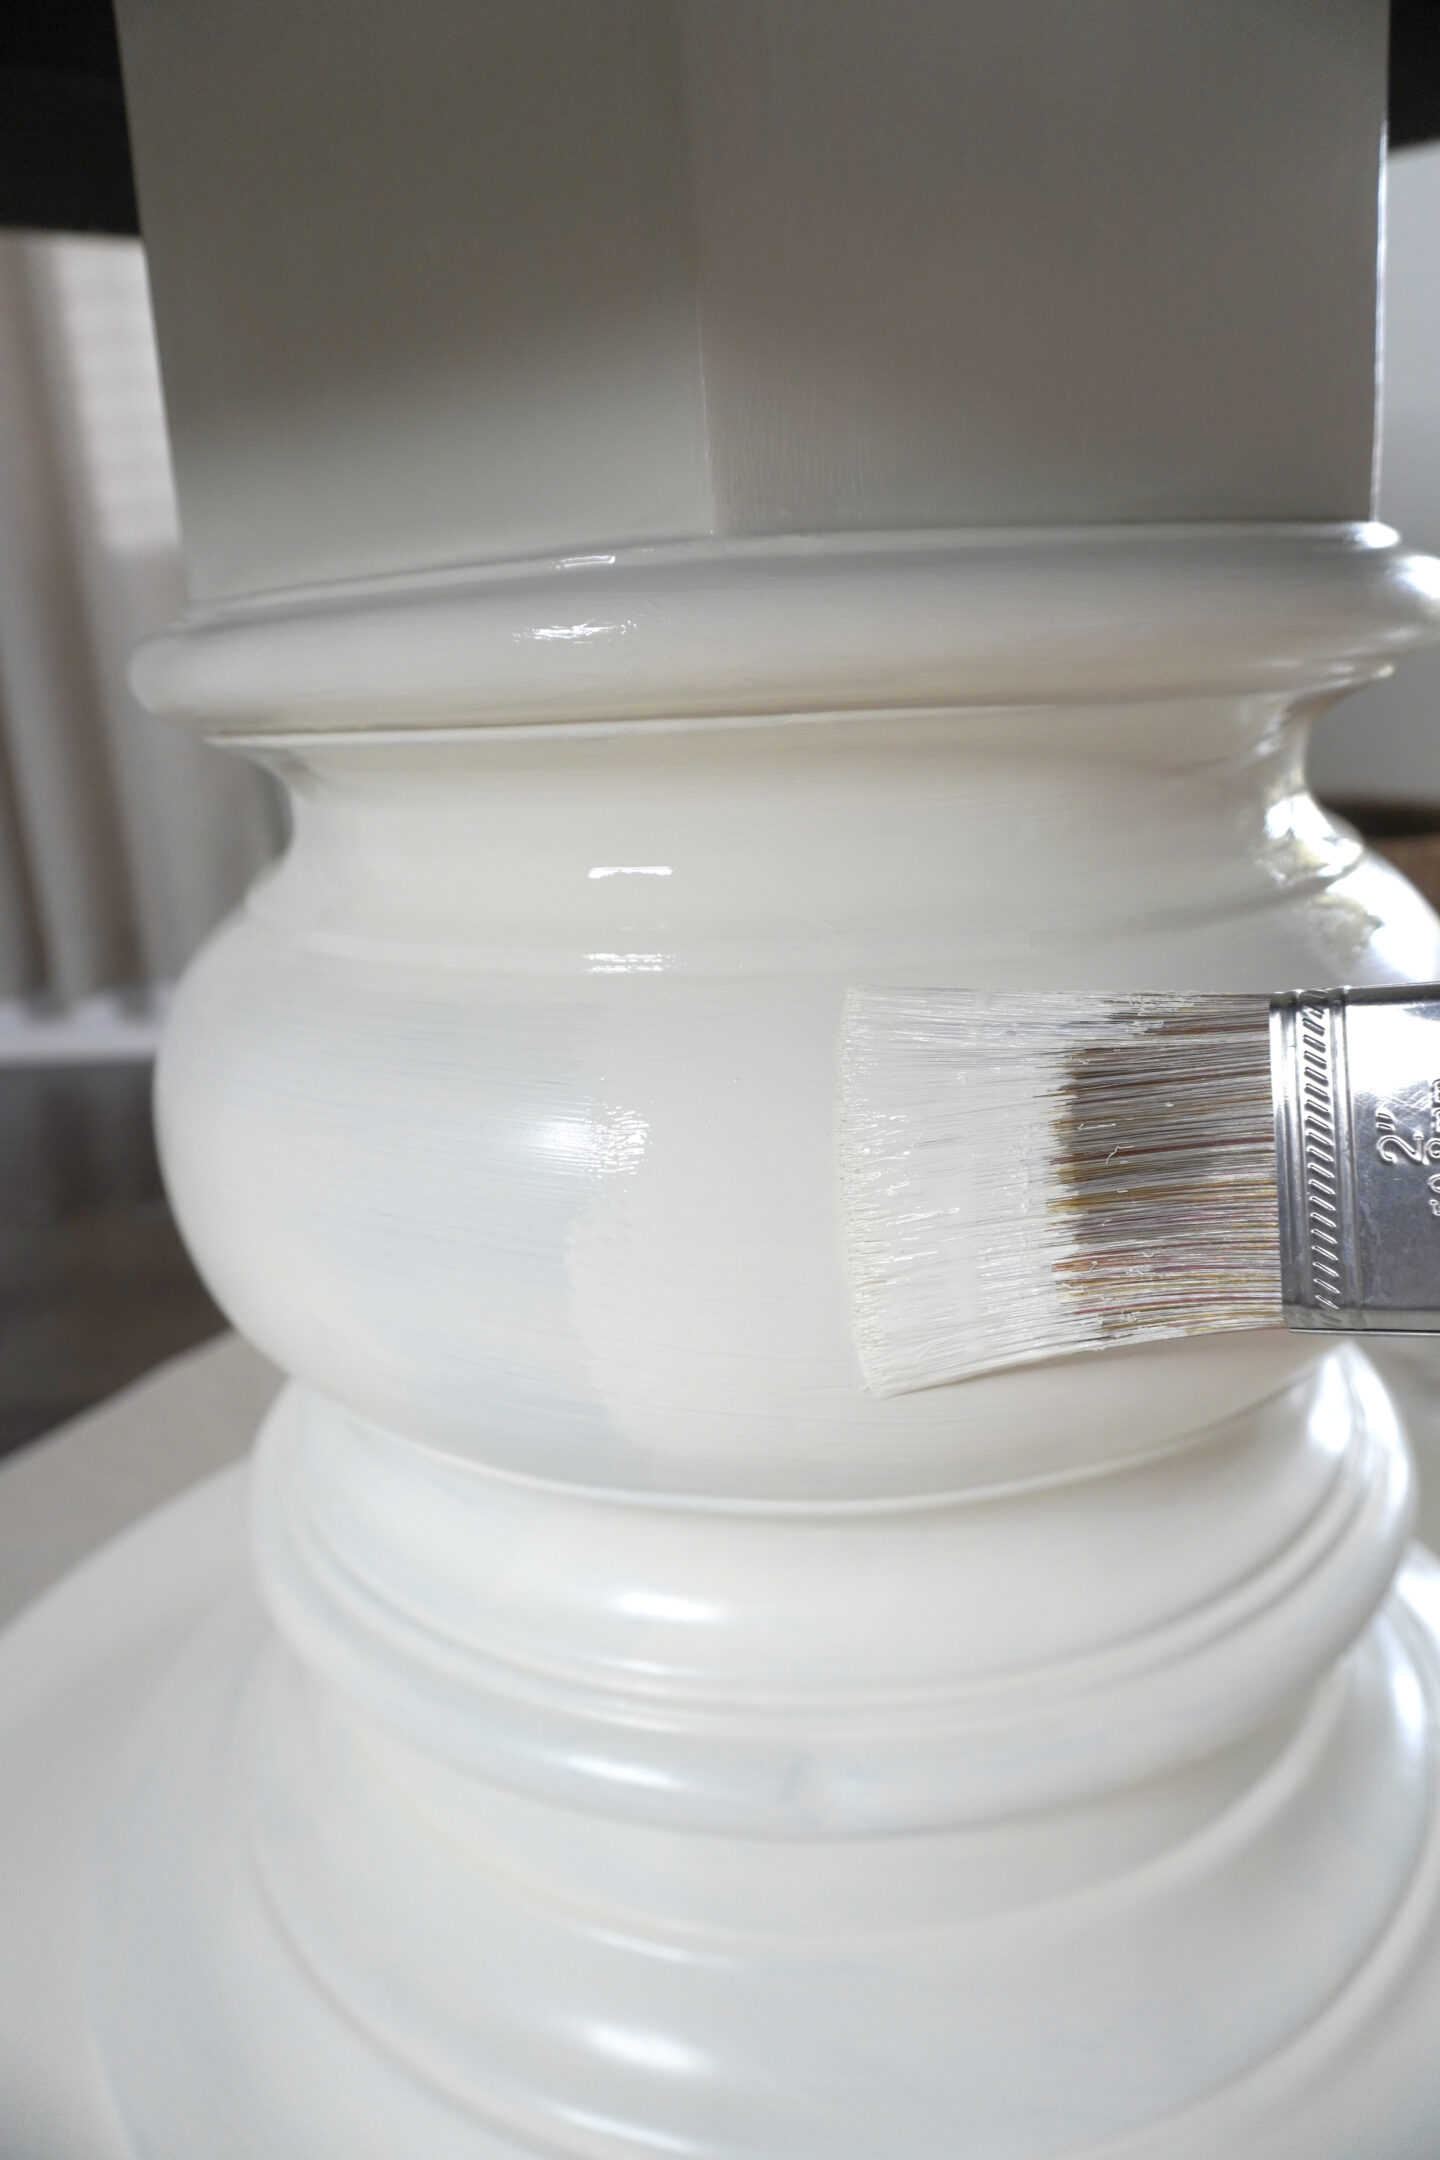
Yay! It’s finally time to paint this gorgeous table! I chose the color Cottage White by BEHR, which you can find at Home Depot. The particular kind of paint I used is the BEHR Ultra Scuff Defense paint in a Satin finish. Because my family has 3 little boys, it only made sense to get this one LOL! This paint it tough, but pretty, has amazing coverage, and cleans up wonderfully too.
The photo below is the first coat of paint. You can still see just a tiny bit of a shadow underneath this first coat, which is why it’s important to follow up with a second coat for maximum coverage.
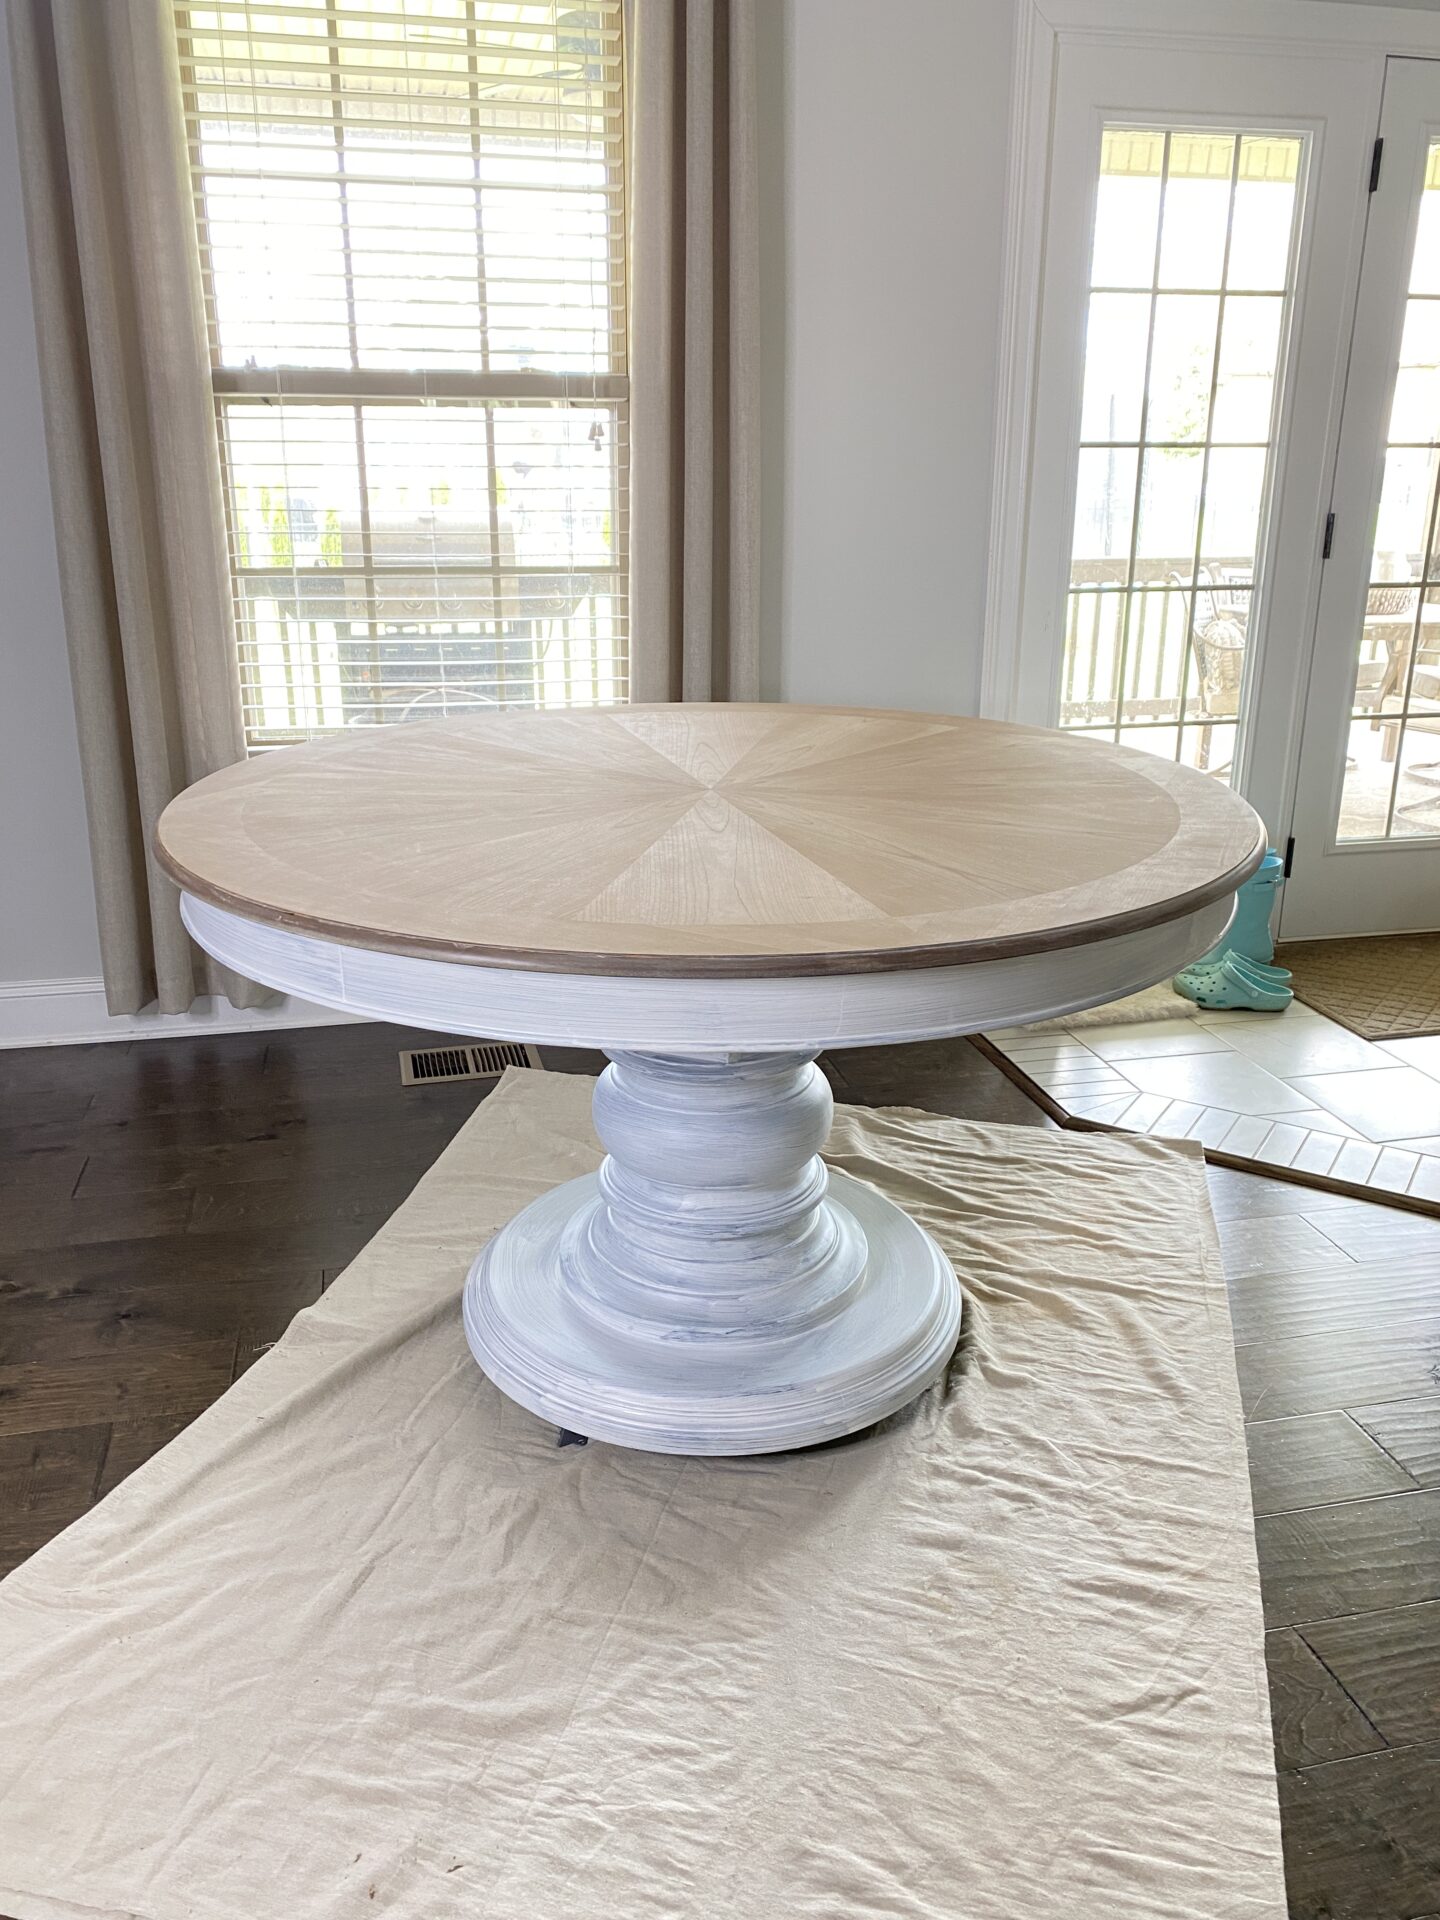
This is the final coat! You can see the difference between one and two coats here.
Normally I would distress my paint to match my furniture in the house, but I decided not to do that this time around due to the dark stain underneath. Because the top of my table is stripped, but the base is not, I didn’t want to expose a dark stain. Keeping it one solid color on the bottom turned out to be beautiful though! I am so happy with it!
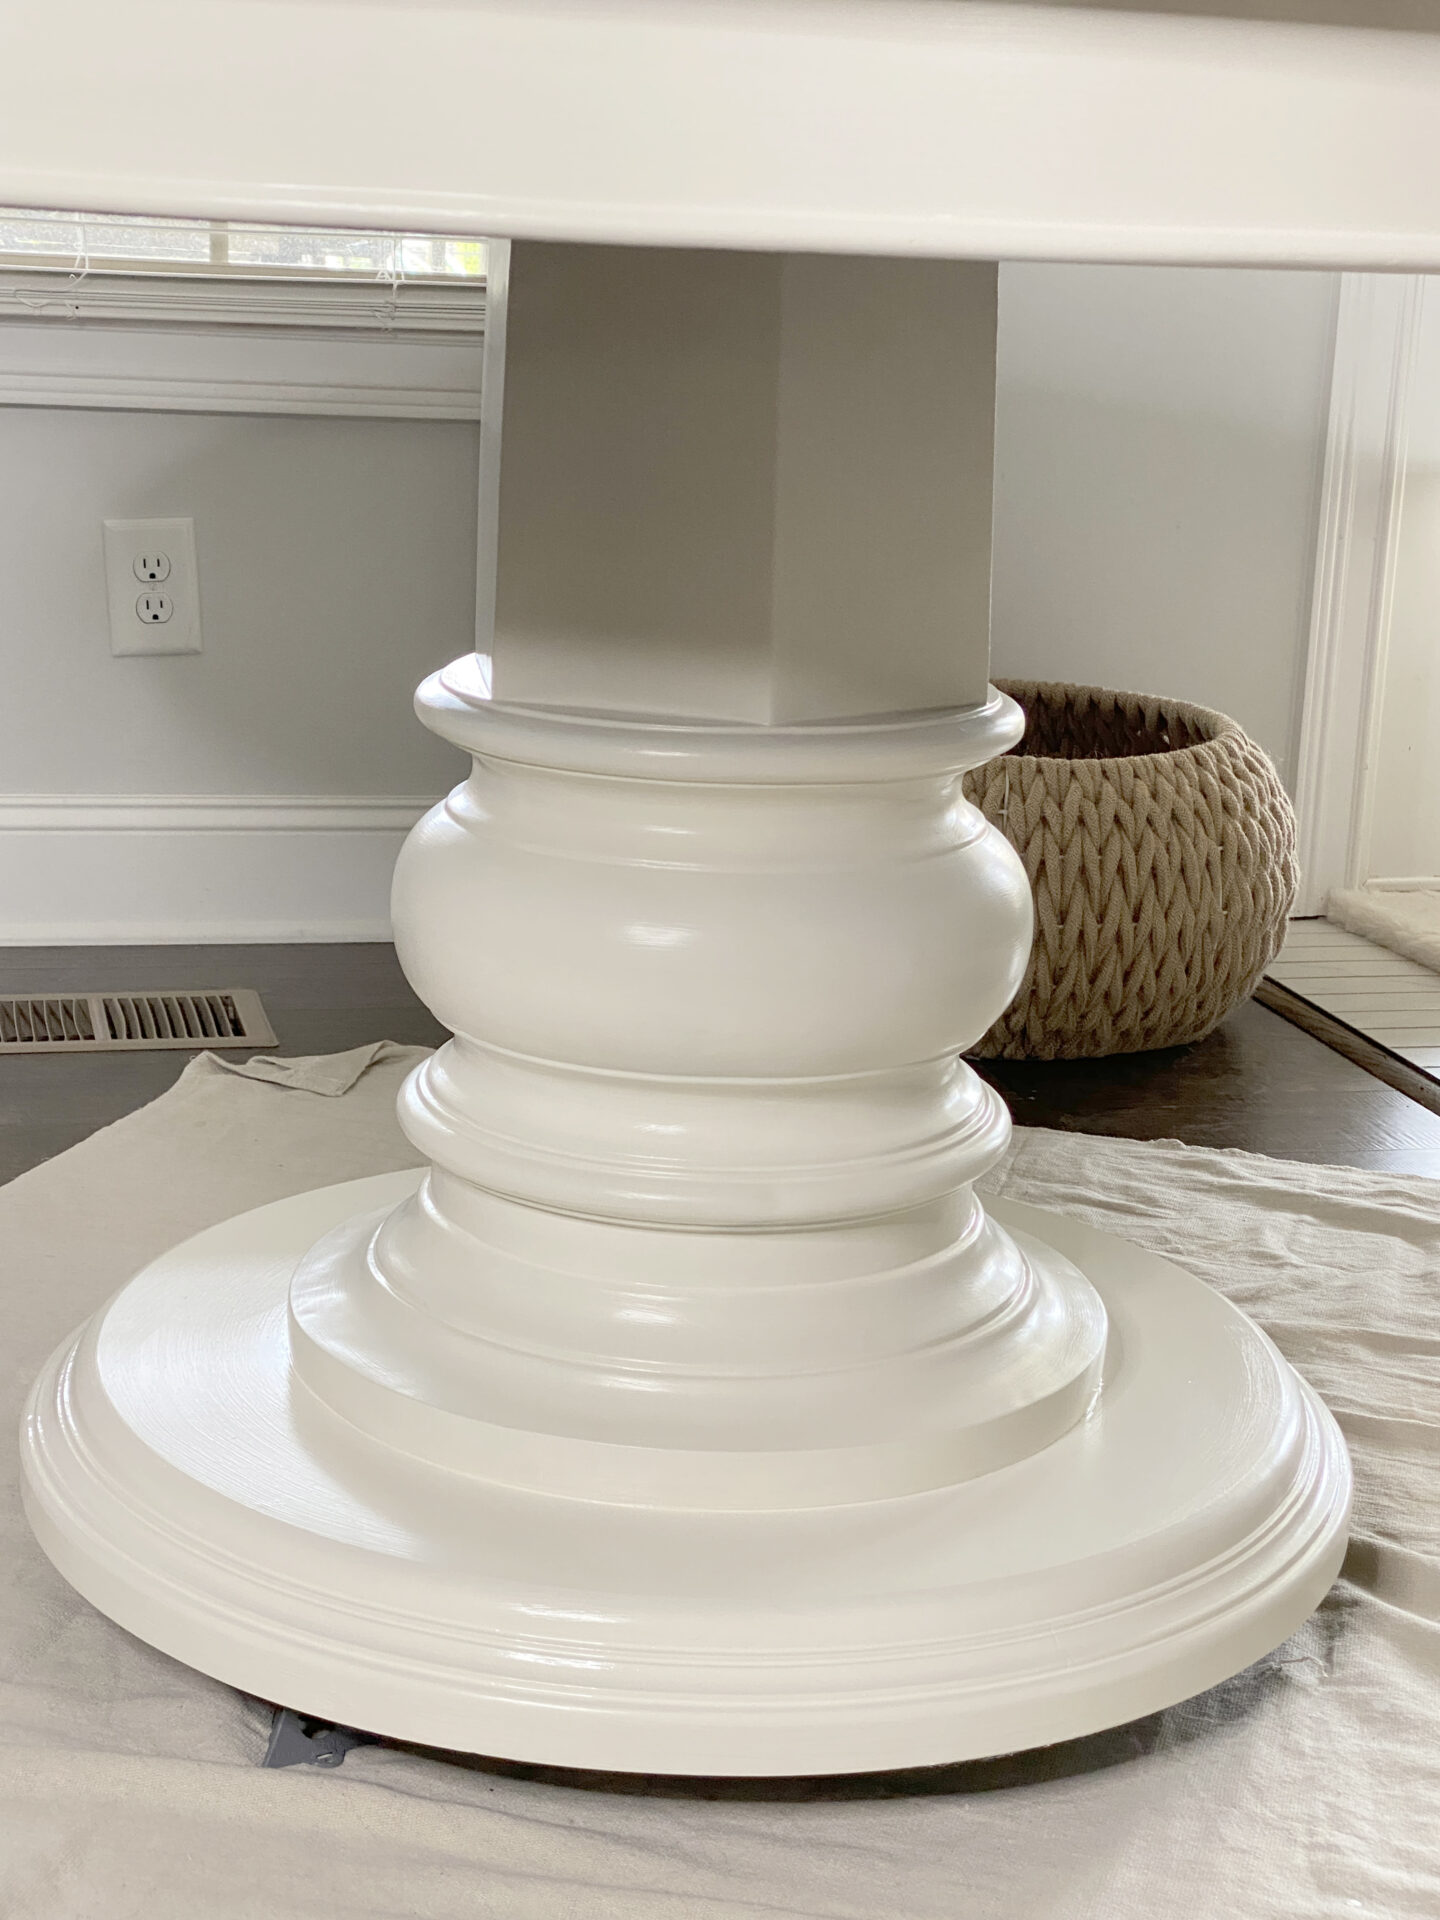
The BEHR Cottage White color is really pretty and a great match to the rest of my furniture which is painted in Renaissance Furniture Paint Ivory Tower. Cottage White is an offwhite, which is prefect for French Country Farmhouse Style homes.
Sealing the Table Top – The Final Step
We’re on the final step, YAY! The last step for How I Refinished my Kitchen Table is sealing the table top. I know, I know. I LOVE the natural white-washed look of this wood too! However, it really needed a sealer because my family will be eating at this table every day. The sealer will still keep the natural look of the wood, but it will also slightly darken it a bit. Luckily for me it almost ended up completely matching my dining chairs which I was stoked about!
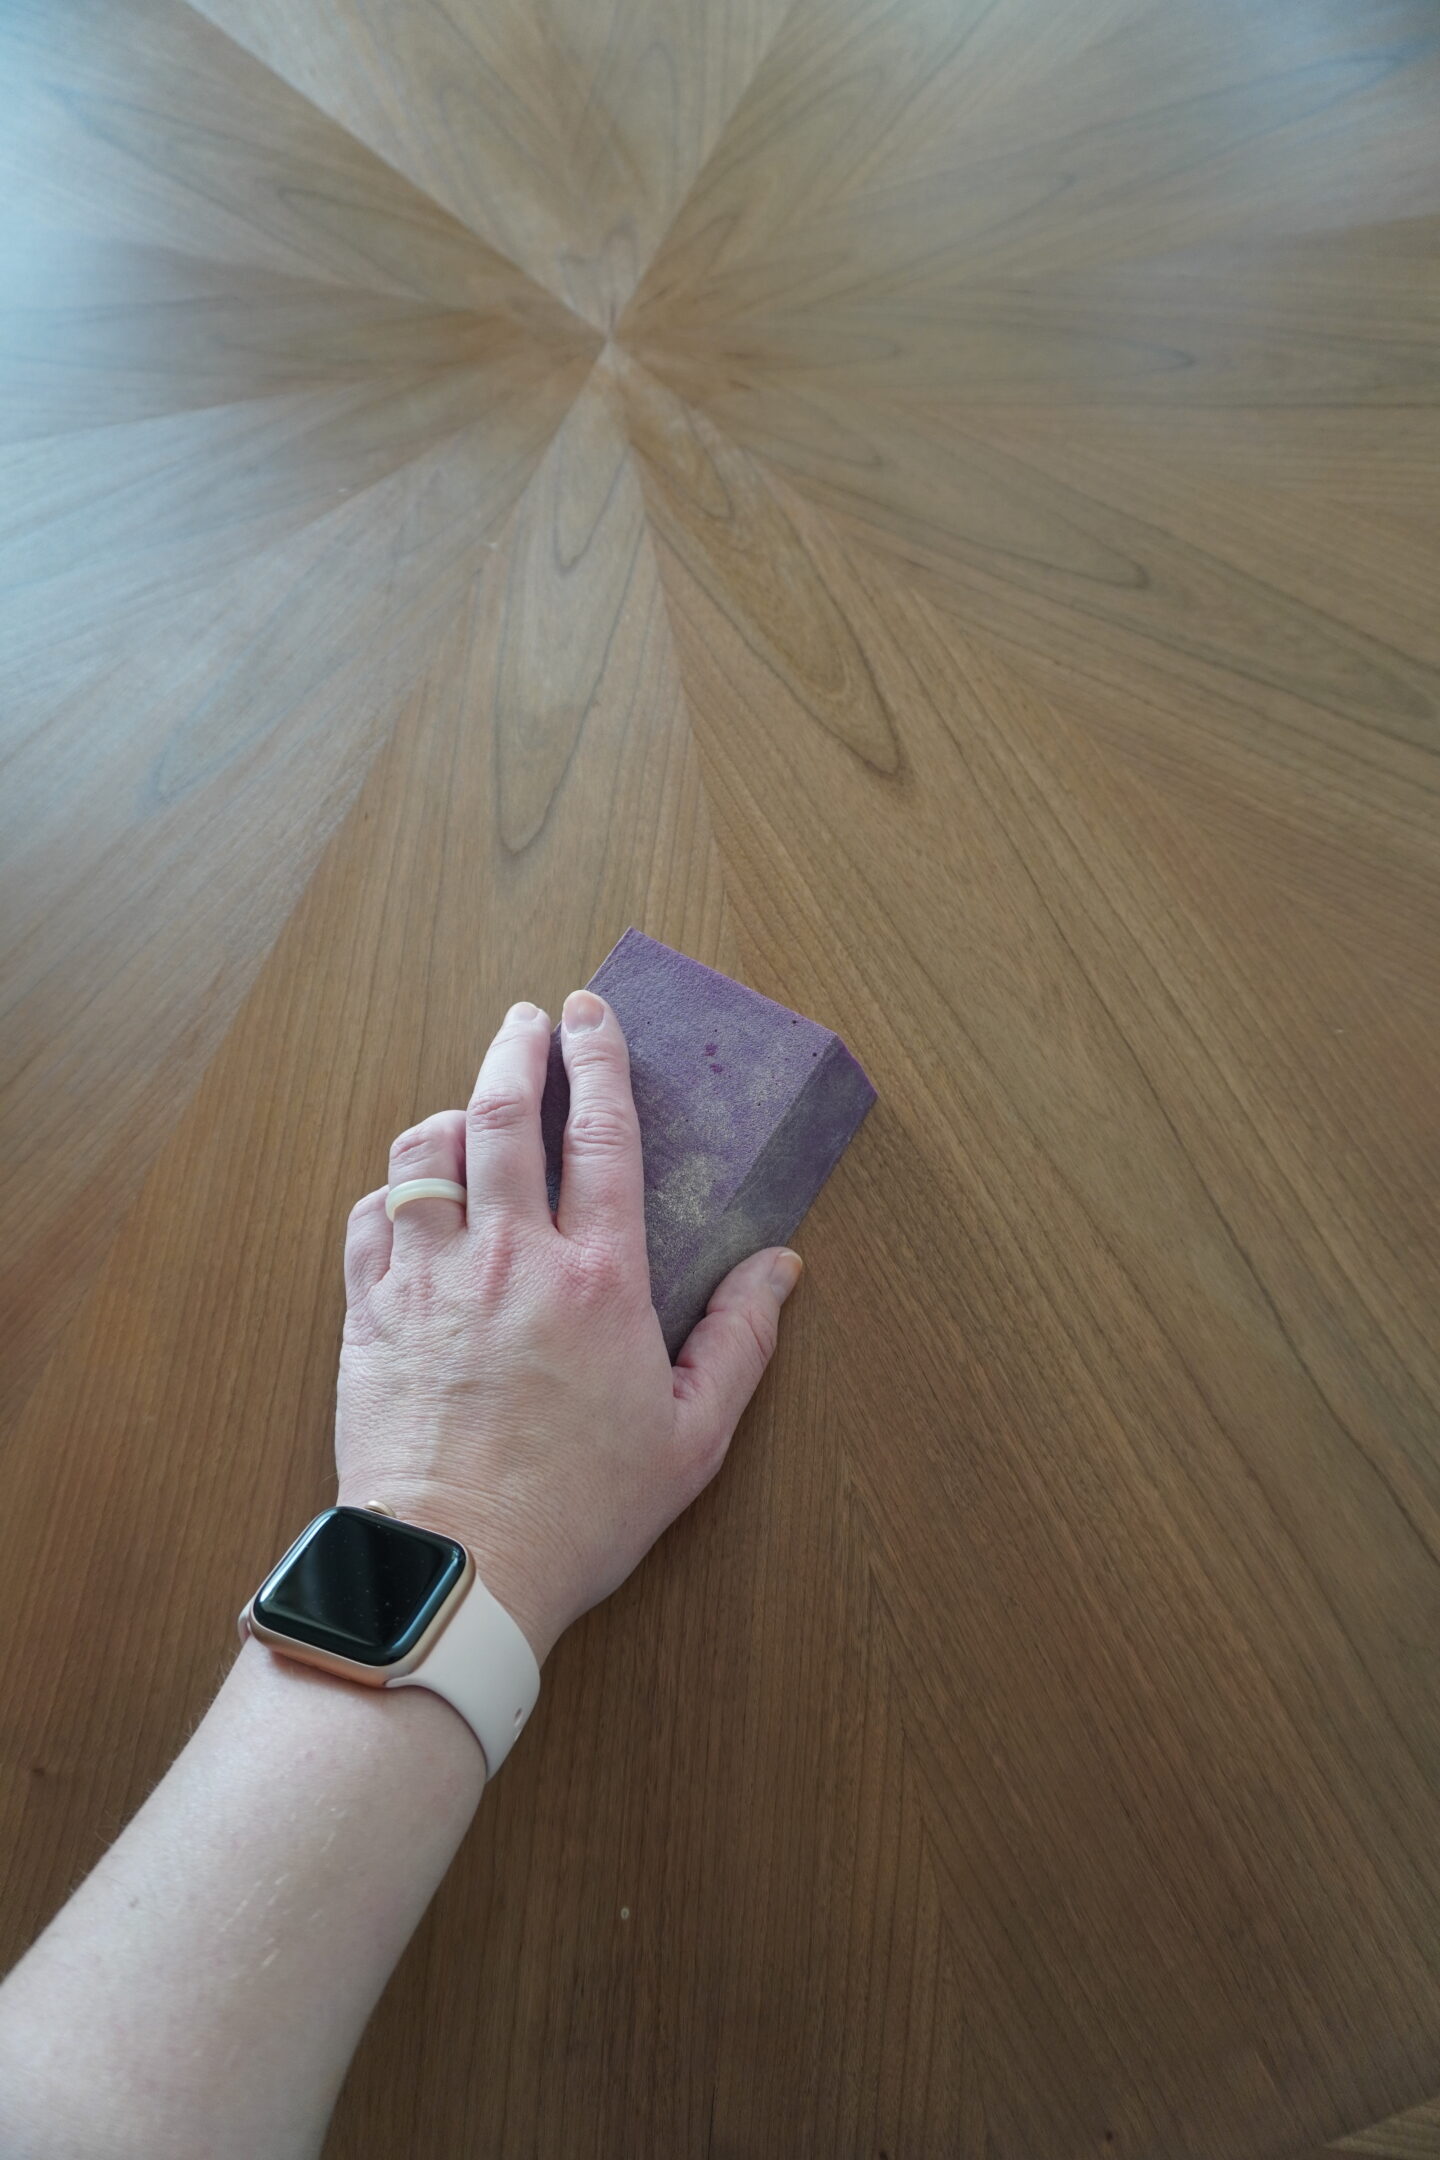
Before I started to seal the top, I very gently sanded the entire top of the table with my fine sanding sponge to make sure I would have a super smooth surface to work with.
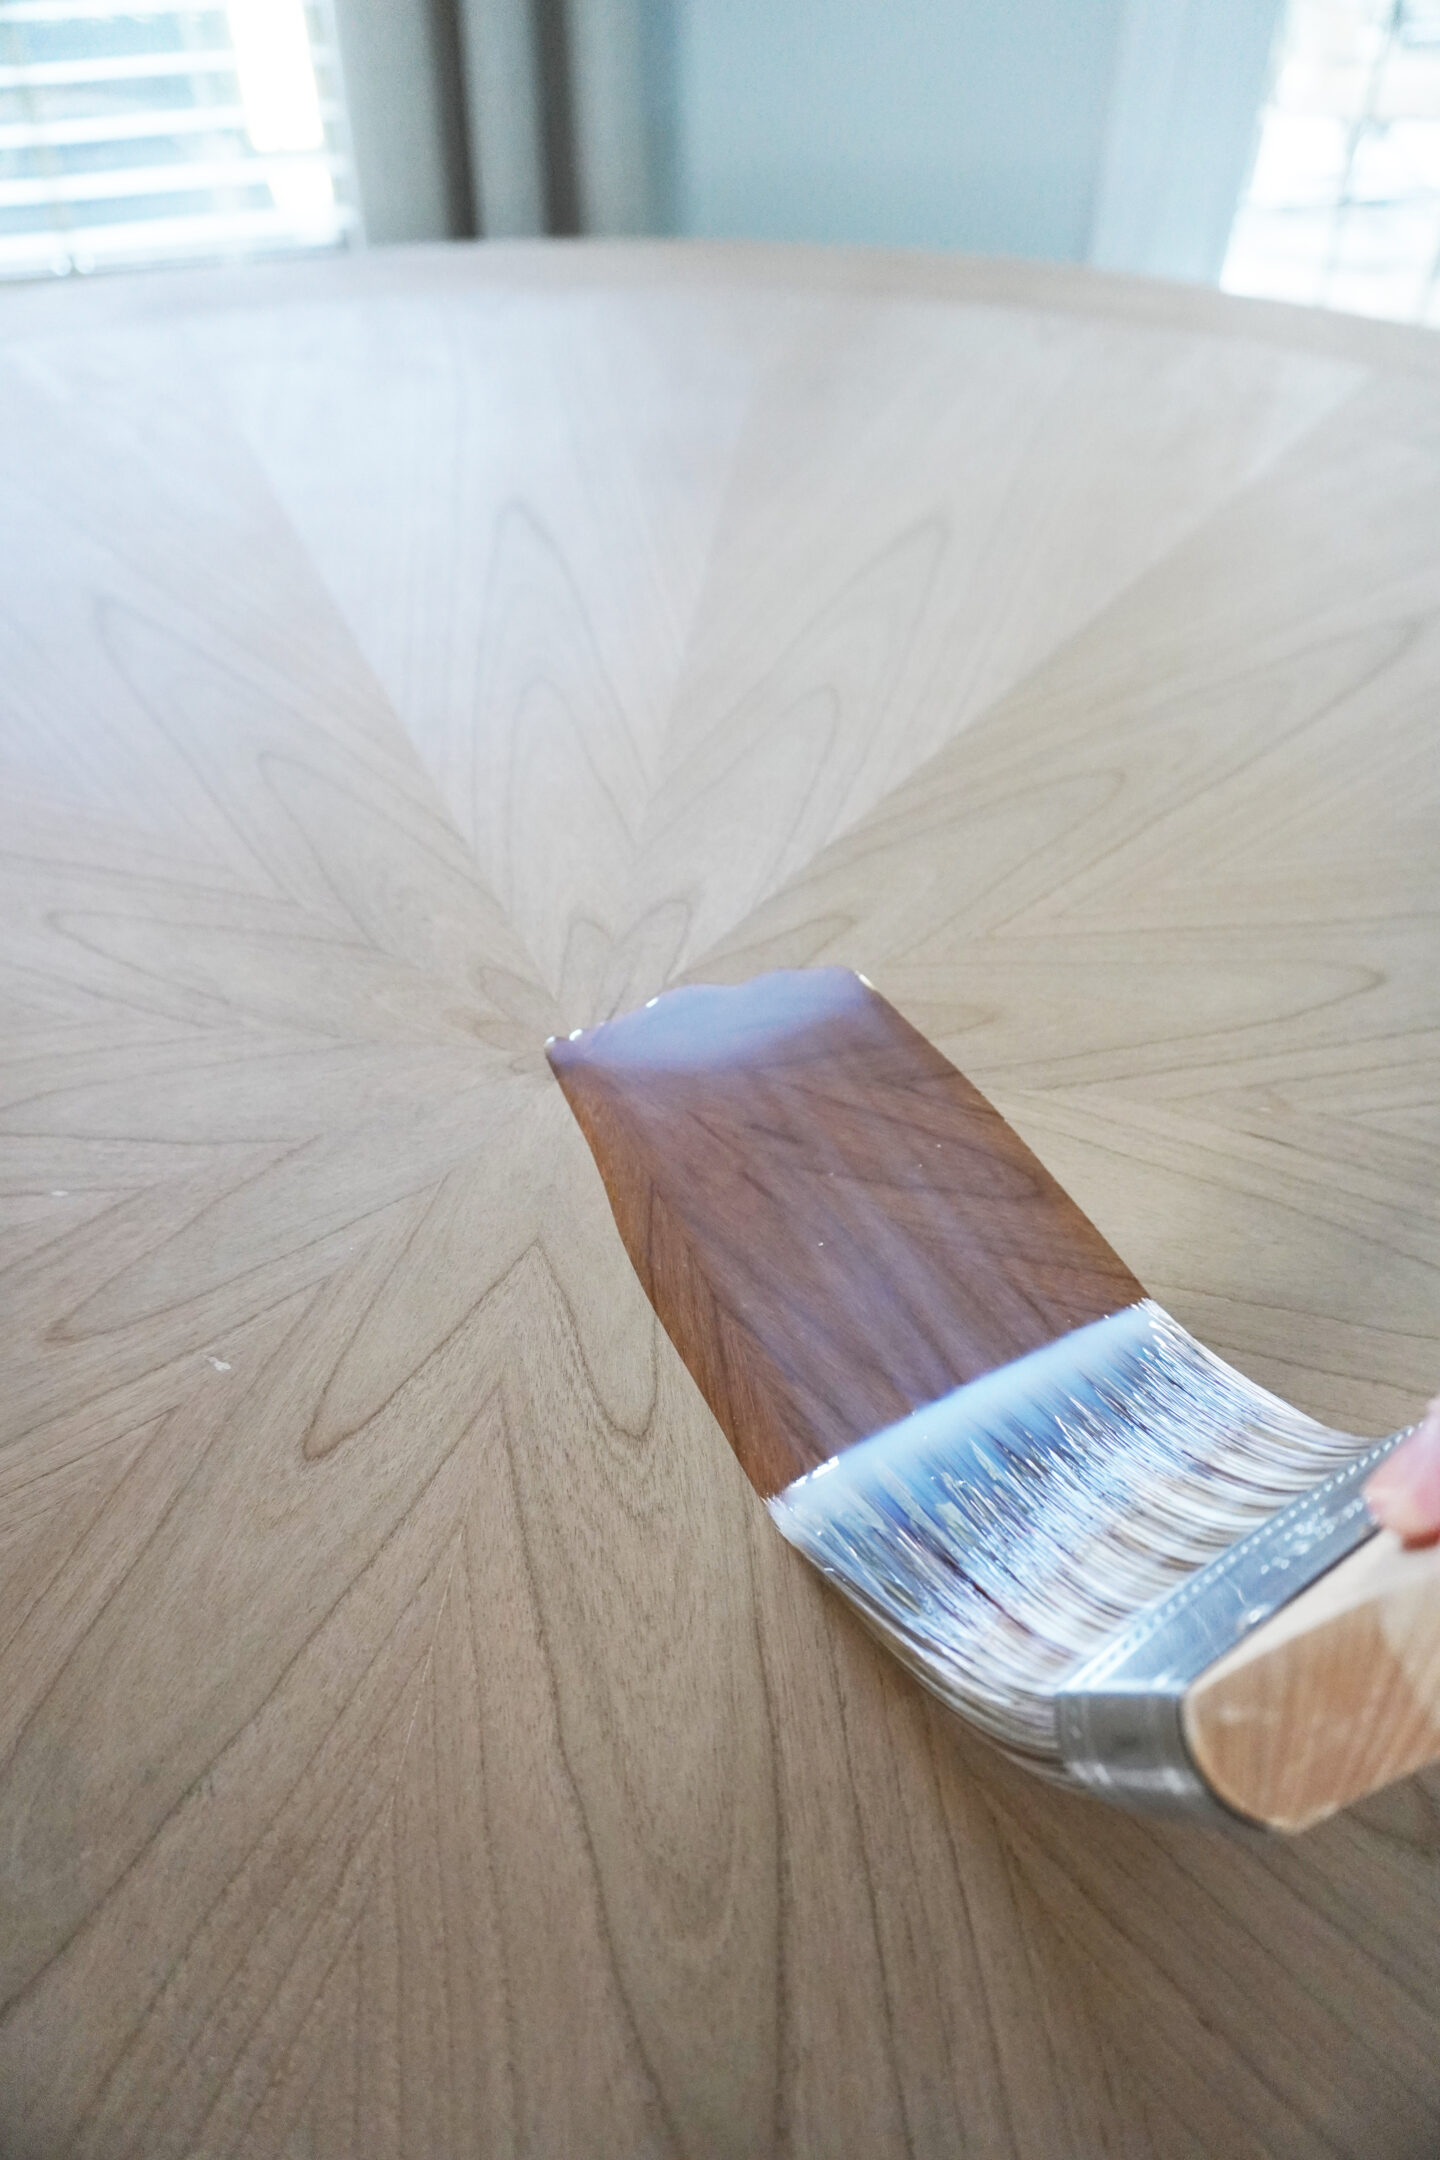
When I first started this project, I wasn’t sure if I was going to need to condition the bare wood prior to doing a polycoat, but it turned out I didn’t need to do that. That’s one less step! I was able to paint my Polycrylic directly onto the bare wood.
The design on the table top made it a little more challenging to seal, but in the end it turned out so pretty! It’s important to keep working when you’re sealing with Polycrylic. It is incredibly fast-drying, which is great! But also doesn’t leave you much time to make any mistakes. So make sure you’re using a high quality brush large enough to handle larger surfaces so you can cover more ground in a shorter period of time.
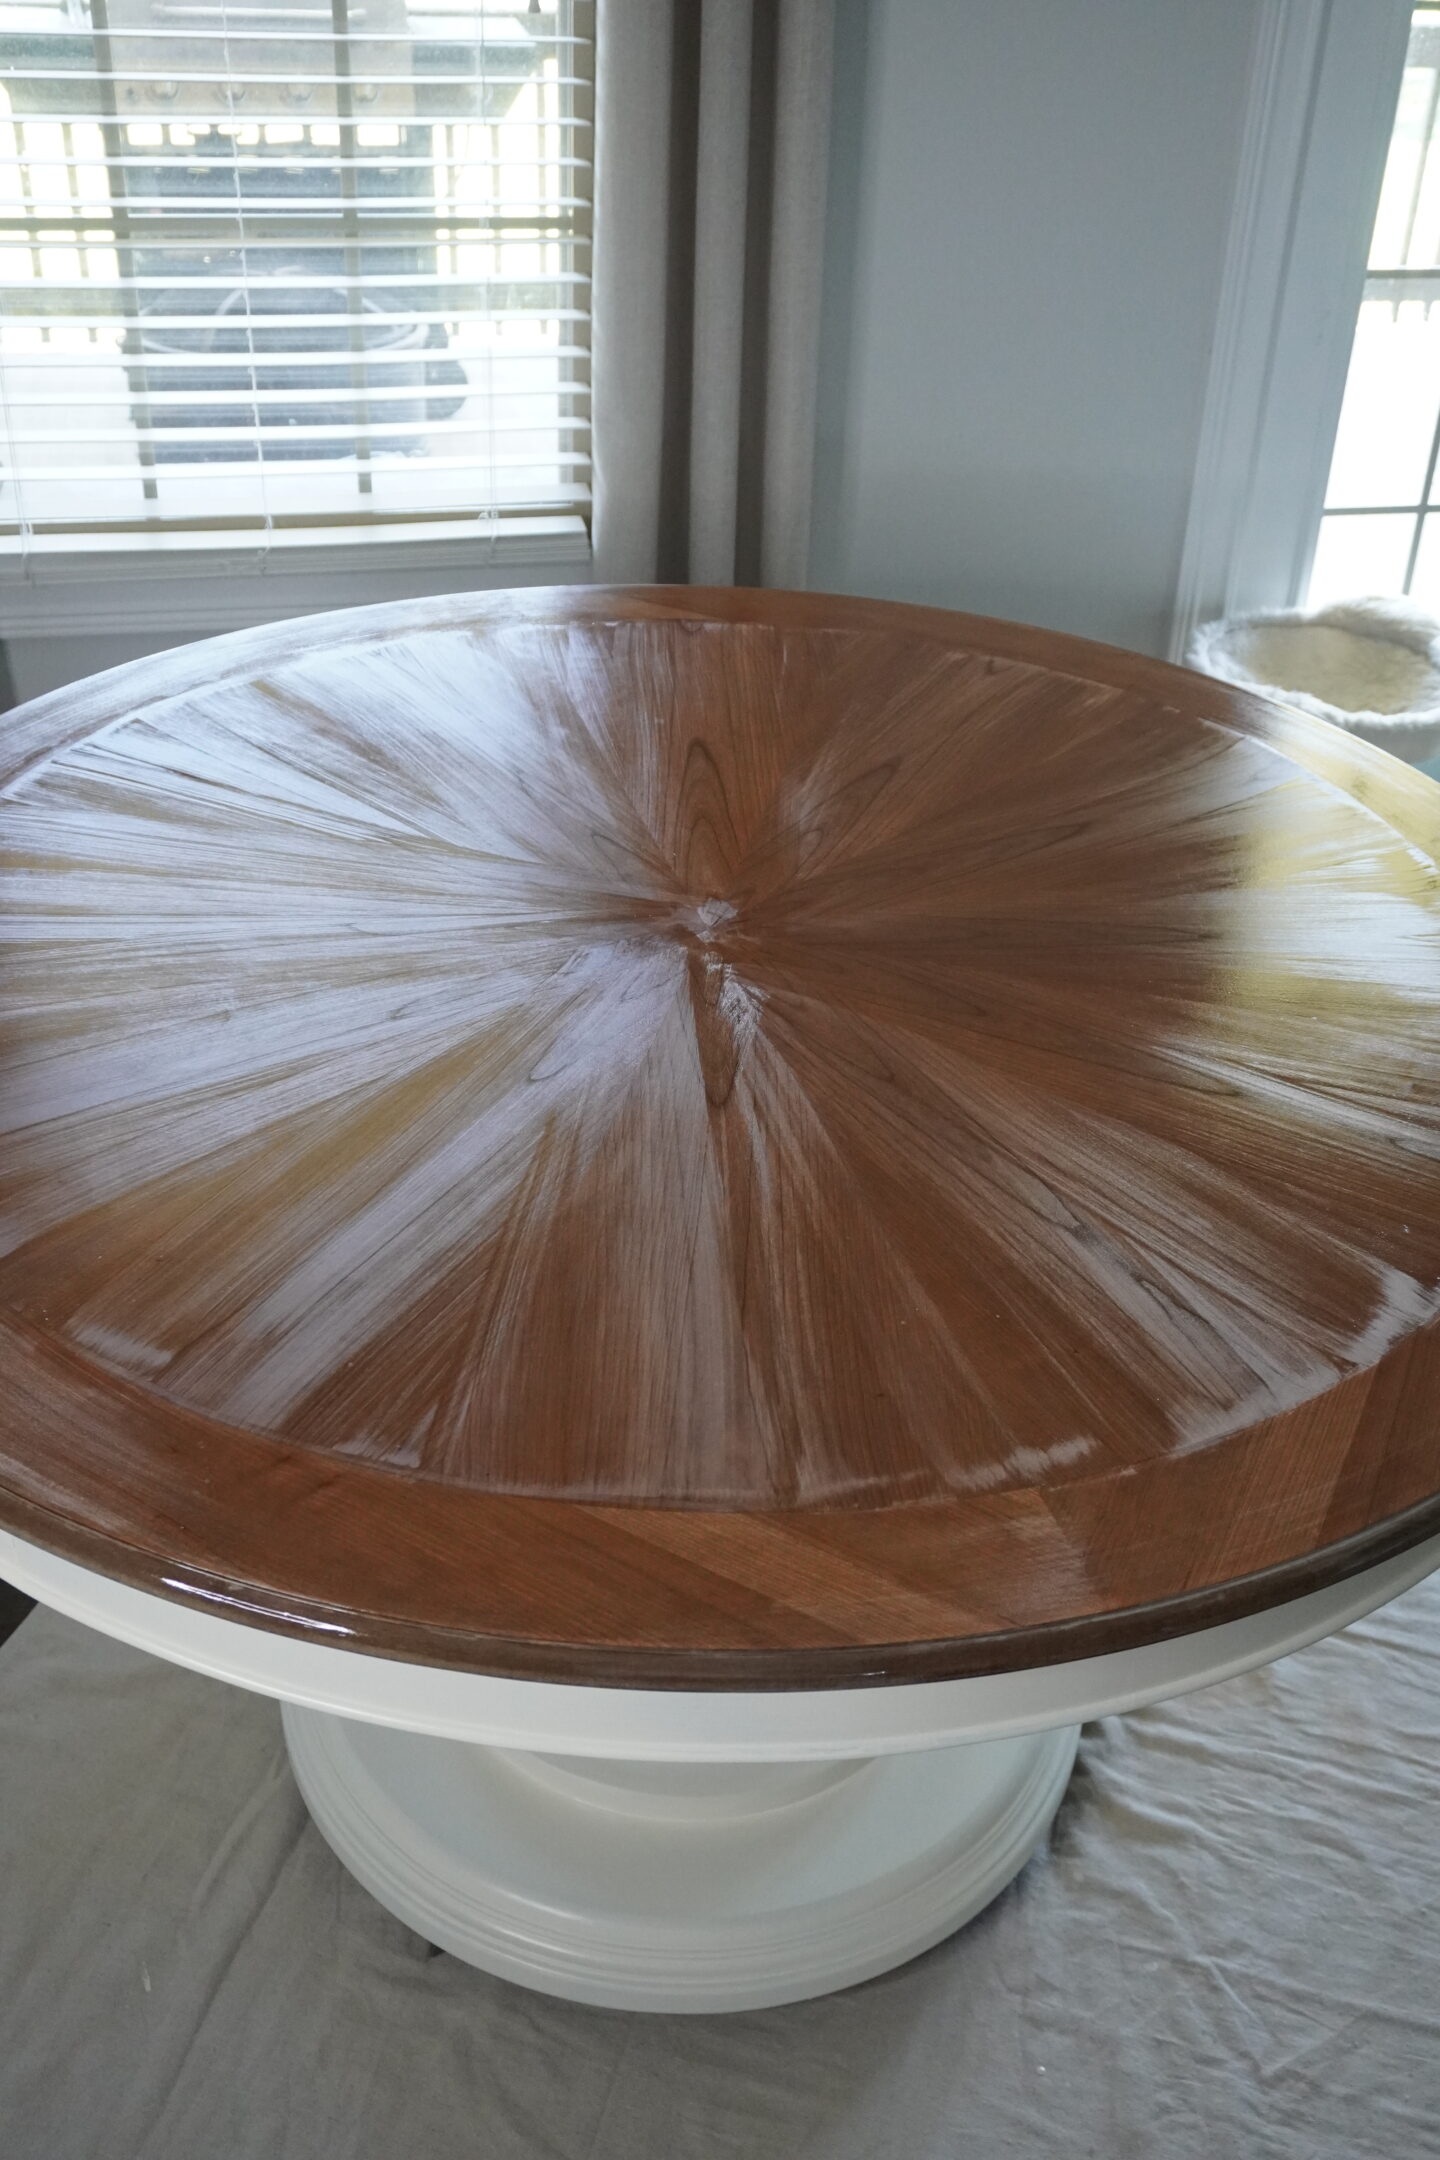
Isn’t that looking good? As you can see, it is already dry in some places more than others! This stuff dries so quickly. After the first coat dries, you will want to gently sand between each polycoat to make sure the next coat is smooth and adheres properly. You will do this a total of 3X.
After 3 coats of Polycrylic, the top is now dry and our project is complete!
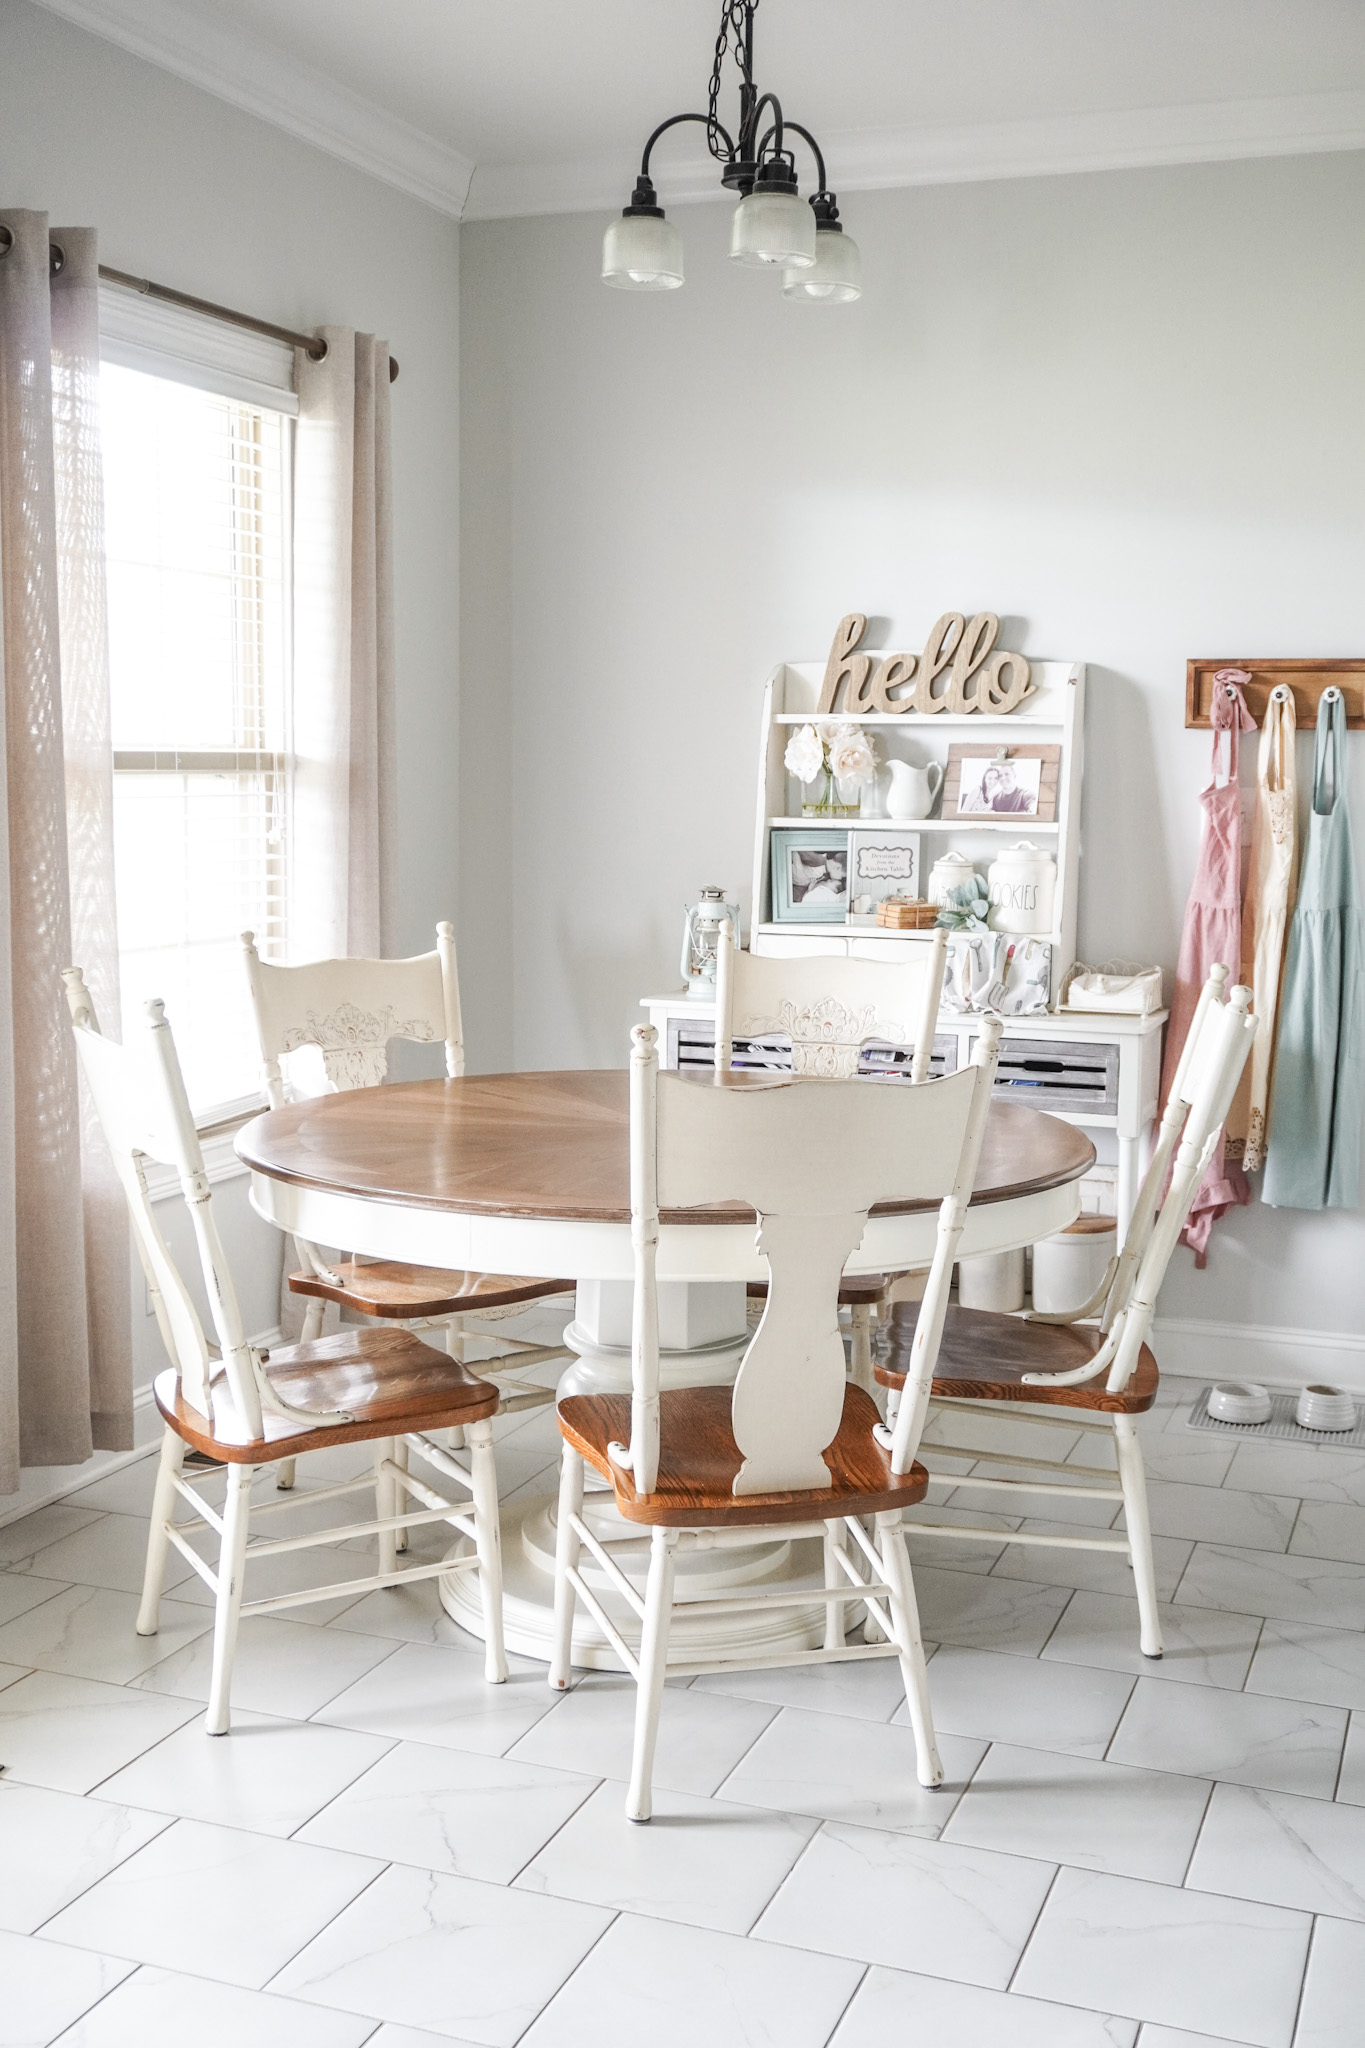
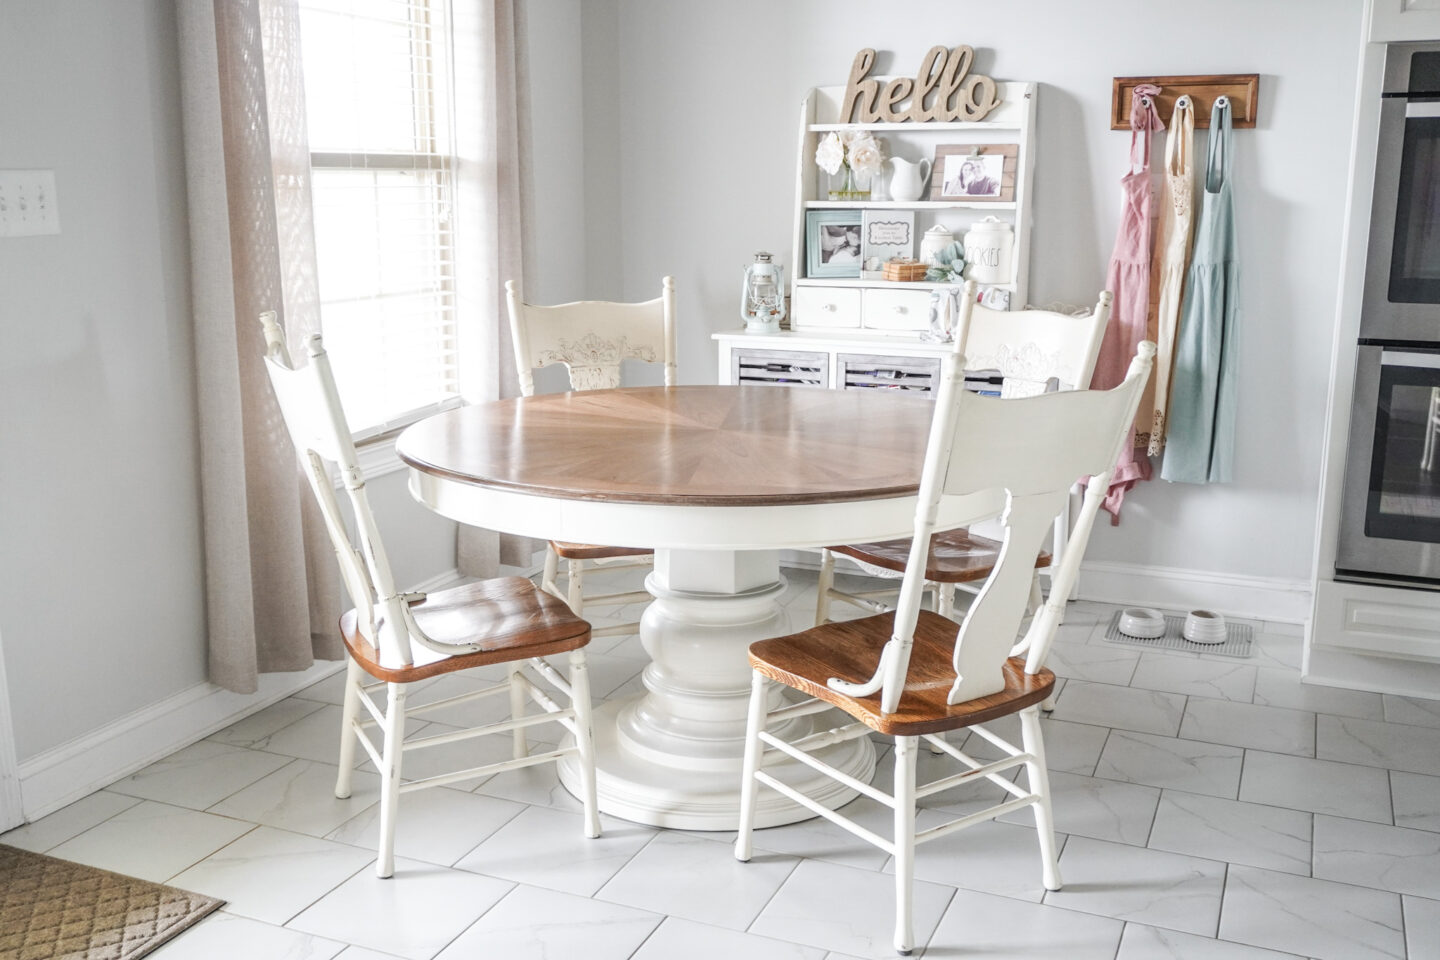
The Big Reveal
Are you ready?! Because I know I am! Look at this you guys!
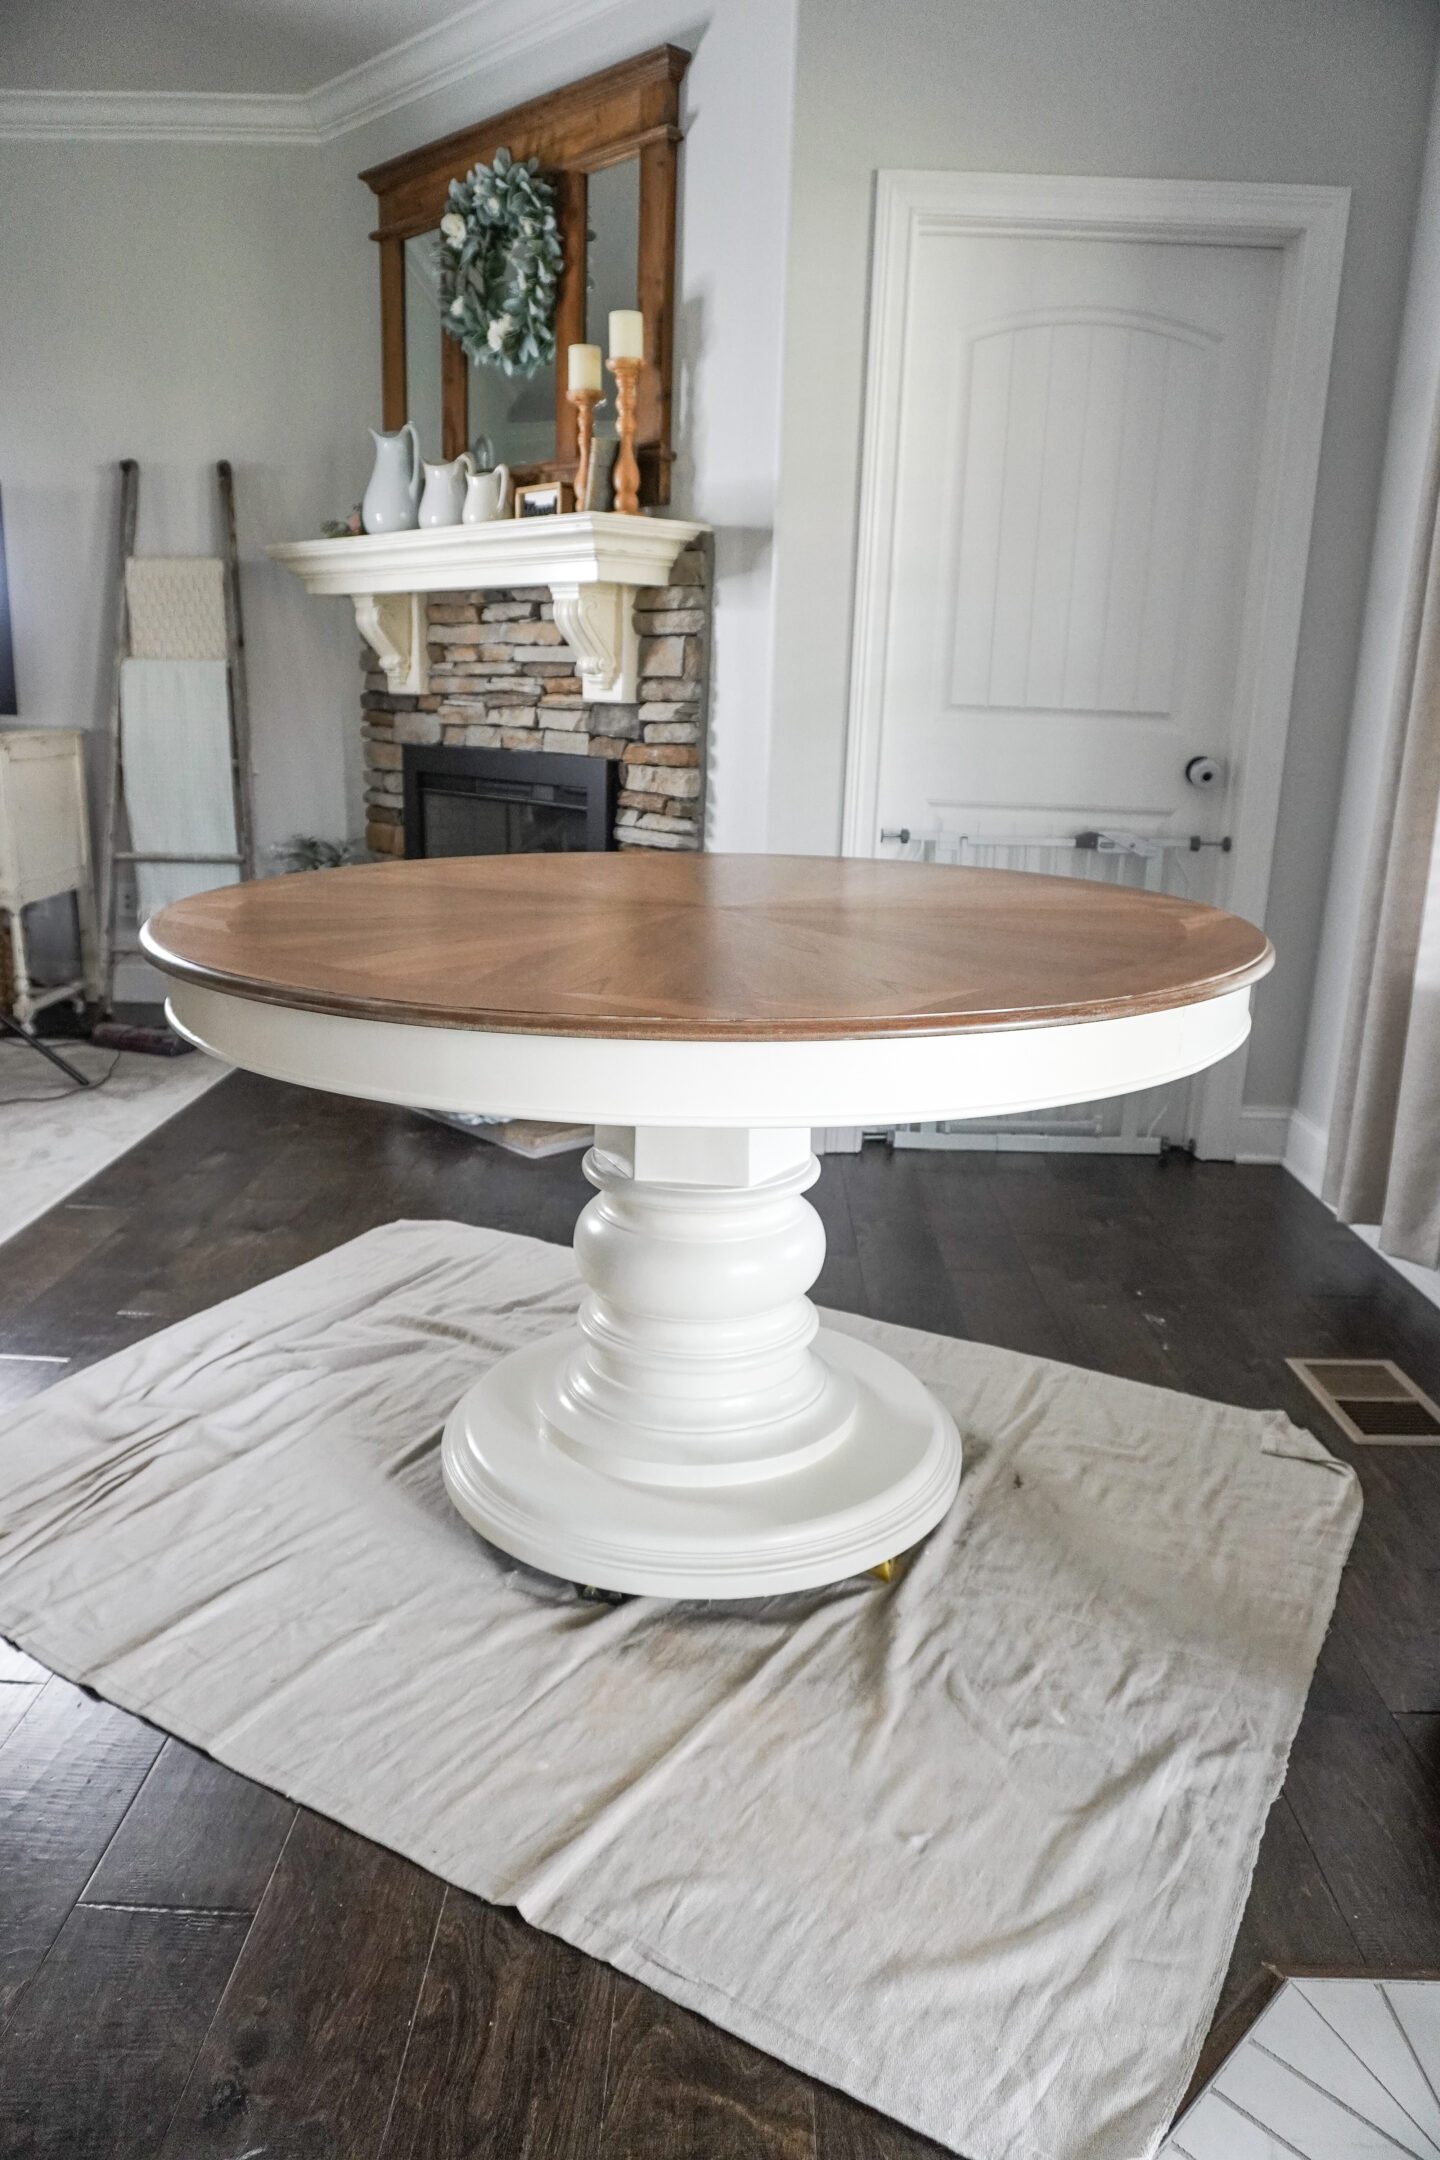
Tada! Isn’t it just perfect for this space? No more chairs banging into the table legs, and we have plenty of space for all 5 of us now. I am so excited to have a functional and pretty table to sit at with my family. Perfect for meals, games, and more! We will enjoy this table for many, many years to come.
Love my Chairs? Visit this Blog Post to see how I refinished them using Chalk Paint!
If you loved How I Refinished my Kitchen Table, I would be so happy if you would Subscribe to see more fun DIY ideas and projects! And don’t forget to Pin the images in this post to Pinterest so more people can find it 🙂